tutorial: without a trace

>

Made using photoshop CS2.
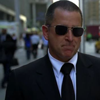
Prepare your base. I used a cap of Without a Trace from here.
Since caps are usually dark, we're going to make it brighter. Usually I would use screen layers, but this time we'll use curves.
Layer>new adjustment layer>curves:
RGB: 77/147
Now the image is brighter, but we still need to add some color to it.
Layer>new adjustment layer>selective color:
R: -80 -30 55 40
Y: 70 15 -30 0
N: -15 -5 0 -10
B: 0 0 0 5
Our image is a bit too yellow-ish, so we're going to add some blue.
Layer>new adjustment layer>channel mixer:
R: 110 5 -20 -7
G: 0 100 5 0
B: -5 10 110 0
The next step is optional. I like my icons to be a bit muted, and exclusion layers are the best way to do it.
Fill a new layer with #1b0e02 and set it to exclusion.
That's it! Remember to play around with layers and settings, not all images will give you the same results.
I would love to see your results :)
PSD (comment if taking)
Examples:


