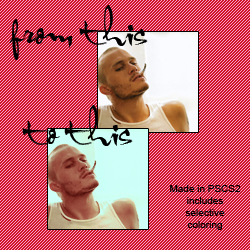
Coloring Tutorial #3 - Heath Ledger & more

Made on PSCS2
Includes Selective Coloring
1. Crop your image. I did not sharpen or lighten any of my results, but that depends upon your picture.
2. Layer > New Fill Layer > Solid Color. Mode: Exclusion. Opacity: 41% (or to your liking.) Click OK. Enter in #cf1626. Click OK. (In other words, fill a new layer with #cf1626 set on Exclusion 41%. I just like making my color layers this way.)
3. Layer > New Adjustment Layer > Selective Color.
REDS: -37, -50, -59, -26
YELLOWS: -40, -31, -100, 0
GREENS: -76, 100, 65, 0
CYANS: 100, -59, 100, 0
BLUES: 100, -100, 0, 0
WHITES: -100, -32, -23, -39
NEUTRALS: -14, -3, -5, 0
4. Layer > New Adjustment Layer > Hue/Saturation.
MASTER: Saturation: 27
5. Layer > New Adjustment Layer > Color Balance.
MIDTONES: 9, -19, -7
SHADOWS: -24, 8, -21
HIGHLIGHTS: -1, -5, -7
6. Duplicate your base and drag to the top. Set it to Soft Light. It's kind of radioactive, but we're getting to that...
7. Image > Adjustments > Gradient Map. Make sure you check the gradient that’s going from black to white. Similarly, you can go Image > Adjustments > Desaturate, but I’m partial to the Gradient Map technique.
*Basically, I push the PS sliders back and forth until magic and wonder happens. In this case, doing so happened to result in some semi-decent icons, so hopefully this coloring will work on other pictures, too.
*Credit never necessary.
*Icons posted below are yours for the taking if you like them.
*Comments and results are lovely if you are so inclined to leave them.
*Questions always welcome.
Results.

to


to


to


to


to
