First Tutorial
My very first Tutorial.
Hope it will help you.
We are going from
this to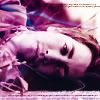
So this is the Picture we are beginning with:
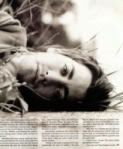
I already resized it.
Now we are starting (I -personally - like copying it into a new picture 100x100 because I think this is working out better)
Ok... first sharpen (I know some of you like to sharpen it later... this is your business). We are duplicating the base and screen it. It's way to lighten now so we set the opacity to 20% (yeah I know wath's the point then anyway?)
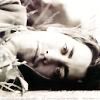
->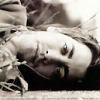
(much better)
Well anyway. duplicate the base again and set it on top. We set it to Soft Light (100%)
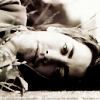
Looks good already (but Jake's always looking exellent ;D )
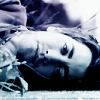
We need a new layer now. and take this brush (I made it myself since it's really easy with Photoshop)

setting it to soft light (100%)
->
now we add some text. it's too tiny to read it so it doesn't matter what you write. (Times New Roman - Size: 2px) You can take as much lines as you want and put it were you want. so we have:
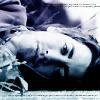
Good. Now we need another layer and this brush:

set it to Hue (I think... in german it's "Farbe" but this is what looked the same)... anyway, Opacity: 55%
it looks like this now:
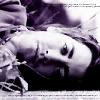
it's a bit too lighten now... but this will change. we take now this brush (from www.absolutetrouble.com)

but it doesn't really work for my picture and so I rotate it 90° clockwise and then flip it to:

then we make another new layer with the brush and set it to Soft Light (100%)
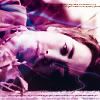
Ok last step: Some lines of the brush are covering his face. So we just brush it there (it just looks nicer then erasing it).
And TADA:

(final layerplate)
BTW: for the two brushes (the red and blue ones) you can take any color you want. I just think the red/blue looks nice on this one ;)
Rules:
- please credit
- comments are appreciated
- NO hotlinks
And I'd LOVE to see your results!!
Hope it will help you.
We are going from
this to

So this is the Picture we are beginning with:

I already resized it.
Now we are starting (I -personally - like copying it into a new picture 100x100 because I think this is working out better)
Ok... first sharpen (I know some of you like to sharpen it later... this is your business). We are duplicating the base and screen it. It's way to lighten now so we set the opacity to 20% (yeah I know wath's the point then anyway?)

->

(much better)
Well anyway. duplicate the base again and set it on top. We set it to Soft Light (100%)

Looks good already (but Jake's always looking exellent ;D )
We need a new layer now. and take this brush (I made it myself since it's really easy with Photoshop)

setting it to soft light (100%)
->

now we add some text. it's too tiny to read it so it doesn't matter what you write. (Times New Roman - Size: 2px) You can take as much lines as you want and put it were you want. so we have:

Good. Now we need another layer and this brush:

set it to Hue (I think... in german it's "Farbe" but this is what looked the same)... anyway, Opacity: 55%
it looks like this now:

it's a bit too lighten now... but this will change. we take now this brush (from www.absolutetrouble.com)

but it doesn't really work for my picture and so I rotate it 90° clockwise and then flip it to:

then we make another new layer with the brush and set it to Soft Light (100%)

Ok last step: Some lines of the brush are covering his face. So we just brush it there (it just looks nicer then erasing it).
And TADA:

(final layerplate)
BTW: for the two brushes (the red and blue ones) you can take any color you want. I just think the red/blue looks nice on this one ;)
Rules:
- please credit
- comments are appreciated
- NO hotlinks
And I'd LOVE to see your results!!