tutorial: simple animation
okay, so this is mostly for sugar1480, but can be used by others. it's for PHOTOSHOP CS2, but may be applicable to other photoshops, I'm not sure.
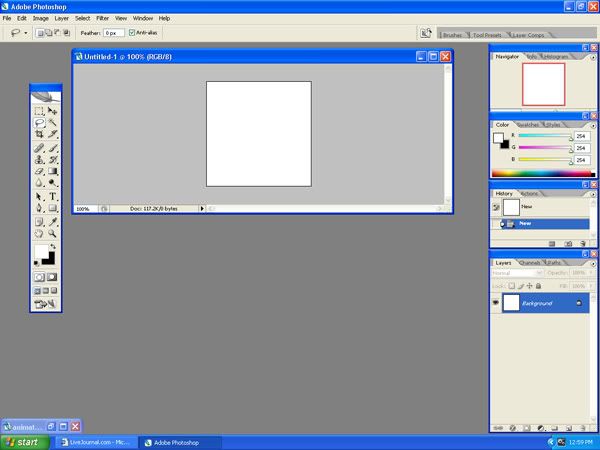
1. so the first thing you should do is click 'new' and get a 200x200 canvas (or 100x100, I just find 200 easier)
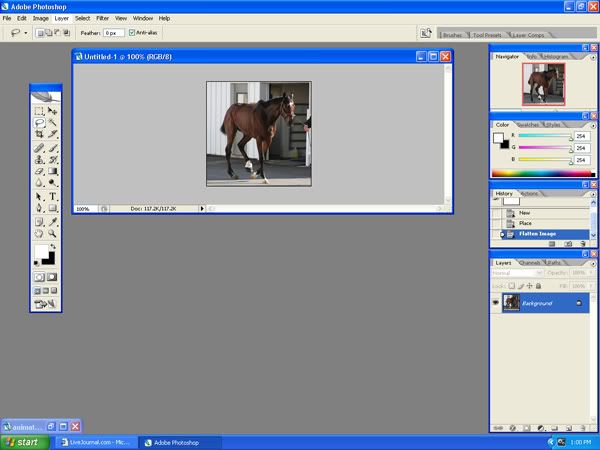
2. Then you go file>place and put on some images. Make sure they place, but DO NOT merge or flatten the image yet.
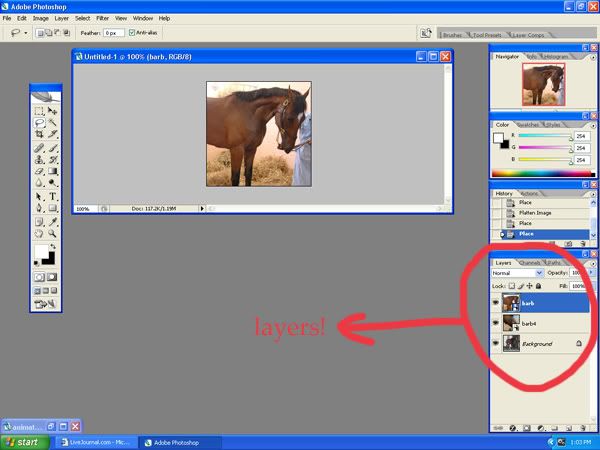
3. keep doing this until you have some layers. The layers are your animation slides. You can edit the layers by clicking on them on the side. Once you have some (livejournal requires the icon be under 40kb, so don't put more than 5 layers)then move on.
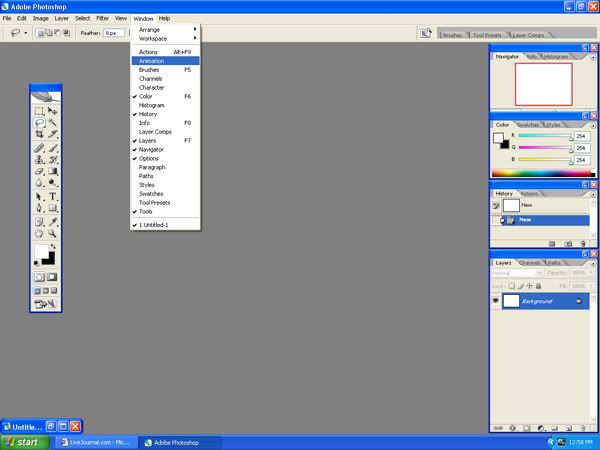
4. Now that you have your layers, you can do animation. Click animation under the 'window' heading.
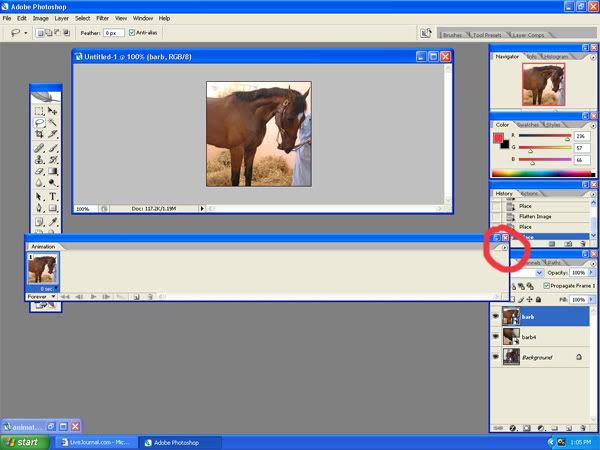
5. An animation bar should pop up. Now, click the little button thing on it.
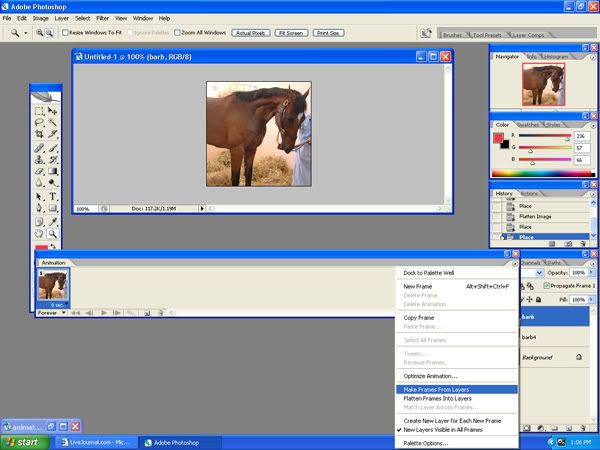
6. Click 'make frames from layers' to change your layers into pretty frames.
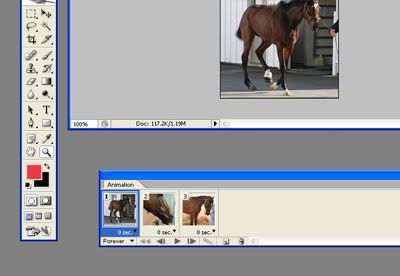
7. Now you have your animation. Here, you can edit the speed and such. If you have unwanted frames, you can delete them.
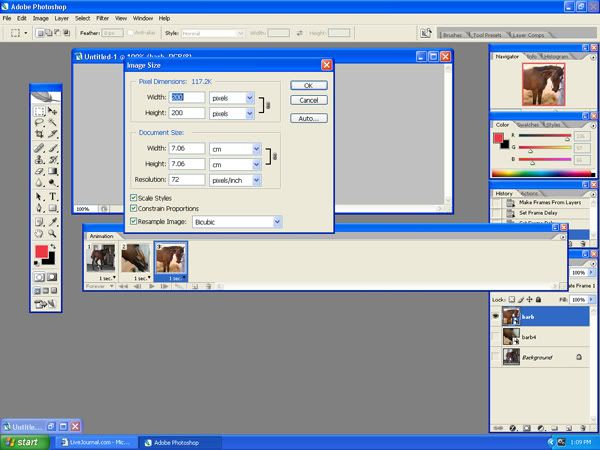
8. Now you have to (if you already didn't) make you animation 100x100 with image size.
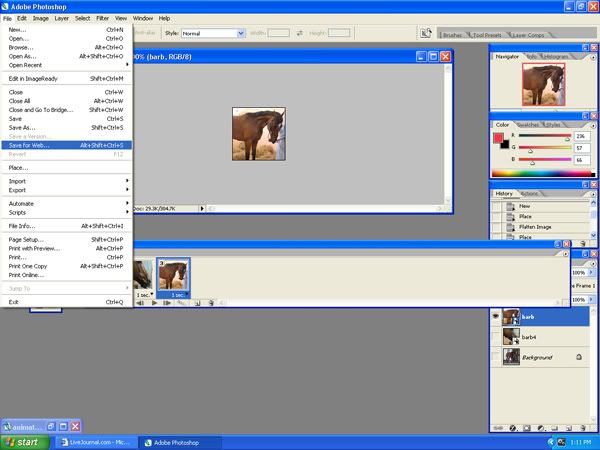
9. NOW YOUR ICON IS DONE! *throws confetti* BUT in order to save it in .GIF format, you must go through 'save for web'.
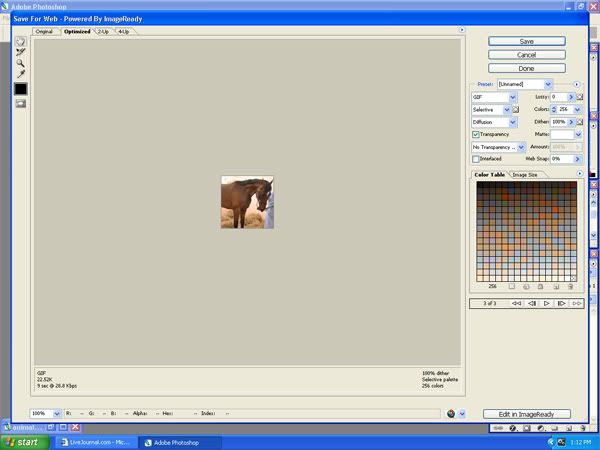
10. I honestly have no idea what this screen does, so, just click 'save' and be done with it. :)
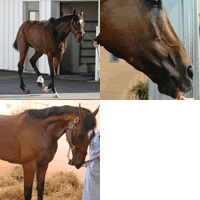
and look at the pretty icon...
AND THATS IT! Hope that helps.
1. so the first thing you should do is click 'new' and get a 200x200 canvas (or 100x100, I just find 200 easier)

2. Then you go file>place and put on some images. Make sure they place, but DO NOT merge or flatten the image yet.

3. keep doing this until you have some layers. The layers are your animation slides. You can edit the layers by clicking on them on the side. Once you have some (livejournal requires the icon be under 40kb, so don't put more than 5 layers)then move on.

4. Now that you have your layers, you can do animation. Click animation under the 'window' heading.

5. An animation bar should pop up. Now, click the little button thing on it.

6. Click 'make frames from layers' to change your layers into pretty frames.

7. Now you have your animation. Here, you can edit the speed and such. If you have unwanted frames, you can delete them.

8. Now you have to (if you already didn't) make you animation 100x100 with image size.

9. NOW YOUR ICON IS DONE! *throws confetti* BUT in order to save it in .GIF format, you must go through 'save for web'.

10. I honestly have no idea what this screen does, so, just click 'save' and be done with it. :)

and look at the pretty icon...

AND THATS IT! Hope that helps.