Tutorial # 12
Icon tutorial requested by pdgblossom from this icon batch
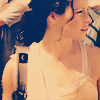
How to go from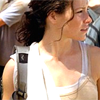
to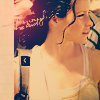
-Made in Ps7
-Translatable (i think) uses gradient map.
1) Crop your image. Zoom in (ctrl+0) and blur her skin, Not her eyes or lips. Now sharpen her hair, eyes, lips and a little of her nose.(This may not look a lot now but it shows in the end. Duplicate (ctrl+J) and set it to softlight 100%
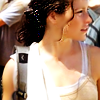
2) Go to layer > New fill layer> solid colour and fill with # C7957B. Set this to overlay on 100%
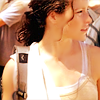
3) Go to layer > New fill layer> solid colour and fill with # A3D2D0. Set this to colorburn on 100%
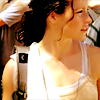
4) Go to Layer > New Adjustment Layer > Gradient Map. I used This gradient by Misplaced Moments.
Download Set 10 here I set it to softlight 100%

5) Go to Layer > New Adjustment Layer > Gradient Map. I used This gradient which i believe belongs to
Download Set 10 here I set it to softlight 100%
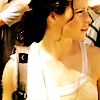
6) Go to layer > New fill layer> solid colour and fill with # 0B2E5A. Set this to exclusion on 100%
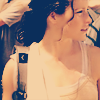
7) Add this texture/gradient by desiderio flip it horizontally and set it to colorburn 36%. Adjust it around to suit your icon.
>>
8) Add this brush and set it to screen 100% Move it around to suit your icon
>>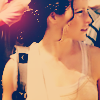
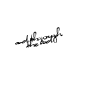
9) Add this texture by dusty_memories and some text brush (which unfortunately i can't remember who it belongs to) Drag both layers down to (before) step 2 (the color layer)
&
>>
Dude!
Please comment and credit if you take any
Please don't hotlink
If you don't understand something, please ask and i'll try my best to help
If you do use the tut I'd love to see your result ;)
And lastly..Enjoy!
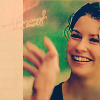
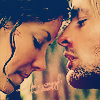
Other examples: (same/similar technique)

How to go from

to
-Made in Ps7
-Translatable (i think) uses gradient map.
1) Crop your image. Zoom in (ctrl+0) and blur her skin, Not her eyes or lips. Now sharpen her hair, eyes, lips and a little of her nose.(This may not look a lot now but it shows in the end. Duplicate (ctrl+J) and set it to softlight 100%

2) Go to layer > New fill layer> solid colour and fill with # C7957B. Set this to overlay on 100%

3) Go to layer > New fill layer> solid colour and fill with # A3D2D0. Set this to colorburn on 100%

4) Go to Layer > New Adjustment Layer > Gradient Map. I used This gradient by Misplaced Moments.
Download Set 10 here I set it to softlight 100%

5) Go to Layer > New Adjustment Layer > Gradient Map. I used This gradient which i believe belongs to
Download Set 10 here I set it to softlight 100%

6) Go to layer > New fill layer> solid colour and fill with # 0B2E5A. Set this to exclusion on 100%

7) Add this texture/gradient by desiderio flip it horizontally and set it to colorburn 36%. Adjust it around to suit your icon.

>>

8) Add this brush and set it to screen 100% Move it around to suit your icon

>>

9) Add this texture by dusty_memories and some text brush (which unfortunately i can't remember who it belongs to) Drag both layers down to (before) step 2 (the color layer)

&

>>
Dude!
Please comment and credit if you take any
Please don't hotlink
If you don't understand something, please ask and i'll try my best to help
If you do use the tut I'd love to see your result ;)
And lastly..Enjoy!
Other examples: (same/similar technique)