Tutorial #4: Antique Shadows (Grunge Windows)
As requested by aquarian_abyss, a tutorial for this 1st placing icon @ transferredout, featuring Miko Rika-chama from Higurashi no Naku Koro ni. ^_^ As always, please try not to remake the icon 100%, and experimentation on your part is highly encouraged! Have fun!
Today we're learning how to turn:
into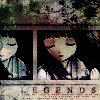
For Photoshop CS2, translatable.
1. Starting off with a blank, white 100x100 base, open the picture you'd like to use in a seperate window. Crop it into a small rectangular or square shape to fit inside your icon (I choose to make mine 64 x 50 pixels), sharpen it, contrast it, do whatever you'd like to get it to the quality you'd like. ^^ Now place it towards the end of the right side of your icon wherever you see fit.
Now duplicate that image, and place it towards the left side of your icon (or you can even use a different image from the original one). Make sure it lines up with your right picture in height, and that you leave some space in between them by erasing some of the edge from the left picture so they don't overlap (it's a lot easier to do this if you zoom in, of course). I choose to leave 4px in between the two. You should now have something that looks like this:
2. Now after we have our image placing set up, we're gonna take a little step back, and make our box. Select your original white layer background, and make a new layer (shft+ctrl+N) ontop of it. Using your rectangle tool (or whatever tool suits you) make a rectangle with a light gray color to fit underneath your images. I choose #DDDDDD, and the height was 58px. Now, set an Outer Glow on your box with something like the following settings: Linear Burn, color: #000000 (aka black), 60% opacity.
Now select your layer with you right image (JUST the right one), and also set it with an Inner Glow with something like the following settings: Linear Burn, color: #000000 (aka black), 75% opacity.

>
3. Duplicate the layer with your left image, Desaturate it, and set it to Color. OR you can just Desaturate the original to save yourself some time; the effect is 99% the same. xD; Now set an Inner Glow to it with something like the following settings: Linear Burn, color: #000000 (aka black), 75% opacity.
>
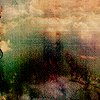
4. Set this beautiful texture by 77words to Color Dodge w/ 80% opacity.
>
5. You don't have to do this step, but it adds a nice effect to the outcome. ^_^ Using brushes of your choice set to the color #d7c6a7 (or any creamy brown), create a new layer, and place them around your icon however you like. As you can see, I picked some nice flowery brushes by unmasked_icons.

>
6. New layer, fill it with a dark blue (I chose #16254b), and set it to Exclusion. Duplicate that color layer, and set it to Screen @ 30% opacity.

>
7. New layer, fill it with a light blue (I chose #aebcde), and set it to Color Burn @ 20% opacity.

>
8. New layer, fill it with a light brown (I chose #d5cbb3), and set it to Soft Light.

>
9. Set this diamond light texture me, ignored_tears, to Screen.

>
10. Now duplicate the layer with your right image on it (JUST the right image), drag it on top of your layers, and set it to Lighten @ 40% opacity. Don't forget to take off the Inner Glow on this layer! Duplicate layer, but this time Desaturate it (still keeping it to lighten @ 40% opacity with no inner glow). Your icon should now look something like this:

11. Now set this same texture by 77words to Overlay @ 40% opacity. Leave it or edit whatever part doesn't look good on your icon by erasing it with a feather brush. I turned it over, and erased mostly everything except the dark top part & a bit of the bottom, but it depends on your image. :)
>
12. Again, with this same 77words texture (because it's SMEX xD), flip it horizontally so that the brighter part is on the bottom, and set it to Screen.
>
13. Now is where it all comes together! New layer, fill it with a dark blue (I chose #16254b, the same as my blue exclusion & screen layers), and set it to Color Burn.
>
14. To give the icon a more dimmed effect, make a new layer, fill it with #000000 (aka black XD), and set it to Color at around 50% opacity (or whatever looks good for you).

>
Add any text or brushes you'd like, maybe even a border, and you're all done! I tried to make it easy to follow, though it is a bit complicated, so if you have any questions don't be shy. I'd also love to see your outcomes if you tried it. :D
Thanks for dropping by, and I hope you found it useful! Don't forget to consider watching my icon journal for updates on icons, tutorials, resources, cookies, and more goodies~~ XD
Today we're learning how to turn:
into
For Photoshop CS2, translatable.
1. Starting off with a blank, white 100x100 base, open the picture you'd like to use in a seperate window. Crop it into a small rectangular or square shape to fit inside your icon (I choose to make mine 64 x 50 pixels), sharpen it, contrast it, do whatever you'd like to get it to the quality you'd like. ^^ Now place it towards the end of the right side of your icon wherever you see fit.
Now duplicate that image, and place it towards the left side of your icon (or you can even use a different image from the original one). Make sure it lines up with your right picture in height, and that you leave some space in between them by erasing some of the edge from the left picture so they don't overlap (it's a lot easier to do this if you zoom in, of course). I choose to leave 4px in between the two. You should now have something that looks like this:
2. Now after we have our image placing set up, we're gonna take a little step back, and make our box. Select your original white layer background, and make a new layer (shft+ctrl+N) ontop of it. Using your rectangle tool (or whatever tool suits you) make a rectangle with a light gray color to fit underneath your images. I choose #DDDDDD, and the height was 58px. Now, set an Outer Glow on your box with something like the following settings: Linear Burn, color: #000000 (aka black), 60% opacity.
Now select your layer with you right image (JUST the right one), and also set it with an Inner Glow with something like the following settings: Linear Burn, color: #000000 (aka black), 75% opacity.
>
3. Duplicate the layer with your left image, Desaturate it, and set it to Color. OR you can just Desaturate the original to save yourself some time; the effect is 99% the same. xD; Now set an Inner Glow to it with something like the following settings: Linear Burn, color: #000000 (aka black), 75% opacity.
>
4. Set this beautiful texture by 77words to Color Dodge w/ 80% opacity.
>
5. You don't have to do this step, but it adds a nice effect to the outcome. ^_^ Using brushes of your choice set to the color #d7c6a7 (or any creamy brown), create a new layer, and place them around your icon however you like. As you can see, I picked some nice flowery brushes by unmasked_icons.
>
6. New layer, fill it with a dark blue (I chose #16254b), and set it to Exclusion. Duplicate that color layer, and set it to Screen @ 30% opacity.
>
7. New layer, fill it with a light blue (I chose #aebcde), and set it to Color Burn @ 20% opacity.
>
8. New layer, fill it with a light brown (I chose #d5cbb3), and set it to Soft Light.
>
9. Set this diamond light texture me, ignored_tears, to Screen.
>
10. Now duplicate the layer with your right image on it (JUST the right image), drag it on top of your layers, and set it to Lighten @ 40% opacity. Don't forget to take off the Inner Glow on this layer! Duplicate layer, but this time Desaturate it (still keeping it to lighten @ 40% opacity with no inner glow). Your icon should now look something like this:
11. Now set this same texture by 77words to Overlay @ 40% opacity. Leave it or edit whatever part doesn't look good on your icon by erasing it with a feather brush. I turned it over, and erased mostly everything except the dark top part & a bit of the bottom, but it depends on your image. :)
>
12. Again, with this same 77words texture (because it's SMEX xD), flip it horizontally so that the brighter part is on the bottom, and set it to Screen.
>
13. Now is where it all comes together! New layer, fill it with a dark blue (I chose #16254b, the same as my blue exclusion & screen layers), and set it to Color Burn.
>
14. To give the icon a more dimmed effect, make a new layer, fill it with #000000 (aka black XD), and set it to Color at around 50% opacity (or whatever looks good for you).
>
Add any text or brushes you'd like, maybe even a border, and you're all done! I tried to make it easy to follow, though it is a bit complicated, so if you have any questions don't be shy. I'd also love to see your outcomes if you tried it. :D
Thanks for dropping by, and I hope you found it useful! Don't forget to consider watching my icon journal for updates on icons, tutorials, resources, cookies, and more goodies~~ XD