Adventures In Costuming (!!!)
Progress so far on the Summoner Yuna costume from Final Fantasy X. Everything but the pajama top I'm wearing for modeling purposes was hand-sewn, as I have no clue how to use a sewing machine. Wired items were constructed using braided floral wire stitched into a layer of white cloth, with the colored pieces stiched on in an overlay before the painting stage. All painting is done in acrylics, using a flat-edged 1 brush. Paint was set using an iron before the pieces were assembled.
I started on the assembly the 27th of September. Here's where I'm at as of October 4th.
Front:
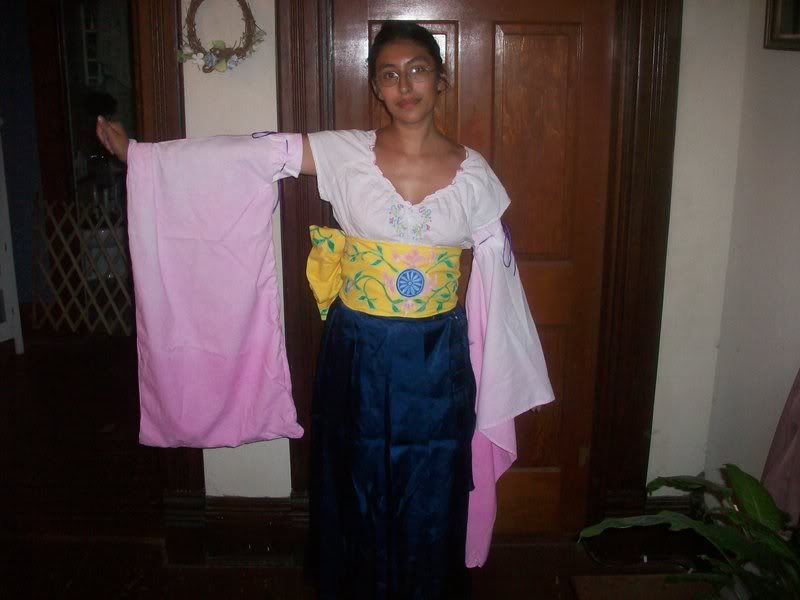
Front view of the obi, sleeves, and skirt.
Back:
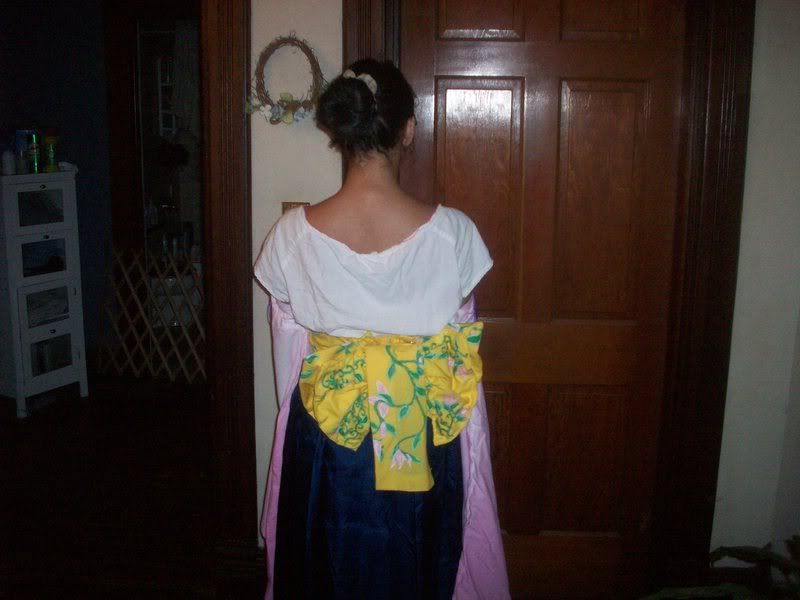
back view of the obi, sleeves, and skirt.
Side:
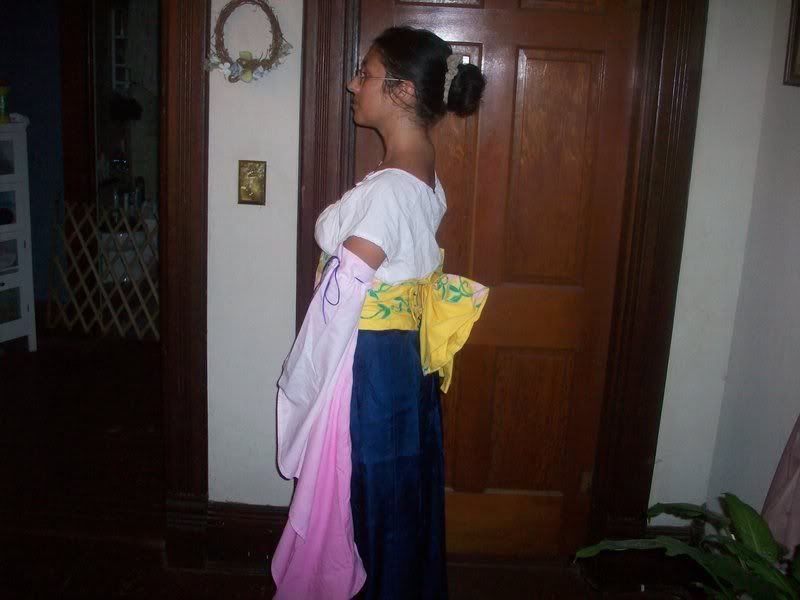
Side view of the obi, sleeves, and skirt
Obi Bow Pieces:
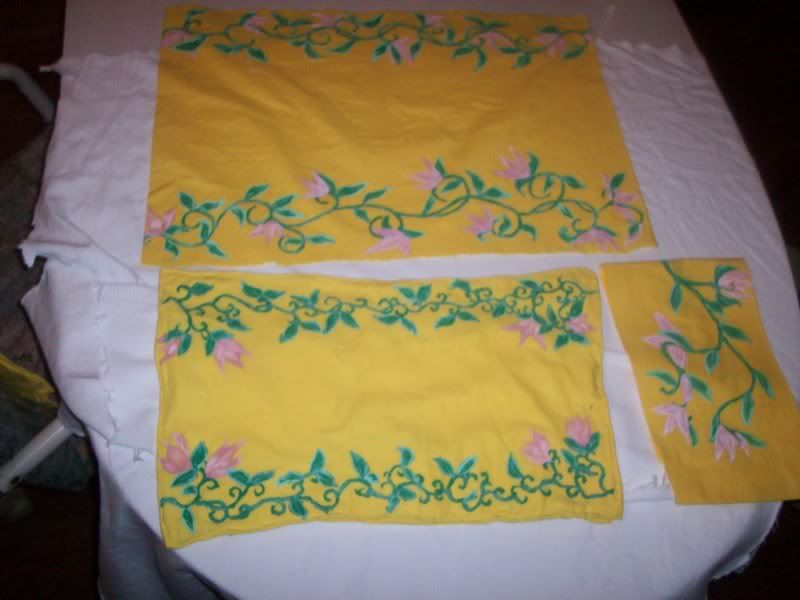
Pieces used to assemble the obi, or yellow belt. The square piece is built over a wired white piece of cloth, and painted . The narrower strip is the loose piece of cloth that falls over the back of the bow, and the wide one is the back of the bow, as it has a doubled appearance. I freehanded the vines and flowers, without, regrettably, clear reference. It's inaccurate, but I think the pattern turned out alright.
Obi Front:
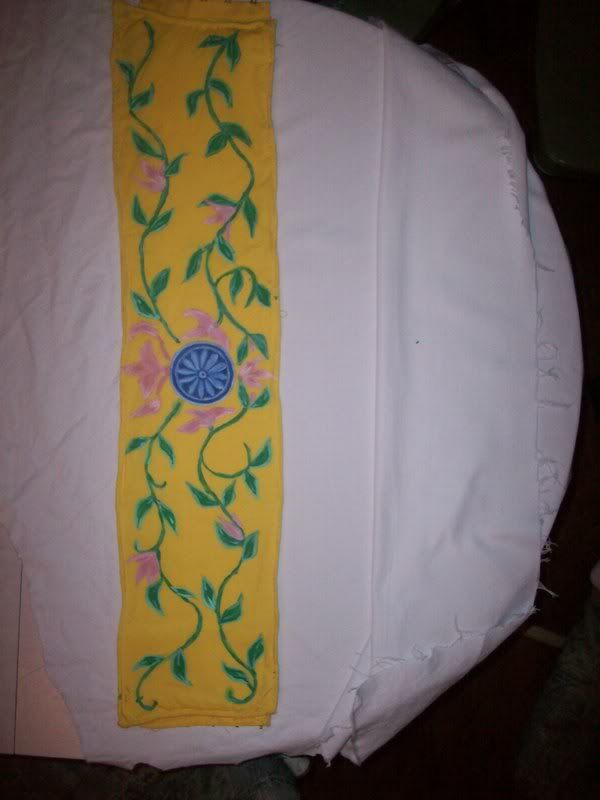
The part of the obi that goes around the waist. It is constructed on a wired frame of heavy white cloth, with the yellow stitched over this, then painted with acrylic. Vines and flowers are freehand, while the circular detail was placed with a handmade styrofoam stamp, then had the details added in. This fastens around the waist by means of hook-and-eye closures I sewed onto the ends.
Closeup of circle and obi stamp:

The circle detail, as near as I could get to the original on Yuna's costume, and the styrofoam stamp I made to help me lay out the details before painting it. The stamp was made using a mechanical pencil, a bit of styrofoam from a food service container, a sewing needle, and a length of measured thread. I used the thread and needle to make a simple compass, traced the circle, then sketched in the details. Once those were complete, I dug into the styrofoam using the end of my pencil, until I felt the grooves were deep enough to leave the pattern on the cloth. The circle was stamped out of the styrofoam by continuing to follow the needle/compass/pencil lines until the grooves allowed me to pop the piece out. Then, I just painted it over with paint in the base dark blue, stamped it on the cloth, and worked in the details with a chisel-edged 1 brush.
The bow affixes to the obi belt by means of snaps.
The sleeves were made out of two yard lengths of sheet each, with purple cord strung through the tops to affix them to the arm. The pink gradient was accomplished by pouring pink fabric dye into a spray bottle and spraying it over the lain-out, pre-assembled sleeves.
The skirt is a box-pleated skirt with a fitted waist. I made this without a pattern or any previous experience with a project like this. It uses a pleating style called the 'box pleat', which is what is used in cheerleading skirts, and has a slit up the left side to the knee, which I cheated on by simply affixing an extra panel of pleated cloth in the left seam that only reached to the knee, both allowing me to have my fitted skirt and get into the garment without a crazy closure system or elastic. The waist fastens with hook-and-eye closures at the waistband, and two lower on the hip to keep the flap of extra pleats closed. When finished, it will have a pattern of flowers and vines up the front.
So far, I have learned the following:
1: Good GOSH, do I need to learn how to use a sewing machine! My fingers are so stabbed it's only moderately funny, and my fingernails have gotten scratched by the needle and floral wire. 0.0
2: When making a fitted skirt, remember: Hips tend to be about 10 inches wider than the waist measurement. So even if the brief and sketchy tutorial you read said "Bunch to the waist measurement, then stitch up the hem," make sure you make an enterance/escape route to your skirt!
3: Um, make sure things are the right side up when you paint. Kay? Thanks.
4: When dyeing to a gradient, put tape in layers over the area you do not want colored, because otherwise, you WILL get spatters.
5: When dyeing cord, test the dye first. Otherwise your carnation ends up flamingo pink. ;.;
6: A waist cincher style belt really shouldn't be a solid rectangle. The waist dips in the middle. Next time you construct one, look up HOW first. (Note: Same for every other piece here. I've been mostly guessing.)
I started on the assembly the 27th of September. Here's where I'm at as of October 4th.
Front:
Front view of the obi, sleeves, and skirt.
Back:
back view of the obi, sleeves, and skirt.
Side:
Side view of the obi, sleeves, and skirt
Obi Bow Pieces:
Pieces used to assemble the obi, or yellow belt. The square piece is built over a wired white piece of cloth, and painted . The narrower strip is the loose piece of cloth that falls over the back of the bow, and the wide one is the back of the bow, as it has a doubled appearance. I freehanded the vines and flowers, without, regrettably, clear reference. It's inaccurate, but I think the pattern turned out alright.
Obi Front:
The part of the obi that goes around the waist. It is constructed on a wired frame of heavy white cloth, with the yellow stitched over this, then painted with acrylic. Vines and flowers are freehand, while the circular detail was placed with a handmade styrofoam stamp, then had the details added in. This fastens around the waist by means of hook-and-eye closures I sewed onto the ends.
Closeup of circle and obi stamp:
The circle detail, as near as I could get to the original on Yuna's costume, and the styrofoam stamp I made to help me lay out the details before painting it. The stamp was made using a mechanical pencil, a bit of styrofoam from a food service container, a sewing needle, and a length of measured thread. I used the thread and needle to make a simple compass, traced the circle, then sketched in the details. Once those were complete, I dug into the styrofoam using the end of my pencil, until I felt the grooves were deep enough to leave the pattern on the cloth. The circle was stamped out of the styrofoam by continuing to follow the needle/compass/pencil lines until the grooves allowed me to pop the piece out. Then, I just painted it over with paint in the base dark blue, stamped it on the cloth, and worked in the details with a chisel-edged 1 brush.
The bow affixes to the obi belt by means of snaps.
The sleeves were made out of two yard lengths of sheet each, with purple cord strung through the tops to affix them to the arm. The pink gradient was accomplished by pouring pink fabric dye into a spray bottle and spraying it over the lain-out, pre-assembled sleeves.
The skirt is a box-pleated skirt with a fitted waist. I made this without a pattern or any previous experience with a project like this. It uses a pleating style called the 'box pleat', which is what is used in cheerleading skirts, and has a slit up the left side to the knee, which I cheated on by simply affixing an extra panel of pleated cloth in the left seam that only reached to the knee, both allowing me to have my fitted skirt and get into the garment without a crazy closure system or elastic. The waist fastens with hook-and-eye closures at the waistband, and two lower on the hip to keep the flap of extra pleats closed. When finished, it will have a pattern of flowers and vines up the front.
So far, I have learned the following:
1: Good GOSH, do I need to learn how to use a sewing machine! My fingers are so stabbed it's only moderately funny, and my fingernails have gotten scratched by the needle and floral wire. 0.0
2: When making a fitted skirt, remember: Hips tend to be about 10 inches wider than the waist measurement. So even if the brief and sketchy tutorial you read said "Bunch to the waist measurement, then stitch up the hem," make sure you make an enterance/escape route to your skirt!
3: Um, make sure things are the right side up when you paint. Kay? Thanks.
4: When dyeing to a gradient, put tape in layers over the area you do not want colored, because otherwise, you WILL get spatters.
5: When dyeing cord, test the dye first. Otherwise your carnation ends up flamingo pink. ;.;
6: A waist cincher style belt really shouldn't be a solid rectangle. The waist dips in the middle. Next time you construct one, look up HOW first. (Note: Same for every other piece here. I've been mostly guessing.)