Tutorial: Supernatural promo
So I opened a tutorial request post earlier this week ( here) and this is the first from there. It was requested by smidgy06.
This tutorial is not meant to be followed exactly as the steps say. Use this as a guide to get ideas or to add elements to your own icons. Icon making is about experimentation and trying new things, old things and a blend of both. Besides that, the steps of a tutorial for a certain icon usually don't work the same when you try to copy them 100% for a different icon.
The icon this tutorial was made from was made in CS 2. It's translateable to PS7, at least but not PSP.

to
Cap by myself.
1. Make your base. Do whatever your heart desires here.

2. Duplicate base, set to screen, sharpen. Use fade sharpen under 'edit', if necessary.
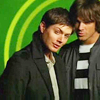
3. Selective colouring layer. I'm not going to give the exact numbers because what's the point? They won't work on any other cap/icon but this one with the same results. I focused on the reds, yellows, greens and neutrals. I upped the reds a little and played with the green a lot. With the neutral I upped the blue and cyan just a little. Remember that you can go back and play with your layers after you get to the end of your icon to get it the way you want it.

4. Gradient map set to soft light 100% (Hex- #b2978e to #d2b5af).

-->
6. Gradient map set to soft light 100% (Hex- #3a5451 to #859884). I find gradient maps set like this with the right colours can take the edge out of the dark spots in the icon. There could be other ways of going about this but I really like gradient maps. So whatever.

-->
7. Brightness/contrast layer. I left the brightness alone and set the contrast to +11. That's a totally optional step but I like sharper icons, in terms of colour richness and clarity, and futzing with the contrast can do wonders for this.
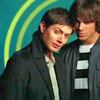
8. Text layer- Santana-regular condensed, 15pt, white with drop shadow in black, 59% opacity, distance set at 2, size at 5, spread at 0.
And voila!
Feel free to friend this journal to keep track of future tuts and icons!

This tutorial is not meant to be followed exactly as the steps say. Use this as a guide to get ideas or to add elements to your own icons. Icon making is about experimentation and trying new things, old things and a blend of both. Besides that, the steps of a tutorial for a certain icon usually don't work the same when you try to copy them 100% for a different icon.
The icon this tutorial was made from was made in CS 2. It's translateable to PS7, at least but not PSP.

to

Cap by myself.
1. Make your base. Do whatever your heart desires here.

2. Duplicate base, set to screen, sharpen. Use fade sharpen under 'edit', if necessary.

3. Selective colouring layer. I'm not going to give the exact numbers because what's the point? They won't work on any other cap/icon but this one with the same results. I focused on the reds, yellows, greens and neutrals. I upped the reds a little and played with the green a lot. With the neutral I upped the blue and cyan just a little. Remember that you can go back and play with your layers after you get to the end of your icon to get it the way you want it.

4. Gradient map set to soft light 100% (Hex- #b2978e to #d2b5af).

-->

6. Gradient map set to soft light 100% (Hex- #3a5451 to #859884). I find gradient maps set like this with the right colours can take the edge out of the dark spots in the icon. There could be other ways of going about this but I really like gradient maps. So whatever.

-->

7. Brightness/contrast layer. I left the brightness alone and set the contrast to +11. That's a totally optional step but I like sharper icons, in terms of colour richness and clarity, and futzing with the contrast can do wonders for this.

8. Text layer- Santana-regular condensed, 15pt, white with drop shadow in black, 59% opacity, distance set at 2, size at 5, spread at 0.
And voila!

Feel free to friend this journal to keep track of future tuts and icons!