Ask the maker filled request 1 of ?
Ask the maker filled request 1 of ?
Ask the maker fill for: anassa_anemou.
Everything is under spoiler cuts to keep from scrolling for ages. If anything isn't clear, feel free to ask questions! :D

[Alana]
You will need this cap.
To lighten up the cap and normalize the coloring some; go to image > auto contrast > auto tone. Sharpen to your liking.
Copy the base and set it to Screen at 100%
The next six layers we'll be painting!
Create a new layer and take this color #336767 and paint over her scarf. Set layer to Overlay.
Another new layer and take this color #40372f and go over her hair. Set layer to Soft Light at 64%.
New layer and use this color #40372f and paint the lighter parts of her hair to bring out the highlights. Set to Linear Dodge at 70%.
New layer and with this color #40372f paint over the highlights again. Set to Overlay.
Go back to the linear dodge layer, copy it and drag it up over the overlay layer and set it to Soft Light at 52%.
Create a new layer and take this blue #40372f and paint over the white parts to the far right and set to Overlay at 70%.
Everything should look something like this,
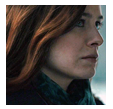
Create a Hue/Saturation layer, set to Color and change the saturation to +12
You'll need to download this gradient map for the next part (I don't know how else to share this so it's in a psd). As you can see, anything that is blue is erased (+ her eyes). It's set to Subtract at 37%.
Create a new layer and merge everything into this one (ctrl + shift + alt + e) erase everything as shown,
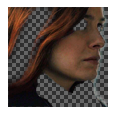
Set the layer to Screen at 33%.
For the light textures that are coming up next, you'll just have to save them through the links I'm going to post. I have no idea who made them but since they're light textures I'm going to guess it's by midnight_road because I use hers the most often. (If anyone can recogize these feel free to let me know!)
Here is all 4 we're going to be using; one - two - three - four
For #1 this will be on the left over her hair. Set to Screen.
#2 set to Screen at 27% again, it's on the left side only.
#3 is on the right side covering her face. Set to Screen at 48%.
#4 is kinda tricky if you look below you'll see that the pink stripe is right where her hair curves, which is what we want.
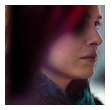
When you have it placed, set to Screen at 65%.
Everything should look like this;
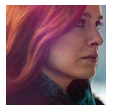
Create Brightness/Contrast layer and change brightness to 26 and contrast to 30.
Create a Color Balance layer set to Color and change the settings in midtones to this, 2+, -6, -8.
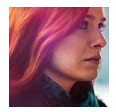
Take black and with a soft brush go over her hair and set to Soft Light at 39%.
Download this gradient map. Set to Exclusion at 19%.
Create a Levels layer and change the settings to this, 14, 1.07, 218.
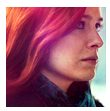
Create a Color Balance layer set to Color and change the settings in midtones to, -54, -13, -34. Change the opacity to 52%.
Create a new layer and merge again and sharpen it a bit.
Copy that layer and go to Filter > Moasic and change the settings to where ever you like. It should look something like this,
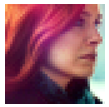
I can't remember what setting I used myself and messing around with it didn't provide the same result. :( Sorry!
Deselect the pixel layer and create a new layer and merge everything in that and keep this layer above the pixel one. Reselect the pixel layer so it's visible. Now back to the new merged layer erase everything except for the hair
Keep the layer set to normal and just change the opacity to 47%.
Create a new layer and merge again. Sharpen it a bit just to bring out the details some.
Take this texture by pamkips (from the Contact texture pack). I've blurred it a bit and flipped it vertical. Set the layer to Hard Light at 47%.
Take this texture (maker unknown). Set to Screen.
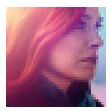
Create a new layer and with a large soft brush on a low opacity brush over the bright spots on the left side. Set to Soft Light at 51%.
Create a new layer and take this color #efa9b6 and go over her cheeck. Set to Soft Light.
Create a new layer and take this color #fee1be and paint over the highlighted parts of her hair. Set to Overlay at 43%.
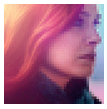
Create a Brightness/Contrast layer change brightness to 9 and contrast to 39.
Create a Levels layer and change the settings to 8, 1.00, 236. Erase the upper left corner with a soft low opacity brush just to tone it down a bit.
Create a new layer and merge. Go to Filter > Noise > Add Noise. My settings are always Uniform, 4.8. I vary between monochromatic and non. For this one keep that unselected. Keep the layer on normal and chance the opacity to 60%.
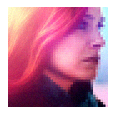
Next is the text! You will need these two fonts; Atreyu and Elephant. Note: to get the first font for free just put '0' in the payment option!
I used this color #fae7e3 for the text. With Atreyu write "Dissolve" the font size is 18, anti-aliasing is set to Smooth and the tracking set to 50. And with Elephant write 'says death' on italic, font size 10, anti-aliasing on Smooth and tracking on 50.
Copy the text layers and only change the color to black, then rasterize the type (right click over the layer and hit rasterize). Merge them together and move it below your original layers, and then move it down and to the right a bit to create a drop shadow so the text will show up better. Blur it a little bit. Set to Soft Light at 59%. Now it still isn't dark enough under the word death, so copy the layer and erase everything but that one word and change the opacity to 76%.
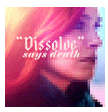
Download this gradient map, set to Divide at 23%.
Create a Vibrance layer, set to Color at 52% and change the settings to +33, +4. Erase a line in the mask like this where the coloring is too harsh.

Flatten, save, and you're done!

~~~~

[Will - brown]
You will need these two caps, one - two
Open them up and go to Image > Auto Contrast. That's all we'll need to do to make them brighter.
Since we'll be blending these together it's best to work with a larger canvas. I used 200x200.
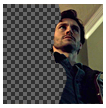
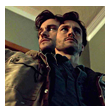
Place the cap where he's looking forward on top of the other one. Add a layer mask and erase the left side til his shirt melts into the other one so to speak. Should look something like this
Create a new layer and merge (ctrl + shift + alt + e) into one layer and sharpen to your liking.
Download this gradient map, set to Hard Light.
Then you will need this texture (maker unknown), set to Linear Dodge.
Create a new layer and add this texture (maker unknown), set to Overlay at 29%.
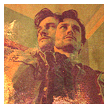
Create a gradient map layer and make the colors black and white. Leave it set to normal and change the opacity to 25%.
Take this texture (maker unknown), set to Overlay at 39%. Create a layer mask and with a watercolor brush (one that has visible paint strokes..if that makes sense?) erase from his face.
Download this gradient map, set to Soft Light at 21%. On the mask erase with a slpatter brush so it's faded some but not completely. I left the mask on it so you could see what I mean.
Create a Levels layer and change the settings to 5, 1.00, 246. Then rotate image (Image > Image Rotation > 90 CCW).
Flatten, save, and you're done!

~~~~

[Will - blue]
I was again, a dunce and forgot to save which episode I got my cap for this from :\ All I know is that it's from season 2. Here's what the base we are going to be working with looks like

In case you can find it or something. D: Sorry!
First we're going to create Brightness/Contrast layer, change the settings to 7, 19. Erase from the highlights on the right side of his face so they're not too bright.
Create a new layer and with a large soft brush use this blue #3198b4 and paint over that blue blob on the left. Set to Overlay.
Create a new layer and still using the blue we used before, paint over the right side of the icon on the blue only. Set to Overlay.
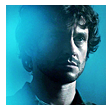
Create a Color Balance layer set to Color at 66%. Change the settings to +15, - 16, -24. Erase it all except for the right side of his face like so

Create a Hue/Saturation layer, set to Color. Change the saturation to +34.
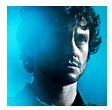
Note: The upcoming layers are mostly textures, which I can't find the makers on most of them, they're in my misc folder which have no names but if anyone recognizes them, let me know!
Create a new layer and take this texture by vetica. Set to Soft Light at 64%. Blur it a bit on the right side of his face.
Create a new layer and add this texture (maker unknown), flip horizontal. Set to Screen at 67% and erase from the right side of his face.
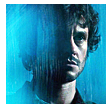
Create a new layer and take this texture (maker unknown), flip vertical & horizontal, and blur so it looks like this
Set to Soft Light.
Create a Levels Layer and change the settings to 11, 1.11, 247.
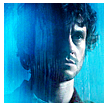
Create a new layer and take this texture (maker unknown), flip vertical & horizontal, and blur so it looks like this
Set to Screen at 56%.
Create a new layer and take this texture (maker unknown), set the layer to Linear Dodge.
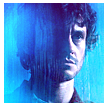
Create a new layer and take this texture (maker unknown), set to Screen.
Create a new layer and merge (ctrl + shift + alt + e). Sharpen to your liking.
Create a new layer and take this texture (maker unknown), add a layer mask and with a watercolor stroke brush (you can find these on deviantart) and erase it a bit. Something like this

Create a Vibrance layer, set to Color. Change the settings to +39, +8.
Flatten, save, and you're done!

~~~~
Ask the maker fill for: anassa_anemou.
Everything is under spoiler cuts to keep from scrolling for ages. If anything isn't clear, feel free to ask questions! :D

[Alana]
You will need this cap.
To lighten up the cap and normalize the coloring some; go to image > auto contrast > auto tone. Sharpen to your liking.
Copy the base and set it to Screen at 100%
The next six layers we'll be painting!
Create a new layer and take this color #336767 and paint over her scarf. Set layer to Overlay.
Another new layer and take this color #40372f and go over her hair. Set layer to Soft Light at 64%.
New layer and use this color #40372f and paint the lighter parts of her hair to bring out the highlights. Set to Linear Dodge at 70%.
New layer and with this color #40372f paint over the highlights again. Set to Overlay.
Go back to the linear dodge layer, copy it and drag it up over the overlay layer and set it to Soft Light at 52%.
Create a new layer and take this blue #40372f and paint over the white parts to the far right and set to Overlay at 70%.
Everything should look something like this,
Create a Hue/Saturation layer, set to Color and change the saturation to +12
You'll need to download this gradient map for the next part (I don't know how else to share this so it's in a psd). As you can see, anything that is blue is erased (+ her eyes). It's set to Subtract at 37%.
Create a new layer and merge everything into this one (ctrl + shift + alt + e) erase everything as shown,
Set the layer to Screen at 33%.
For the light textures that are coming up next, you'll just have to save them through the links I'm going to post. I have no idea who made them but since they're light textures I'm going to guess it's by midnight_road because I use hers the most often. (If anyone can recogize these feel free to let me know!)
Here is all 4 we're going to be using; one - two - three - four
For #1 this will be on the left over her hair. Set to Screen.
#2 set to Screen at 27% again, it's on the left side only.
#3 is on the right side covering her face. Set to Screen at 48%.
#4 is kinda tricky if you look below you'll see that the pink stripe is right where her hair curves, which is what we want.
When you have it placed, set to Screen at 65%.
Everything should look like this;
Create Brightness/Contrast layer and change brightness to 26 and contrast to 30.
Create a Color Balance layer set to Color and change the settings in midtones to this, 2+, -6, -8.
Take black and with a soft brush go over her hair and set to Soft Light at 39%.
Download this gradient map. Set to Exclusion at 19%.
Create a Levels layer and change the settings to this, 14, 1.07, 218.
Create a Color Balance layer set to Color and change the settings in midtones to, -54, -13, -34. Change the opacity to 52%.
Create a new layer and merge again and sharpen it a bit.
Copy that layer and go to Filter > Moasic and change the settings to where ever you like. It should look something like this,
I can't remember what setting I used myself and messing around with it didn't provide the same result. :( Sorry!
Deselect the pixel layer and create a new layer and merge everything in that and keep this layer above the pixel one. Reselect the pixel layer so it's visible. Now back to the new merged layer erase everything except for the hair
Keep the layer set to normal and just change the opacity to 47%.
Create a new layer and merge again. Sharpen it a bit just to bring out the details some.
Take this texture by pamkips (from the Contact texture pack). I've blurred it a bit and flipped it vertical. Set the layer to Hard Light at 47%.
Take this texture (maker unknown). Set to Screen.
Create a new layer and with a large soft brush on a low opacity brush over the bright spots on the left side. Set to Soft Light at 51%.
Create a new layer and take this color #efa9b6 and go over her cheeck. Set to Soft Light.
Create a new layer and take this color #fee1be and paint over the highlighted parts of her hair. Set to Overlay at 43%.
Create a Brightness/Contrast layer change brightness to 9 and contrast to 39.
Create a Levels layer and change the settings to 8, 1.00, 236. Erase the upper left corner with a soft low opacity brush just to tone it down a bit.
Create a new layer and merge. Go to Filter > Noise > Add Noise. My settings are always Uniform, 4.8. I vary between monochromatic and non. For this one keep that unselected. Keep the layer on normal and chance the opacity to 60%.
Next is the text! You will need these two fonts; Atreyu and Elephant. Note: to get the first font for free just put '0' in the payment option!
I used this color #fae7e3 for the text. With Atreyu write "Dissolve" the font size is 18, anti-aliasing is set to Smooth and the tracking set to 50. And with Elephant write 'says death' on italic, font size 10, anti-aliasing on Smooth and tracking on 50.
Copy the text layers and only change the color to black, then rasterize the type (right click over the layer and hit rasterize). Merge them together and move it below your original layers, and then move it down and to the right a bit to create a drop shadow so the text will show up better. Blur it a little bit. Set to Soft Light at 59%. Now it still isn't dark enough under the word death, so copy the layer and erase everything but that one word and change the opacity to 76%.
Download this gradient map, set to Divide at 23%.
Create a Vibrance layer, set to Color at 52% and change the settings to +33, +4. Erase a line in the mask like this where the coloring is too harsh.
Flatten, save, and you're done!

~~~~

[Will - brown]
You will need these two caps, one - two
Open them up and go to Image > Auto Contrast. That's all we'll need to do to make them brighter.
Since we'll be blending these together it's best to work with a larger canvas. I used 200x200.
Place the cap where he's looking forward on top of the other one. Add a layer mask and erase the left side til his shirt melts into the other one so to speak. Should look something like this
Create a new layer and merge (ctrl + shift + alt + e) into one layer and sharpen to your liking.
Download this gradient map, set to Hard Light.
Then you will need this texture (maker unknown), set to Linear Dodge.
Create a new layer and add this texture (maker unknown), set to Overlay at 29%.
Create a gradient map layer and make the colors black and white. Leave it set to normal and change the opacity to 25%.
Take this texture (maker unknown), set to Overlay at 39%. Create a layer mask and with a watercolor brush (one that has visible paint strokes..if that makes sense?) erase from his face.
Download this gradient map, set to Soft Light at 21%. On the mask erase with a slpatter brush so it's faded some but not completely. I left the mask on it so you could see what I mean.
Create a Levels layer and change the settings to 5, 1.00, 246. Then rotate image (Image > Image Rotation > 90 CCW).
Flatten, save, and you're done!

~~~~

[Will - blue]
I was again, a dunce and forgot to save which episode I got my cap for this from :\ All I know is that it's from season 2. Here's what the base we are going to be working with looks like

In case you can find it or something. D: Sorry!
First we're going to create Brightness/Contrast layer, change the settings to 7, 19. Erase from the highlights on the right side of his face so they're not too bright.
Create a new layer and with a large soft brush use this blue #3198b4 and paint over that blue blob on the left. Set to Overlay.
Create a new layer and still using the blue we used before, paint over the right side of the icon on the blue only. Set to Overlay.
Create a Color Balance layer set to Color at 66%. Change the settings to +15, - 16, -24. Erase it all except for the right side of his face like so
Create a Hue/Saturation layer, set to Color. Change the saturation to +34.
Note: The upcoming layers are mostly textures, which I can't find the makers on most of them, they're in my misc folder which have no names but if anyone recognizes them, let me know!
Create a new layer and take this texture by vetica. Set to Soft Light at 64%. Blur it a bit on the right side of his face.
Create a new layer and add this texture (maker unknown), flip horizontal. Set to Screen at 67% and erase from the right side of his face.
Create a new layer and take this texture (maker unknown), flip vertical & horizontal, and blur so it looks like this
Set to Soft Light.
Create a Levels Layer and change the settings to 11, 1.11, 247.
Create a new layer and take this texture (maker unknown), flip vertical & horizontal, and blur so it looks like this
Set to Screen at 56%.
Create a new layer and take this texture (maker unknown), set the layer to Linear Dodge.
Create a new layer and take this texture (maker unknown), set to Screen.
Create a new layer and merge (ctrl + shift + alt + e). Sharpen to your liking.
Create a new layer and take this texture (maker unknown), add a layer mask and with a watercolor stroke brush (you can find these on deviantart) and erase it a bit. Something like this
Create a Vibrance layer, set to Color. Change the settings to +39, +8.
Flatten, save, and you're done!

~~~~