New tutorial
This is a Gimp tutorial, translatable (i guess).
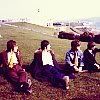
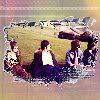
going from: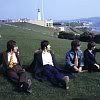
to
Step 1: Open your picture, crop, resize and sharpen if needed, so now we have the base.
Ste 2: Duplicate your base three times and set them to screen (it depends on your base).
Step 3: new layer, fill it with f591b2 and set it to burn 100%
Step 4: new layer fill it with 050957 and set it to exclusion 30% (Gimp: lighten only and diference, both 30%)
Step 5: duplicate the base, drag it to the top and set it to overly 50%.
Step 6: merge layer. layers -->colors--> Hue-saturation, set saturation 30.
Step 7: new layer fill again with 050957 and set to exlusion 20%.
Step 7: now open a new white layer, and use this brush
, place it where you want. Now with the select by color tool select the black part and then invert the selection. Now to make it easier make the layer invisible, see that the base is also selected. So now take a round brush and start painting with blak all over the base(the base might be selected).Finally make visible again the layer with the brush and set it to screen.
*This is the new base.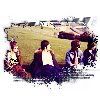
Step 8: Ok now, open a texture that you like and paste the new base in it, i used this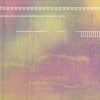
. with the select by color tool, select the white part and cleen(edit-->clean).you can add some text or brush, or whatever you want.
*Now we´re gonna use this Rain Clip made by ch_photoshopped.
Step 9: open the rain clip, as it´s animated it´s gonna open in 5 layers. change the mode of the rain clip from Indexed to RGB.
Step 10: now take the new base and paste it in between the rain layers (each rain layer have to be on top of the base layer).
Step 11: now set each rain layer to screen and merge down each of them (layers-->merge down). On the layers window change the time of the layers,mine: (100ms)
Step 12 : Files-->open as a layer.(open the new base, the one we got after step 7)
Step 13 : Erase the part where you want the rain to show.Duplicate it 5 times and place each of them on top on the rain bases you already had.now again layers-->merge down.
Step 14: FINALLY Save it as .gif
That´s all. i wanted to add text, but i forgot :P
I don´t remember who made the texture and the brush but they´re so credited in my resource page!
oh! it was longer than my usual tuts, but i guess it´s worth it.
comments please :)