Project: Covering Vacuform Relief with Pigsuede
The key to making vacuform armor look good onstage and not like "OMG plastik kostoom arm0r LOL" is covering it before painting it.
For less detailed pieces (plain breastplates, smooth greves, etc) you can use felt--industrial felt if you want it thick, or craft felt or oak-tanned leather if you need it thinner. With detailed pieces, such as our lion-head-relief shoulder-guards, we're using pigsuede--it's stretchier and easy to manipulate into curves and crevices.
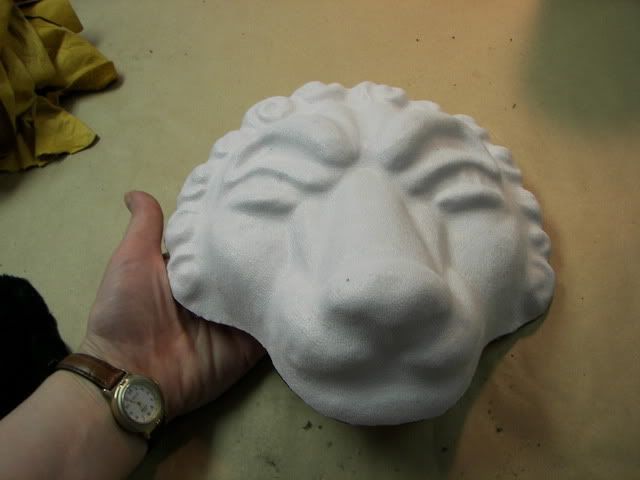
Here is the base piece, cut out of its vacuform sheet.
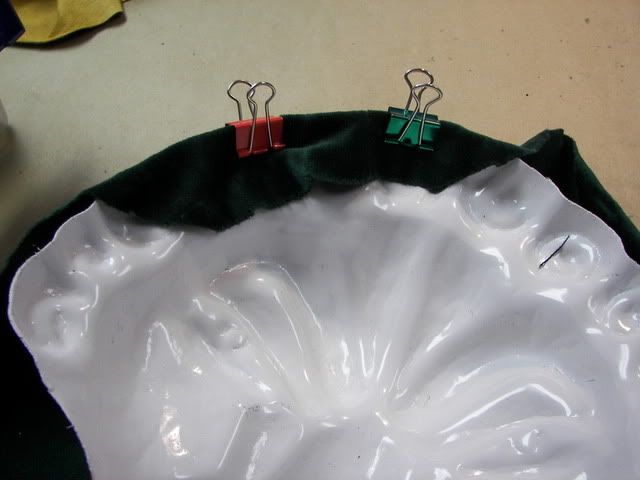
I used some scrap stretch-velvet to create a pattern.
Here i am clipping it around the base piece.
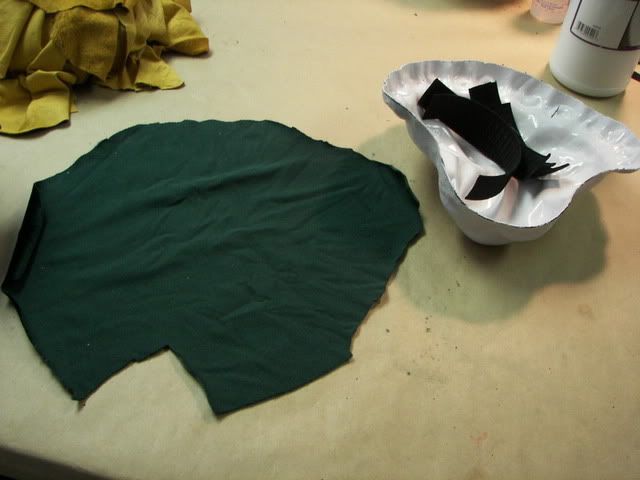
This is what the finished velvet pattern looked like.
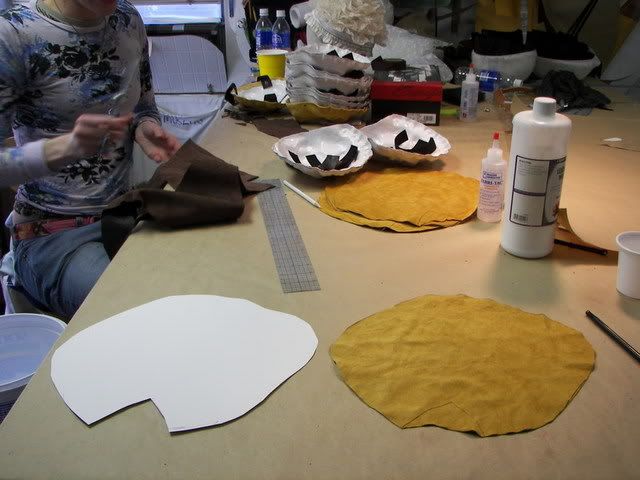
I translated it to cardstock and began tracing it out on the pigsuede.
Because it gets lacquer and paint, i avoided holes in the hide but not scars.
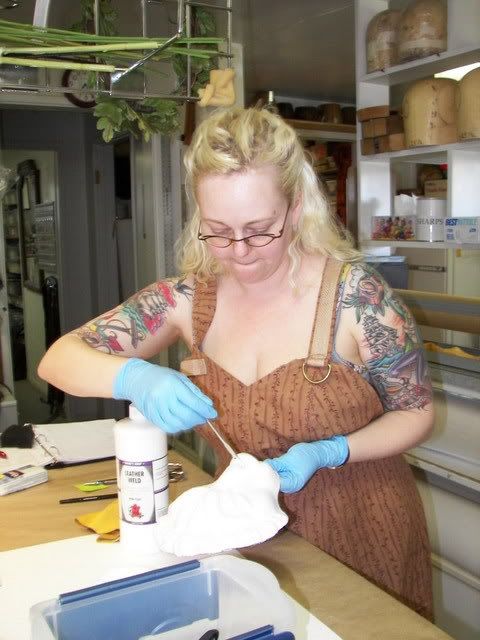
Me (making a concentration-face) applying Leather Weld to the plastic base.
We used Leather Weld (a water-based PVA glue) because it allows for easy manipulation and repositioning of the pigsuede, unlike a solvent-based contact cement.
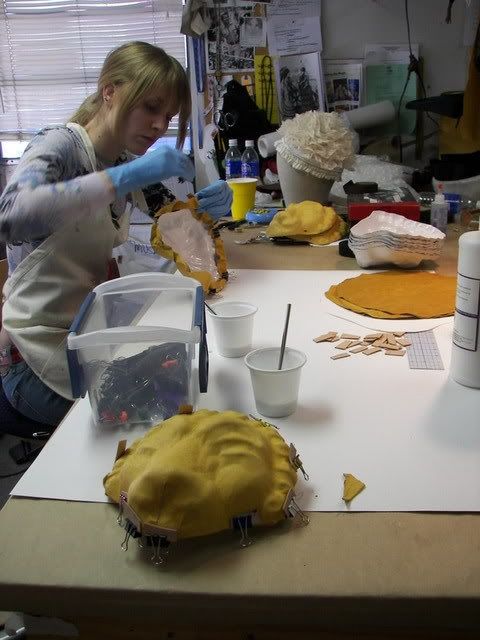
USF Crafts Artisan Grier Coleman applies the pigsuede to the armor piece.
Note her use of binder clips with leather clip guards to prevent them from leaving impressions in the pigsuede.
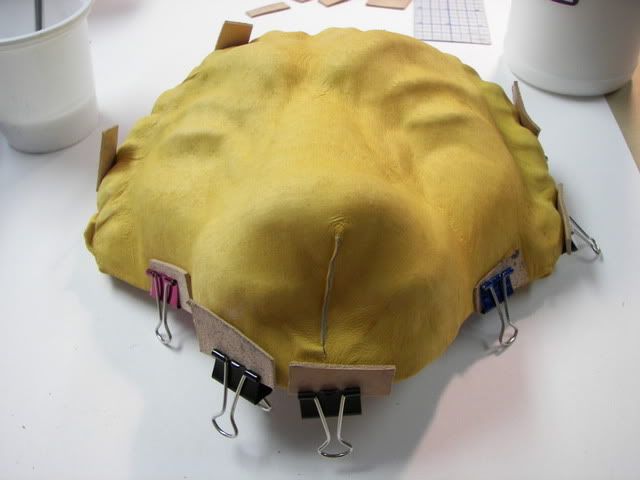
Here you can see where we hid the one dart under the lion's nose.
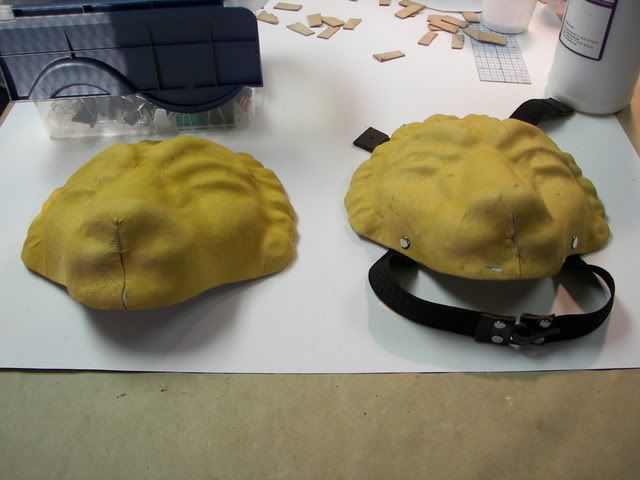
The piece on the right has his straps riveted on.
Next, they all go to the painter/dyer for detail painting!
And that's our method for covering high-relief armor pieces. We'll be hitting our tech/dress weeks soon, so i'm not sure if i'll have more to post, or less.
For less detailed pieces (plain breastplates, smooth greves, etc) you can use felt--industrial felt if you want it thick, or craft felt or oak-tanned leather if you need it thinner. With detailed pieces, such as our lion-head-relief shoulder-guards, we're using pigsuede--it's stretchier and easy to manipulate into curves and crevices.

Here is the base piece, cut out of its vacuform sheet.

I used some scrap stretch-velvet to create a pattern.
Here i am clipping it around the base piece.

This is what the finished velvet pattern looked like.

I translated it to cardstock and began tracing it out on the pigsuede.
Because it gets lacquer and paint, i avoided holes in the hide but not scars.

Me (making a concentration-face) applying Leather Weld to the plastic base.
We used Leather Weld (a water-based PVA glue) because it allows for easy manipulation and repositioning of the pigsuede, unlike a solvent-based contact cement.

USF Crafts Artisan Grier Coleman applies the pigsuede to the armor piece.
Note her use of binder clips with leather clip guards to prevent them from leaving impressions in the pigsuede.

Here you can see where we hid the one dart under the lion's nose.

The piece on the right has his straps riveted on.
Next, they all go to the painter/dyer for detail painting!
And that's our method for covering high-relief armor pieces. We'll be hitting our tech/dress weeks soon, so i'm not sure if i'll have more to post, or less.