Project: Vacuformed Armor for "Coriolanus"
One of the exciting things we are doing this year is vacuforming a new batch of armor for this summer's production of Shakespeare's Coriolanus. Today we went over to one the Festival's two scenery shops where the larger of their two vacuform machines is housed. (The smaller machine being over in the Props shop, apparently; i've never seen it so i can't attest to that.) Vacuforming is one of those things that often seems daunting to those who haven't had first-hand experience with it, but it's not that big of a deal, really.
Want to see how it is done?
The first step in creating vacuformed items is to create a positive of the piece. If you are familiar with molding and casting, you already know about creating the positive. Unlike with moldmaking, there are no workarounds for undercuts with vacuforming--the design's dimensionality must not cut back on itself with any "overhang". It may help metaphorically to think of a topographical map: mountains are ok, but caves are not.
The Festival already owns an array of armor positives, so we used extant ones for the breastplates and backplates. However, our Lead Crafts Artisan on Coriolanus, Lito-John DeMetita, sculpted some specific helmet shapes and lion medallion shapes for this production in addition to the extant breastplate and backplate positives. He sculpted the pieces in oil clay, then created a plaster mold, then cast them in Hydro-stone. You can technically vacuform directly over a clay positive, but the heat generated in the process won't allow for more than a couple of vacuforms before the clay loses its integrity. Our positives are cast in Hydro-stone because we needed ten or more replications.
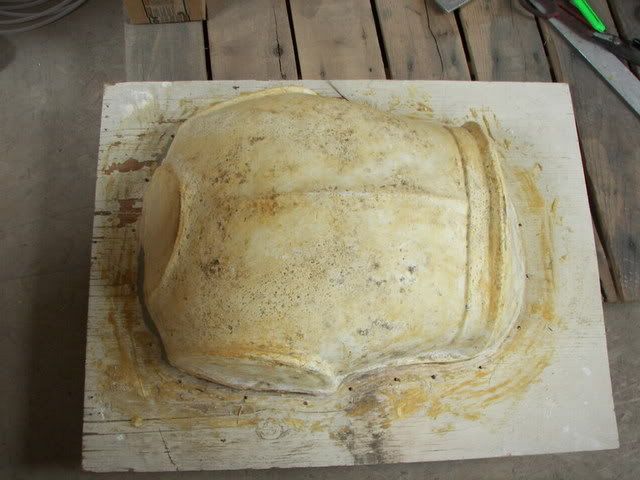
breastplate positive
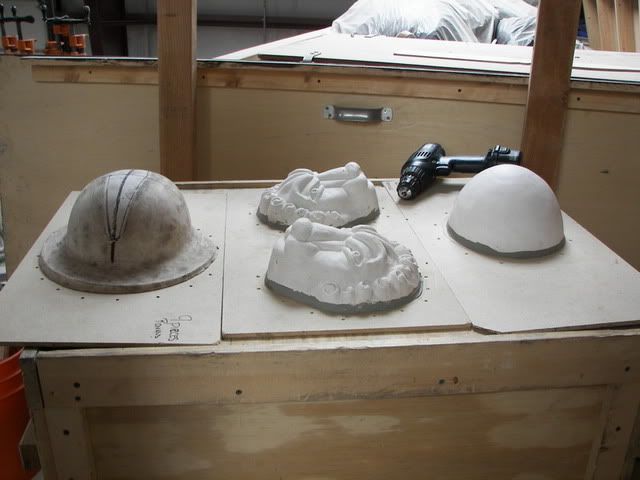
helmet and lion positives
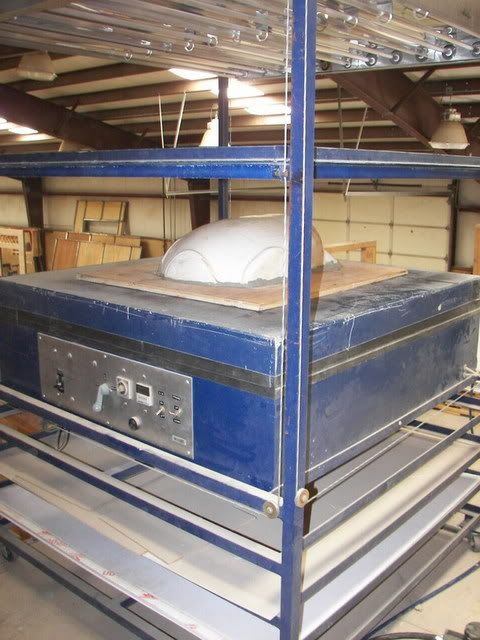
positive on the vacuform machine
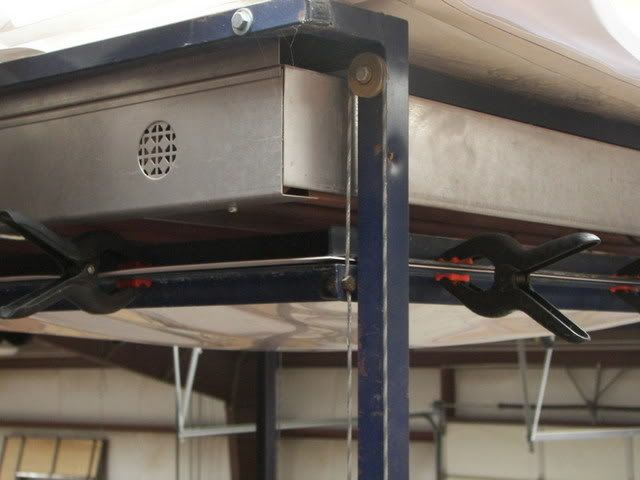
Here's the machine itself, above. See the long tubes across the "ceiling" of the vacuforming area? Those are heating elements. You place the positive in the center of the machine. The blue metal pieces are part of the frame into which the vacuform plastic is clamped...
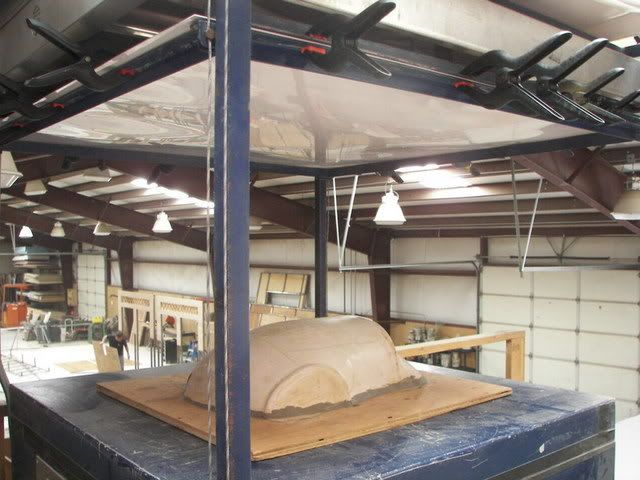
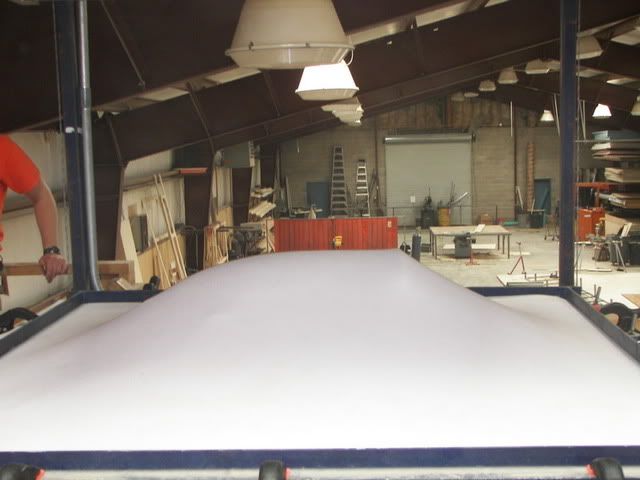
Here's the plastic clamped into the frame; it takes four people to clamp it in properly. The machine hoists the frame up into close proximity with the heating elements. The control operator cuts on the power and the elements heat the plastic up so it gets...well, squishy, for lack of a better word. The plastic starts to sag in the middle, like this:
Once the distention of the plastic starts to "unsag" (sort of suck back up towards flattishness), the operator flips a switch that brings the frame quickly down onto the positive:
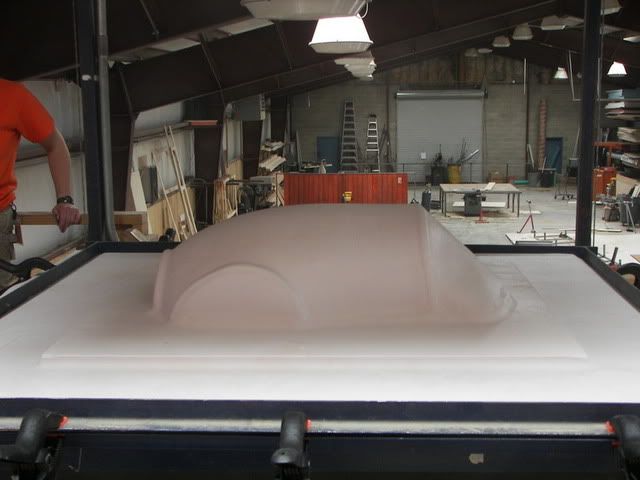
Then s/he engages the vacuum action, which sucks the plastic down around the positive and makes it take on the form of the mold:
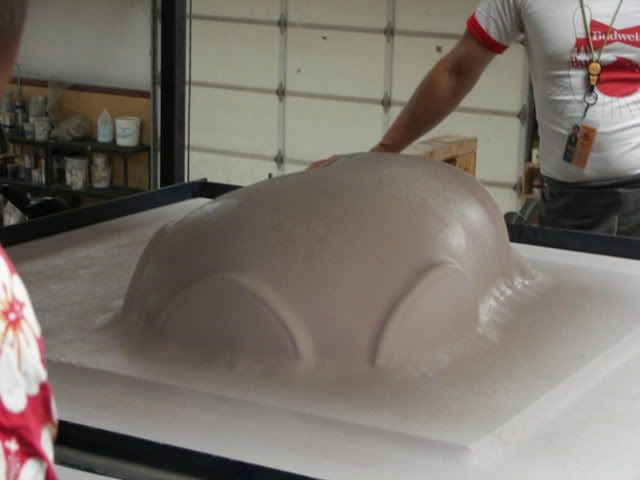
Then the operator lifts the frame up, disengaging the plastic from the positive, and your four technicians unclamp the plastic, remove it from the frame, put the vacuformed piece aside, and move and clamp a new flat plastic sheet into place. Safety note: all operators need to wear heat-resistant gloves and long sleeves. The machine's surfaces get blisteringly hot while in use.
Of course, this is just the first step in making these things stageworthy. Some will get covered in leather or industrial felt, painted, ornaments sculpted on, edges bound in leather or ethafoam tubing, straps riveted on, etc etc etc.
If you have access to a vacuform machine (or the ingenuity to build one) it can be a quick way to crank out lightweight multiples of armor pieces for far less money than purchasing them from a company like Costume Armour.
Want to see how it is done?
The first step in creating vacuformed items is to create a positive of the piece. If you are familiar with molding and casting, you already know about creating the positive. Unlike with moldmaking, there are no workarounds for undercuts with vacuforming--the design's dimensionality must not cut back on itself with any "overhang". It may help metaphorically to think of a topographical map: mountains are ok, but caves are not.
The Festival already owns an array of armor positives, so we used extant ones for the breastplates and backplates. However, our Lead Crafts Artisan on Coriolanus, Lito-John DeMetita, sculpted some specific helmet shapes and lion medallion shapes for this production in addition to the extant breastplate and backplate positives. He sculpted the pieces in oil clay, then created a plaster mold, then cast them in Hydro-stone. You can technically vacuform directly over a clay positive, but the heat generated in the process won't allow for more than a couple of vacuforms before the clay loses its integrity. Our positives are cast in Hydro-stone because we needed ten or more replications.

breastplate positive

helmet and lion positives

positive on the vacuform machine
Here's the machine itself, above. See the long tubes across the "ceiling" of the vacuforming area? Those are heating elements. You place the positive in the center of the machine. The blue metal pieces are part of the frame into which the vacuform plastic is clamped...

Here's the plastic clamped into the frame; it takes four people to clamp it in properly. The machine hoists the frame up into close proximity with the heating elements. The control operator cuts on the power and the elements heat the plastic up so it gets...well, squishy, for lack of a better word. The plastic starts to sag in the middle, like this:

Once the distention of the plastic starts to "unsag" (sort of suck back up towards flattishness), the operator flips a switch that brings the frame quickly down onto the positive:

Then s/he engages the vacuum action, which sucks the plastic down around the positive and makes it take on the form of the mold:


Then the operator lifts the frame up, disengaging the plastic from the positive, and your four technicians unclamp the plastic, remove it from the frame, put the vacuformed piece aside, and move and clamp a new flat plastic sheet into place. Safety note: all operators need to wear heat-resistant gloves and long sleeves. The machine's surfaces get blisteringly hot while in use.
Of course, this is just the first step in making these things stageworthy. Some will get covered in leather or industrial felt, painted, ornaments sculpted on, edges bound in leather or ethafoam tubing, straps riveted on, etc etc etc.
If you have access to a vacuform machine (or the ingenuity to build one) it can be a quick way to crank out lightweight multiples of armor pieces for far less money than purchasing them from a company like Costume Armour.