2 new tutorials
Both of these icons were made a looong time ago so if I get any names wrong for the credits, please say so~
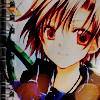
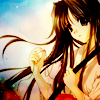
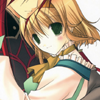
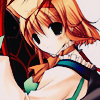
Tutorial One:
>>

9 main steps
Translatable: YESS,
Difficulty: Easy/Medium ?
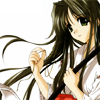
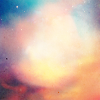
Step One~ Prep up your base . I always do this buy simply duplicating my base usually 4 times with the layer mode set to this order:
1st Duplicate: Screen 100%
2nd: Softlight 100%
3rd: Linear burn: 100%
4th: Screen 42% <(depending on your image)<
This is supposed to give it enough brightness and contrast .
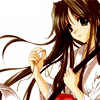
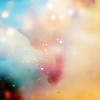
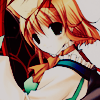
Step Two~ Alrighty, let's get right into the colouring before all the texture suff . New Colour Balance layer:
Midtones: +30, +7, -9
Shadows: +13, -18, -7

Step Three~ This step is just oing to simply make the colours pop out a lot more, mainly the reds in the image . Create a new hue/saturation layer:
Master: 0, +23, 0
Step Four~ Create a new fill layer: DDFEE4 set to multiply at 77%
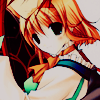
Step Five~ Alrighty, let's put in some textures . Add this and this texture by
treasuresex and set them both to multiply .
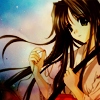
Step Six~ Duplicate your base and drag it all the way to the top . Set this layer to softlight so we could see the character a lot clearer .
Step Seven~ It still looks a little hidden, so we'll fix that up with a levels layer. Create a new levels layer and input these settings:
RGB: 9, 1.33, 232
Step Eight~ Add this texture by aftermidni aftermidnightand set it to softlight .
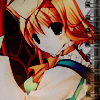
Step Nine~ Add this texture by
girlboheme and set it to multiply .
Add this texture by (? If you know, please tell) and set it to multiply . I erased whatever part of this texture that was on her hand so that it looked like the
writing was behind her .
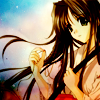
Creat a new layer and take a soft round brush and click anywhere with the colour F80331 . Set this layer to screen with an opacity of 77%
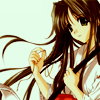
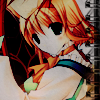
Kay so you're basically done now so you can do anything and add anything you want to it :) Experimenting and adding your own twist instead of completely following this tutorial is encouraged~
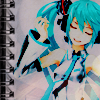
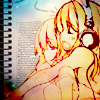
Other results:
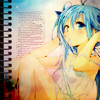
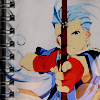
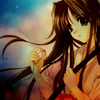
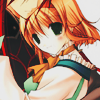
Tutorial 2:
>>
12 main steps
Translatable: No, sorry
Difficulty: Medium

Step One~ Prep up your base . I always do this buy simply duplicating my base usually 4 times with the layer mode set to this order:
1st Duplicate: Screen 100%
2nd: Softlight 100%
3rd: Linear burn: 100%
4th: Screen 41% <(depending on your image)<
This is supposed to give it enough brightness and contrast .

Step Two~ New Fill layer: 323232 set to exclusion with its opacity lowered 40% . This'll dull and slighty darken the skin and highlights to let the midtones and shadows stand out more later .
Step Three~ whoo, it's everyone's best friend selective colouring :\ Create a new selective colouring layer and inpute these settings:
Reds: -100, +36, +100, +29
Yellows: -100, 0, -22, 0

Step Four~ Create a new hue/saturation layer and input these settings:
Master: +4, -18, +6

Step Five~ New fill layer: FFC9C9 set to colourburn at 50% . This'llobviously bring out the reds a little more .

Step Six~ Duplicate your base and bring it to the top and set it to saturation . Duplicate your base once more and bring it to the top and set it to softlight .
Step Seven~ Create a new Selecrive colouring layer and input these settings:
Reds: -100, 0, +100, 0
Yellows:- 100, 0, -58, +46
Neutrals: +38, +6, -16, +12
Step Eight~ New fill layer: 082C2C set to exclusion with its opacity down to 30% .
To darken the shadows, create a new fill layer: E0DFDF set to colourburn 60%
Step Nine~ New channel mixer layer:
Reds: +108, -20, -8, +12
Greens: +12, +90, +12, -4
Blues: +12, -10, +92, 0
Set this layer to exclusion with its opacity down to 20%
Duplicate this same channel mixer once, and set it to softlight 94%
Step Ten~ Create a new hue/saturation layer and input these settings:
Master: 0, +20, 0
Reds: 0, +6, 0
Greens: 0, +38, 0
Cyans: 0, +25, 0
Blues: 0, +22, 0
Step Eleven: Add this texture by
girlboheme and rotate it however you want, then set it to multiply .
Add this texture by
lore_85 and set it to screen .
Step Twelve: Alright, last adjustment layer, I promise . Create a new selective colouring layer and input these settings:
Blacks: 0, 0, 0, +21
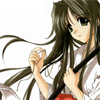
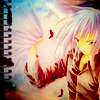
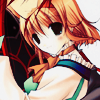
Other results: