Tutorial
Cropping and transforming tutorial for everywinter
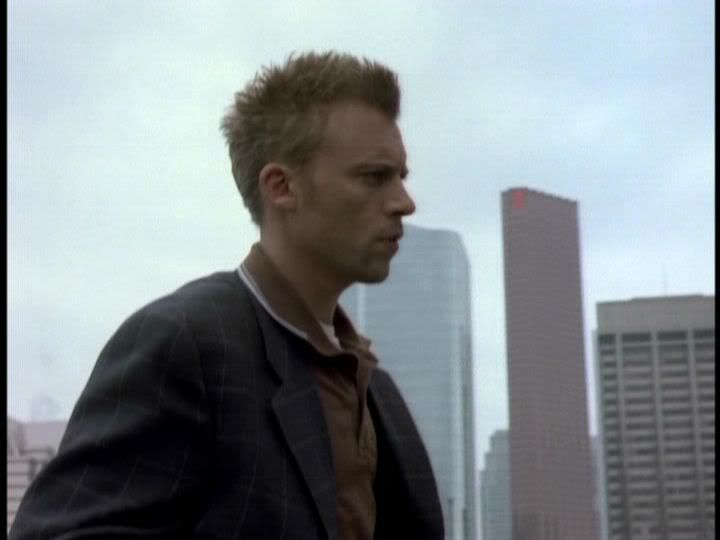
Start with your screencap:

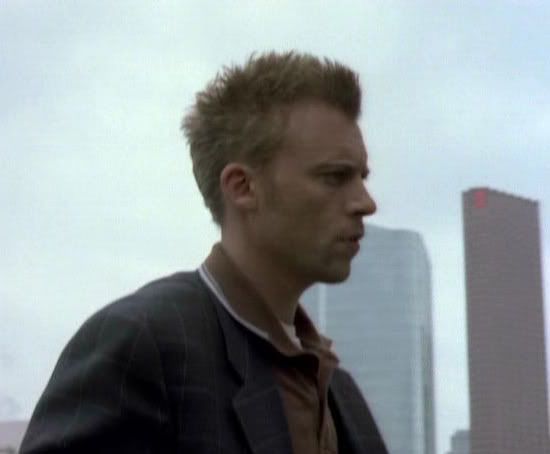
Do an initial crop that sort of puts the subject where you want him (I chose to center Ray), paying no attention to dimensions:

and then I size it to about 200px width wise just to make it more manageable and closer to the icon size:

OK, now some options for getting a 100x100 icon without screwing with the aspect ratio.
1. The easiest method is to use the color-picker/eye dropper tool, click it on some of the sky near the top (I chose color #cfe6eb), and then go to Canvas Size (under image), change the anchor so the alterations are only going upwards, click on Canvas color, and chose the sky color (#cf36eb), and then change the dimensions to 200x200 px.

You end up with this:

2. Now you can resize to 100x100, and then use the blur tool, textures, coloring, or text to help soften the difference:

3. (Used the blur tool to soften the transition. Did a curves layer with RGB input 41 and output 70, copied the base, moved it to the top, set it on screen, and then did a Hue/Saturation level with +15 hue, then flattened layers)
And that's one way you can get 100x100 icons without messing up the aspect ratio.
There's also the transform function, which is slightly more complicated, but extremely useful.
1. Again, you're going to want to change your canvas size, extending it only upwards (though it doesn't really matter what the canvas color is- I often use black against a light background, so I can see what I'm doing).

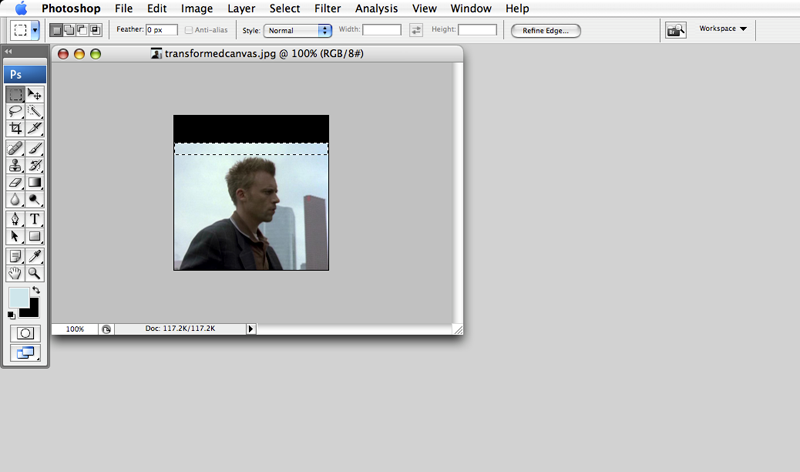
2. Now, using your square marquee tool, select whatever portion of the sky above Ray that you can:

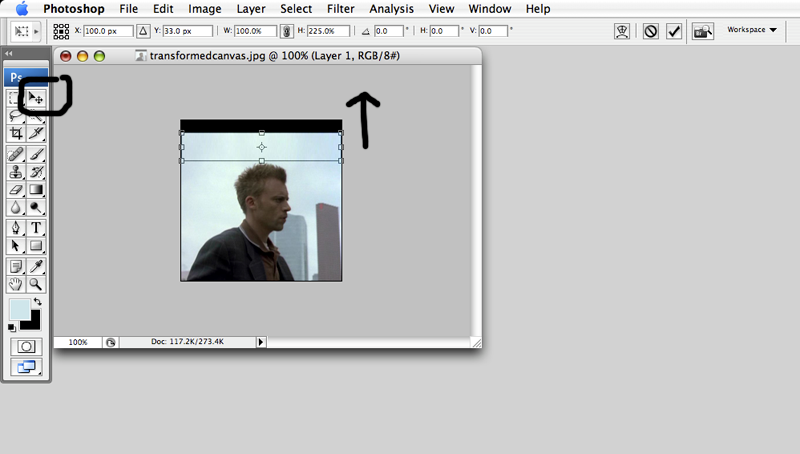
3. Copy and paste it. Then, using your transform/move tool (make sure the "Show Transform Controls" box is checked), stretch the sky piece until all the black is covered. Flatten it down.

You now have this:

and can resize it to 100x100, and clean it up however you like- add textures, coloring, etc.

Questions? Something confusing? I'm happy to clarify.
Start with your screencap:

Do an initial crop that sort of puts the subject where you want him (I chose to center Ray), paying no attention to dimensions:

and then I size it to about 200px width wise just to make it more manageable and closer to the icon size:

OK, now some options for getting a 100x100 icon without screwing with the aspect ratio.
1. The easiest method is to use the color-picker/eye dropper tool, click it on some of the sky near the top (I chose color #cfe6eb), and then go to Canvas Size (under image), change the anchor so the alterations are only going upwards, click on Canvas color, and chose the sky color (#cf36eb), and then change the dimensions to 200x200 px.

You end up with this:

2. Now you can resize to 100x100, and then use the blur tool, textures, coloring, or text to help soften the difference:

3. (Used the blur tool to soften the transition. Did a curves layer with RGB input 41 and output 70, copied the base, moved it to the top, set it on screen, and then did a Hue/Saturation level with +15 hue, then flattened layers)
And that's one way you can get 100x100 icons without messing up the aspect ratio.
There's also the transform function, which is slightly more complicated, but extremely useful.
1. Again, you're going to want to change your canvas size, extending it only upwards (though it doesn't really matter what the canvas color is- I often use black against a light background, so I can see what I'm doing).

2. Now, using your square marquee tool, select whatever portion of the sky above Ray that you can:

3. Copy and paste it. Then, using your transform/move tool (make sure the "Show Transform Controls" box is checked), stretch the sky piece until all the black is covered. Flatten it down.

You now have this:

and can resize it to 100x100, and clean it up however you like- add textures, coloring, etc.
Questions? Something confusing? I'm happy to clarify.