Zhang Ziyi faded photo tutorial in Photoshop
I've never tried to do a faded photo effect before. I'm surprised by how well it come out.
- includes selective colour and levels layers
- pic heavy
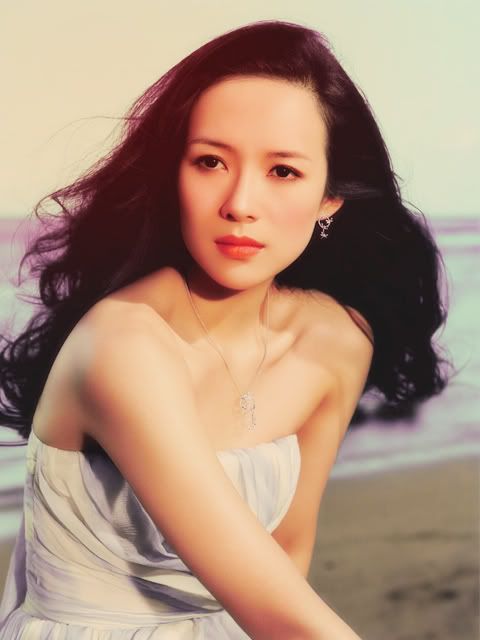
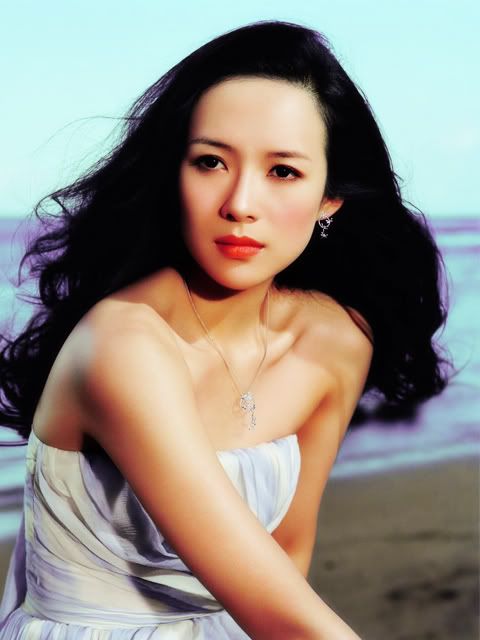
Here's my starting image, nice and bright and crisp:

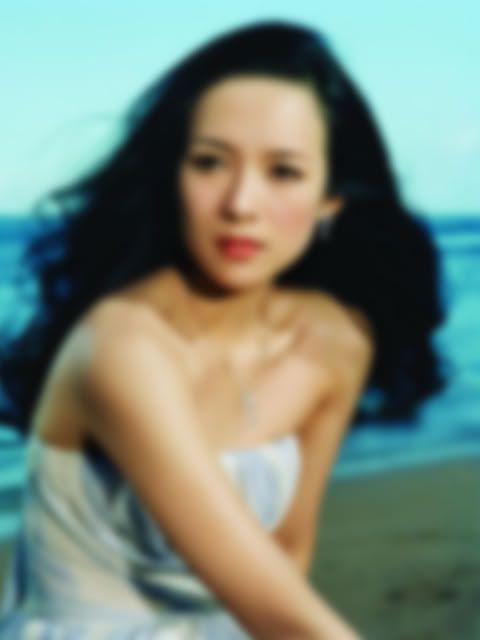
Because old photos tend not to be as clear, I duplicated the layer and use the Guassian Blur filter to blur the image so it looked like this:
I then set the blurred layer to soft light so the image now looked like this:
It now looks much softer.
Next I created a Selective Colour adjustment layer at these settings:
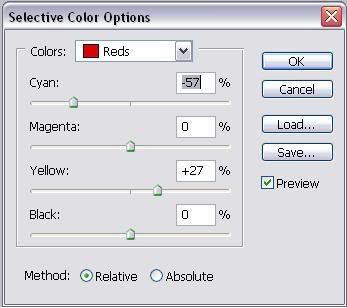
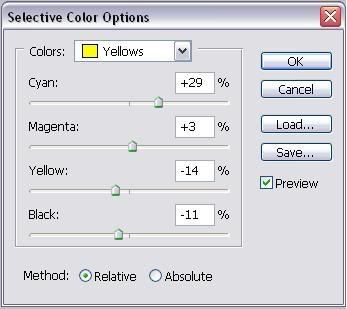
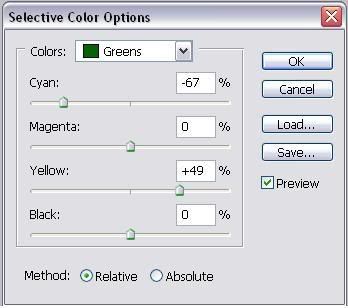
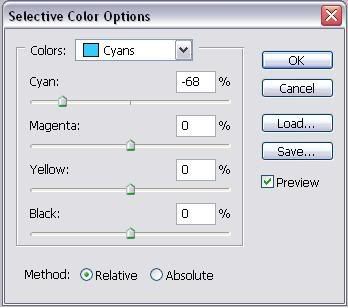
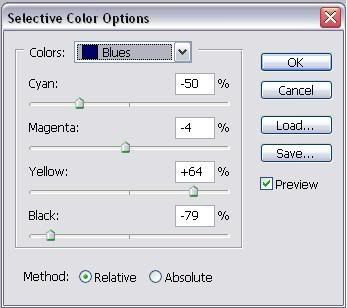
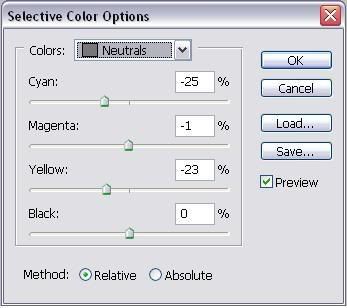
So it looked like this:
I then created a new blank layer and filled it with colour #EECEAC and set it to multiply. This gave me:
I felt it was a bit dark so I created a Levels adjustment layer at these settings:
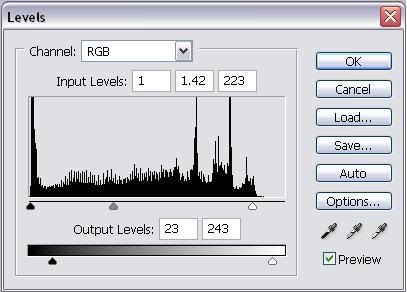
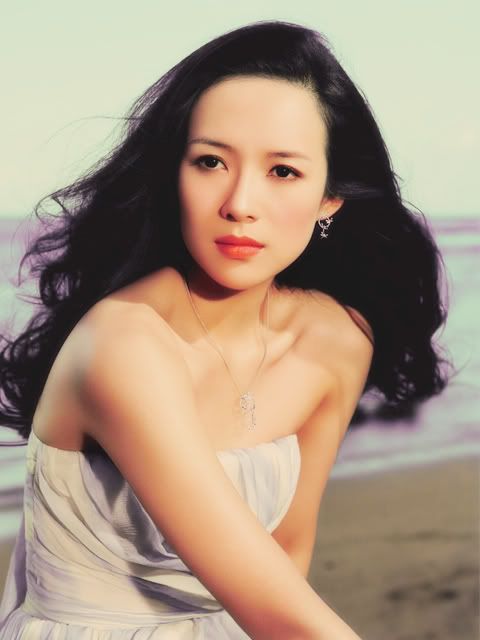
And this gave me:
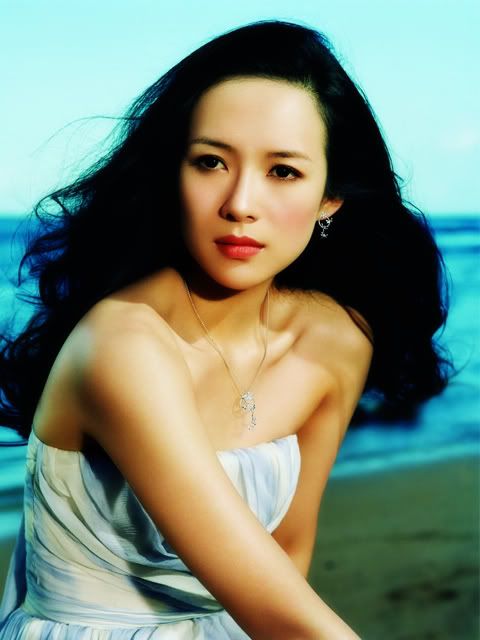
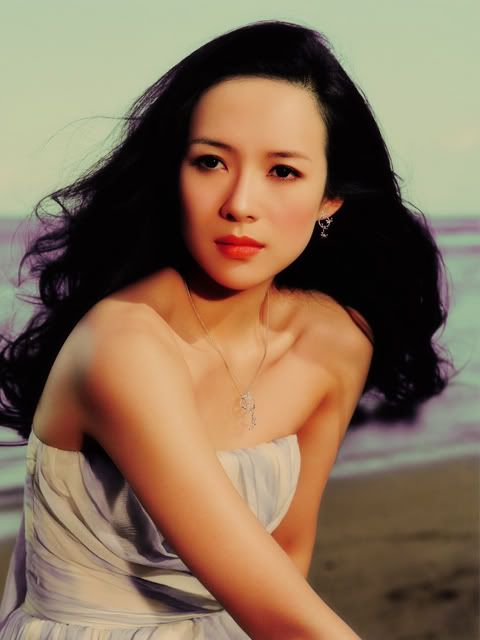
Finally for a little bit extra I added a new layer and colored the top left corner in #E55656 with a large blurred edge brush:

And set it to soft light to give me my final image: