(no subject)
I noticed there were no tutorials for GIMP on the basics of using the pen tool. And since I have been using the pen tool all day, I figured I could, at the very least, make a tutorial on how to do such. So here it is.
Program: Gimp 2.6.7
Level: Beginner
TO
warning: image heavy
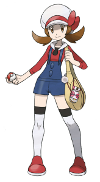
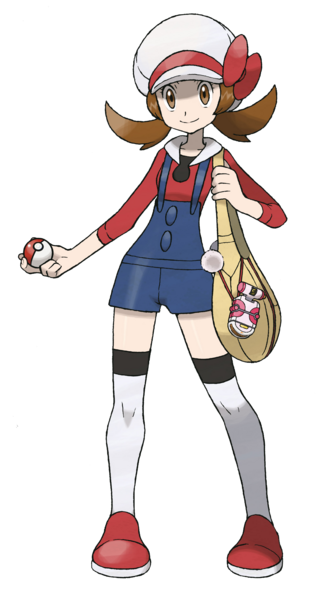
001. Find an image. I recommend using a transparent .png, unless you are good at the eraser tool. I am not. The image I am using is of Lyra from Pokemon HeartGold/SoulSilver.
002. Crop to icon sized (aka 100x100). Sharpen if necessary.
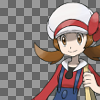
this is currently my base.
003. Do whatever coloring style you want on it. ( a previous tutorial for how I get my coloring)
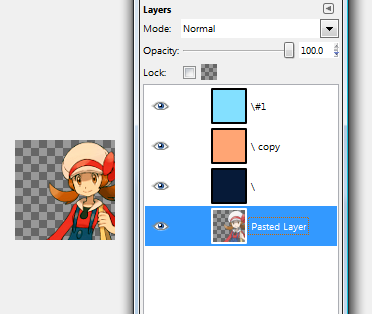
This is currently my icon along with my layers. Ignore the / titles.
004. If you have any layers, merge them. This can be done by pressing ctrl+m. This is very important because you do not want your fill layers to mess with the color/texture/pattern you use as a background.
005. Almost to the pen tool, I promise! Choose a texture or pattern you want as a background. You can also just use a fill layer with any color instead.
I shall be using this pattern by 77words.
Place the texture/pattern/fill layer behind your main layer.
What I have so far.
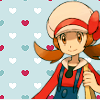
006. Now place a fill layer of #faf4eb between your main layer and your texture/pattern/fill layer. The reason I went with an off white instead of white itself is that white would look too harsh. This color is softer and would look better with my pattern.
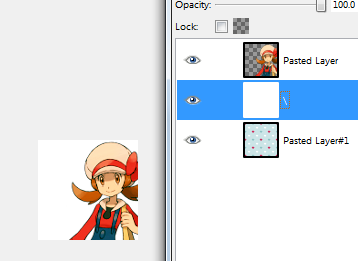
My icon including my layers.
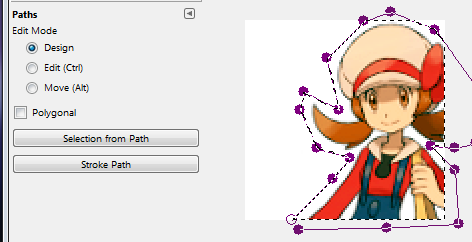
007. NOW FOR THE PEN TOOL :D
While on the off-white layer, select the pen tool (
). Your cursor should change when in this mode (I apologize for not being able to show it; it doesn't show up when print screened). Make sure the path Design is clicked as well.
Now begin to vaguely outline the character. Click the first "dot" you made to complete the outline.

This is how it should look fully outlined.

When fully outlined, the entire icon should look similar to this.
008. Simply press the Selection from path tool.
009. Now unclick the pen tool. Then invert your selection (right click > select > invert or ctrl+I). This is will cause all the excess of the off white layer to be selected. Delete this excess (I usually just use ctrl+x). Now deselect everything ( right click > select > none or shift+ctrl+A). Finally, merge together with ctrl+m and TADA! You have effectively used the pen tool!
QUESTIONS / COMMENTS / CONCERNS?
please direct them here :3
NOTE: If you noticed the outlines change from step 7 to 8, this is due to me having to redo them because I accidentally undid them. I apologize if this throws anyone off!
Program: Gimp 2.6.7
Level: Beginner
TO
warning: image heavy
001. Find an image. I recommend using a transparent .png, unless you are good at the eraser tool. I am not. The image I am using is of Lyra from Pokemon HeartGold/SoulSilver.
002. Crop to icon sized (aka 100x100). Sharpen if necessary.
this is currently my base.
003. Do whatever coloring style you want on it. ( a previous tutorial for how I get my coloring)
This is currently my icon along with my layers. Ignore the / titles.
004. If you have any layers, merge them. This can be done by pressing ctrl+m. This is very important because you do not want your fill layers to mess with the color/texture/pattern you use as a background.
005. Almost to the pen tool, I promise! Choose a texture or pattern you want as a background. You can also just use a fill layer with any color instead.
I shall be using this pattern by 77words.
Place the texture/pattern/fill layer behind your main layer.
What I have so far.
006. Now place a fill layer of #faf4eb between your main layer and your texture/pattern/fill layer. The reason I went with an off white instead of white itself is that white would look too harsh. This color is softer and would look better with my pattern.
My icon including my layers.
007. NOW FOR THE PEN TOOL :D
While on the off-white layer, select the pen tool (
). Your cursor should change when in this mode (I apologize for not being able to show it; it doesn't show up when print screened). Make sure the path Design is clicked as well.
Now begin to vaguely outline the character. Click the first "dot" you made to complete the outline.
This is how it should look fully outlined.
When fully outlined, the entire icon should look similar to this.
008. Simply press the Selection from path tool.
009. Now unclick the pen tool. Then invert your selection (right click > select > invert or ctrl+I). This is will cause all the excess of the off white layer to be selected. Delete this excess (I usually just use ctrl+x). Now deselect everything ( right click > select > none or shift+ctrl+A). Finally, merge together with ctrl+m and TADA! You have effectively used the pen tool!
QUESTIONS / COMMENTS / CONCERNS?
please direct them here :3
NOTE: If you noticed the outlines change from step 7 to 8, this is due to me having to redo them because I accidentally undid them. I apologize if this throws anyone off!