Overdue Post #1
poisonkitty had perhaps the best and most balanced advice on combating burnout. One element of the advice was specific to my profession: software guys need physical projects.
It made complete sense. I'd been doing that in some form or another, but hearing it from someone else put it into perspective. It didn't matter how crazy or bizzarre the project was. It wasn't the end result as much as it was the process. He pointed me to the MAKE blog, and it was there where I realized that the projects in my head were just as crazy as any self-respecting geek.
There is no better project for computer hardware junkie such as myself as a "case mod." Case mods are where people go to great lengths to create a non standard 'computer case' that fulfills some purpose, whether it be aesthetic or practical. My own "case mod" fulfilled both:
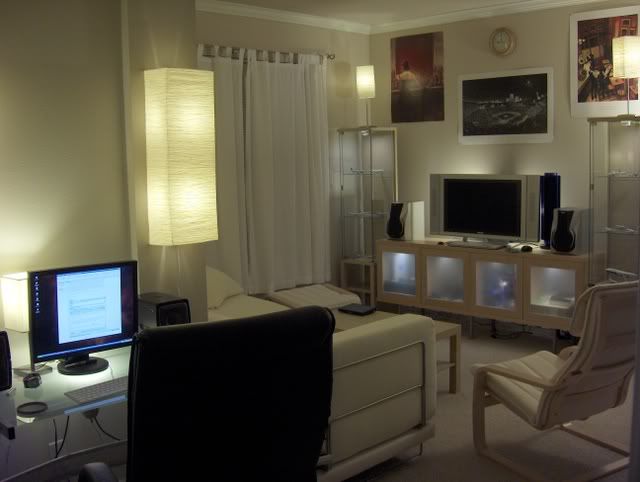
Behold, my case mod! The "case" in this instance is the cabinet itself. The computer in question is the media center computer that drives my television.
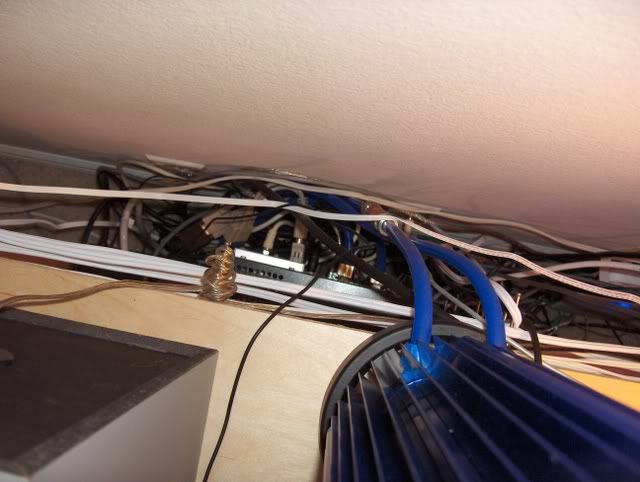
This illustrates the original problem this whole project was intended to solve. Connecting wires to the computer was a total nightmare, and modifying the machine in its mini-itx case was equally nightmarish. No computer belonging to any self-respecting 'geek' is ever complete. Upgrades are a continual process. The media center machine's future upgrades could include a more efficient C2D processor, a larger harddrive, and now that the format war is decided, a bluray drive. Budget conscious that I am now, all these upgrades would happen in increments. Which means.. each and every time, the mess you see here would have to be dealt with.
On top of that, the old Pentium D processor is liquid cooled with a massive passive heatsink that had to be drained each and every time the machine was worked on. A big, big pain in the ass.
The final result addresses all such concerns:
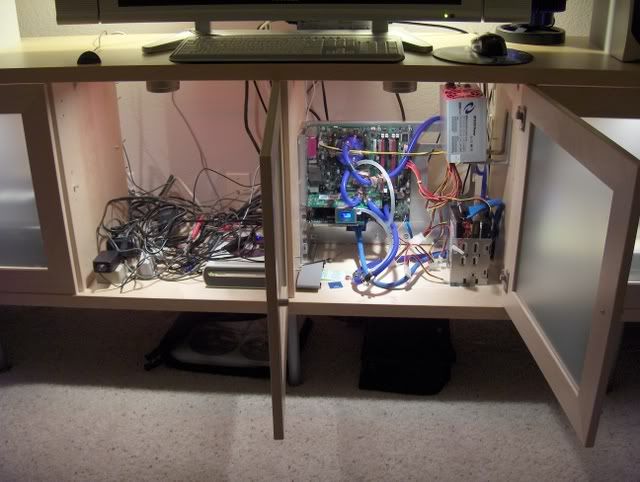
Plainly obvious is the extremely serviceable nature of the setup. The computer parts are fully exposed, making the replacement of any component fairly trivial. Though still plagued by chord spaghetti, attaching and removing things to the computer is also a trivial task.
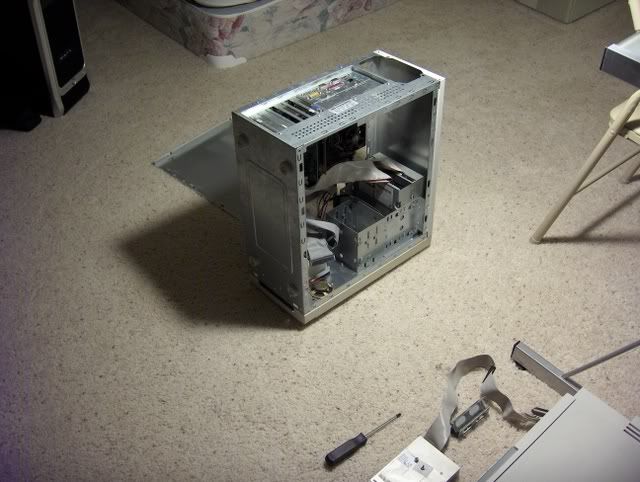
First, I needed mounting hardware for the motherboard. mesosparkle gave me a junk computer for the recycling pile a few months back, and the case was the perfect candidate.
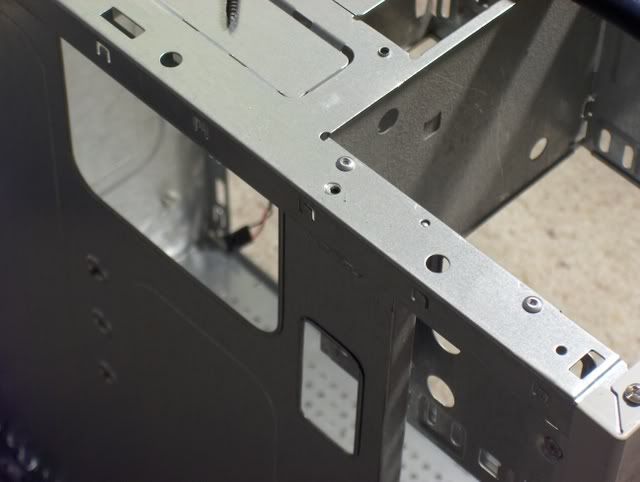
Removing the parts I needed involved some drilling. Not sure what they call those things, but a drill and a bit of force will get them out.
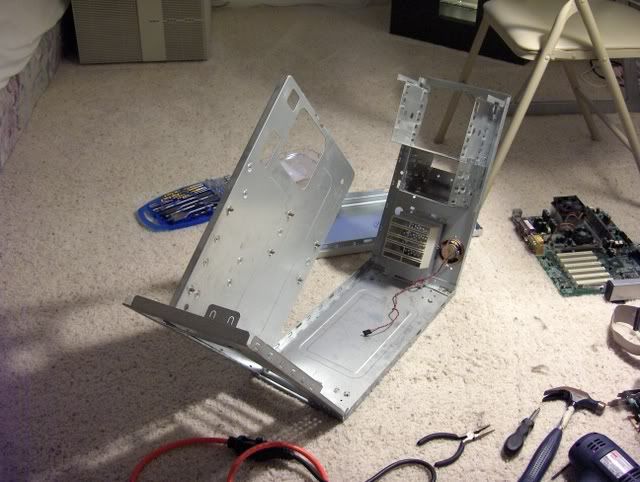
Granted, it's aluminum, but there is still no greater feeling then pulling apart METAL with your bare hands. The motherboard holder is nearly removed from the case...
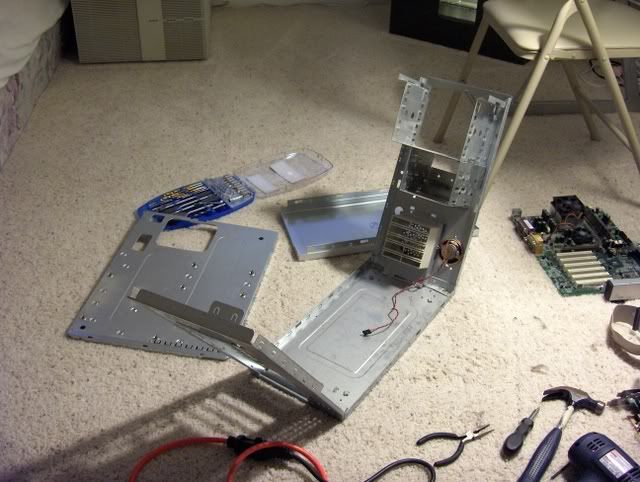
... and sonofabitch! the thing is in two pieces!
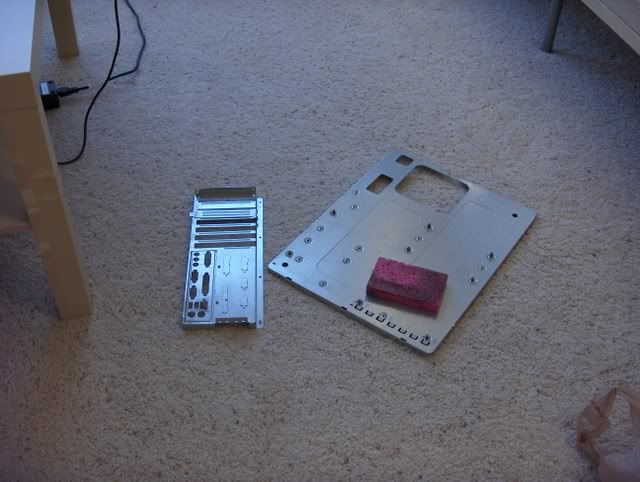
No matter. Clean off the dust, and superglue will handle the rest.
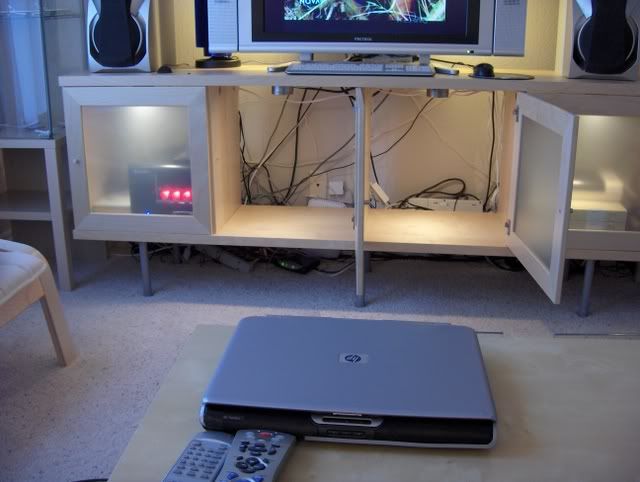
Meanwhile, the two center... "bays" (for lack of a better term) are cleared to prepare for the motherboard holder.
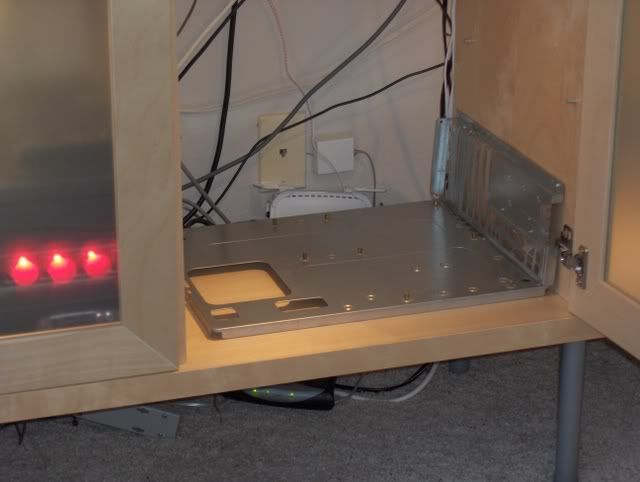
Superglue dry, we now run into a second problem. Cutting out the cabinet would compromise the cabinet's structural integrity. There wouldn't be enough support for the door for one.
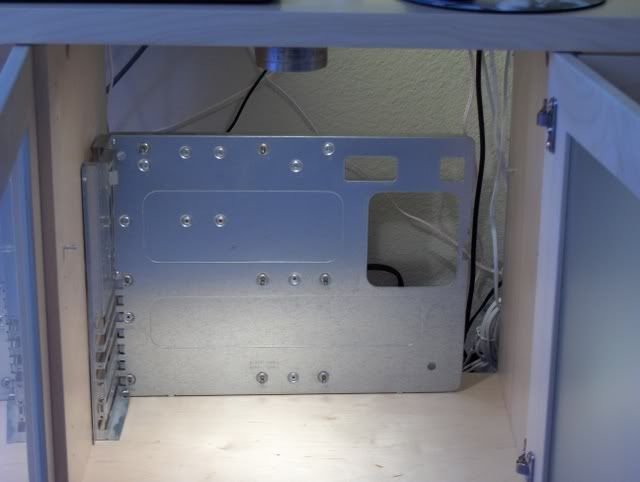
The solution is to mount it vertically.
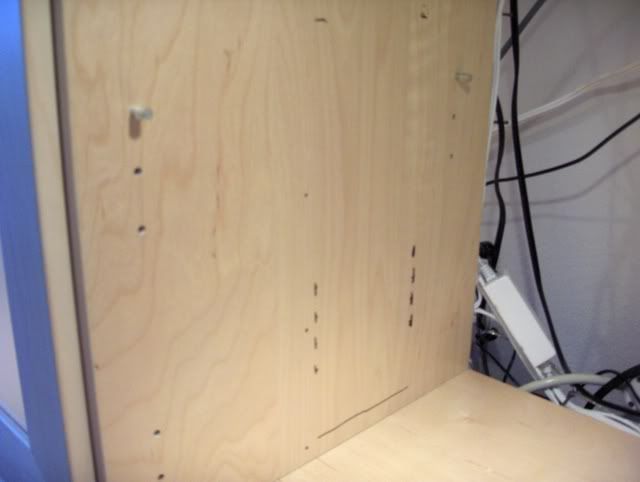
Figuring out where to cut is trickier than you might think. You don't want the outline of the thing, cause you need to screw it in. So I made some marks and now had to connect the dots..
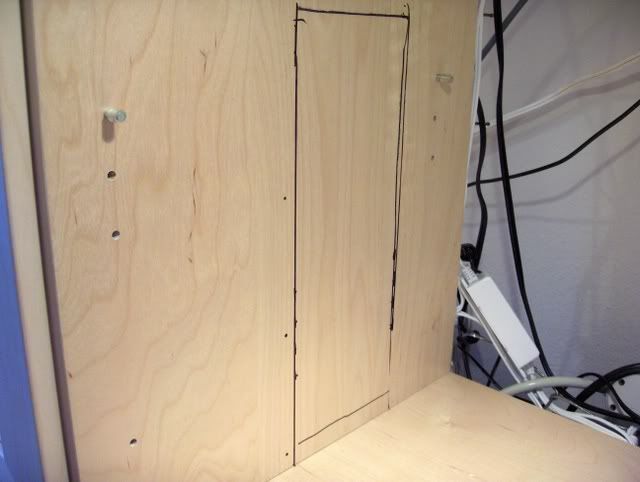
.. if you can't tell, I realized there was no ruler in the house. I used a notepad as a straight edge.
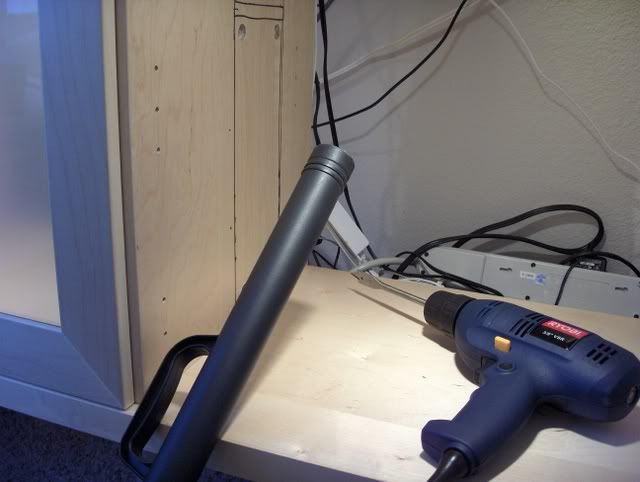
Drill some starting holes for the jig saw. Keep a running vaccum cleaner close, and the mess stays at a minimum.
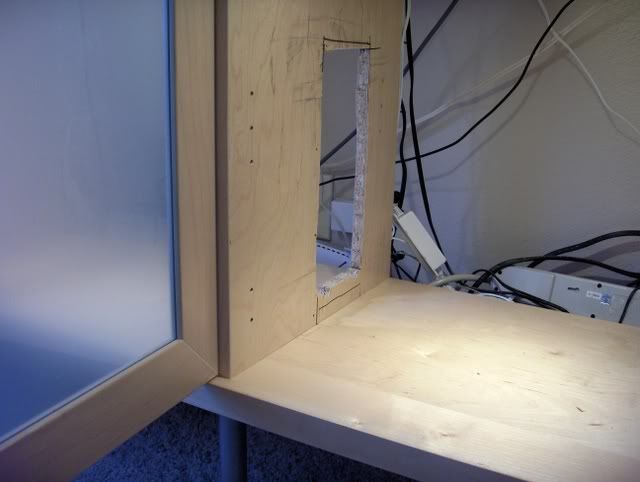
Ok... not the prettiest of holes, but the frosted glass will obscure it either way.
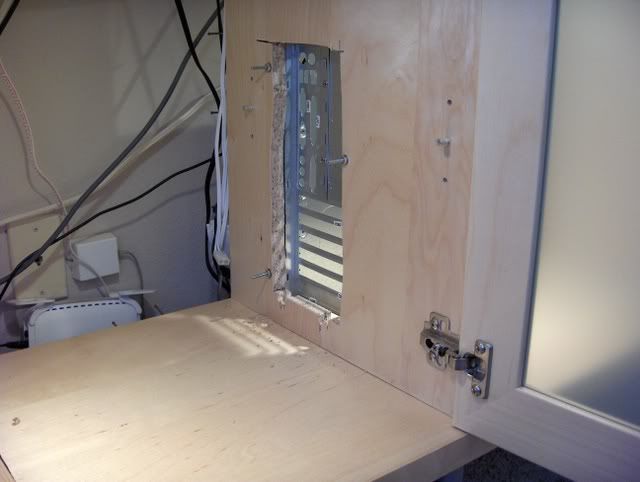
The motherboard holder is attached.
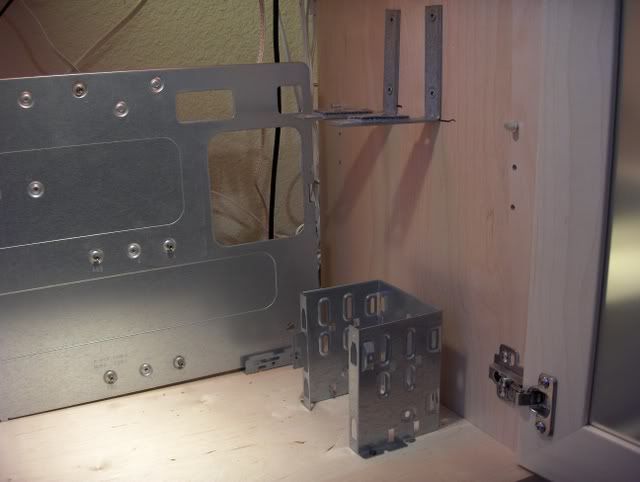
This wasn't quite ideal for the hard drives, but it would do.
I had no idea what to do about the power supply, so I walked around the Home Depot for a bit. These "L" shaped brackets and some velcro were just what I needed.
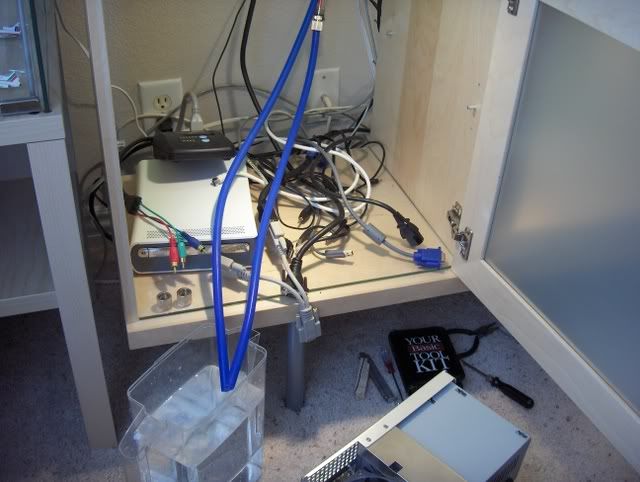
The media center PC is finally disconnected and the cooling tower drained. I waited until the last possible moment so that I could keep TV and music running in the background while I worked.
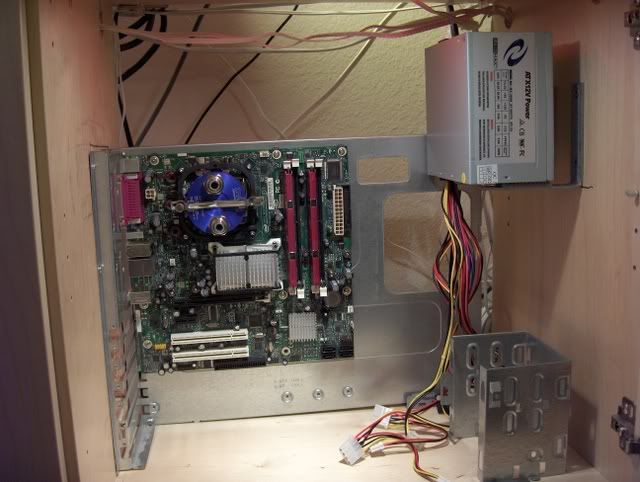
The board is finally mounted. The end of the project is close, and I can finally see that the idea and the effort were justified. Hooking up everything is going to be CAKE.
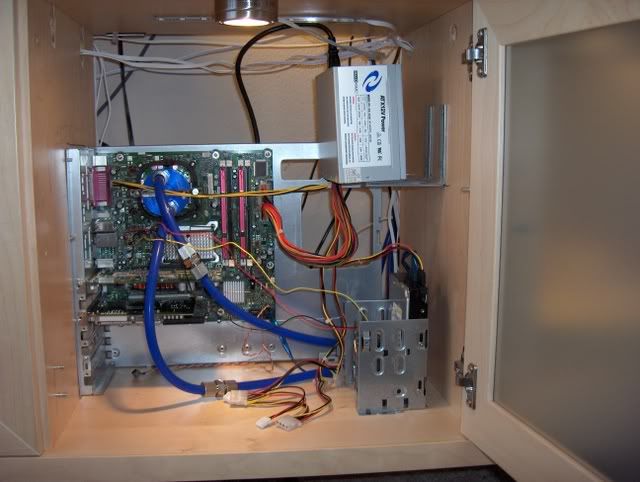
The media center PC, fully functioning in its first incarnation. Note the power switch at the very bottom of the cabinet.
Hooking up all the tiny wires for the power LED, HDD LED, reset and power is arguably one of the more frustrating aspects of building or working with a custom rig. Here, I decided to keep things simply by using only the power switch from the original case.
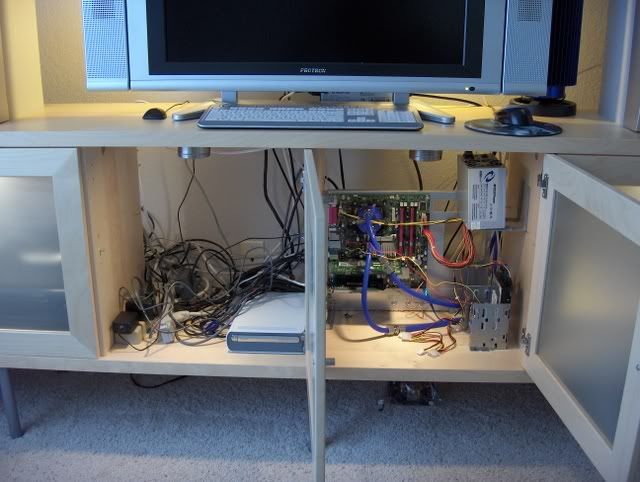
Sadly, the left cabinet is still an eysore. Note the outdated HD-DVD drive. So much for being an early adopter. But the budget for a bluray drive isn't there yet, so the HD-DVD drive stays.

Being that I mostly watch recorded shows rather than rented movies, the next month's budget went to expanding the liquid cooling system. Waterblocks were added for the north and south bridges, as well as the video card. Good excuse to finally mount that 700gig drive I had lying around.
Note that liquid cooling is not here for overclocking, but for silence. The cooling tower has no fans, and relies on its massive surface area to dissipate heat. Only with something like this could you passively cool a Pentium D, nvidia 7600 GT, as well as the major components of the motherboard.
I lament the loss of my previous silent power supply to heat death, cause there are no fanless power supplies on the market anymore. A liquid cooled power supply IS available from koolance, but costs about $600. I don't need silence that badly.
Note that there no 5 1/4 drive bays at the moment. A solution to this problem is still mulling in my head. I want to commandier the right side 'bay,' but it's dominated by the light switches. I'm what I call a "lighting nazi," passionately opposed to overhead lighting and relying heavily instead on indirect 'ambient' lighting. The banks of lights are broken down into 'sections' that can individually be turned on and off. The lights in the cabinet for example, the lights behind the TV, the lamps on top of the display cases, the display cases themselves, etc. There's even a bank of multicolored LED's that can create lighting schemes such as these:
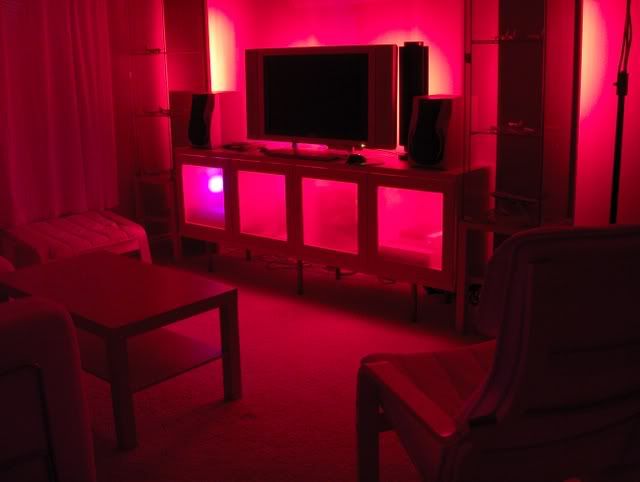
Full-on red is just awesome. The blue lights from the router take away from the effect somewhat, but you get the idea.
It made complete sense. I'd been doing that in some form or another, but hearing it from someone else put it into perspective. It didn't matter how crazy or bizzarre the project was. It wasn't the end result as much as it was the process. He pointed me to the MAKE blog, and it was there where I realized that the projects in my head were just as crazy as any self-respecting geek.
There is no better project for computer hardware junkie such as myself as a "case mod." Case mods are where people go to great lengths to create a non standard 'computer case' that fulfills some purpose, whether it be aesthetic or practical. My own "case mod" fulfilled both:

Behold, my case mod! The "case" in this instance is the cabinet itself. The computer in question is the media center computer that drives my television.

This illustrates the original problem this whole project was intended to solve. Connecting wires to the computer was a total nightmare, and modifying the machine in its mini-itx case was equally nightmarish. No computer belonging to any self-respecting 'geek' is ever complete. Upgrades are a continual process. The media center machine's future upgrades could include a more efficient C2D processor, a larger harddrive, and now that the format war is decided, a bluray drive. Budget conscious that I am now, all these upgrades would happen in increments. Which means.. each and every time, the mess you see here would have to be dealt with.
On top of that, the old Pentium D processor is liquid cooled with a massive passive heatsink that had to be drained each and every time the machine was worked on. A big, big pain in the ass.
The final result addresses all such concerns:

Plainly obvious is the extremely serviceable nature of the setup. The computer parts are fully exposed, making the replacement of any component fairly trivial. Though still plagued by chord spaghetti, attaching and removing things to the computer is also a trivial task.

First, I needed mounting hardware for the motherboard. mesosparkle gave me a junk computer for the recycling pile a few months back, and the case was the perfect candidate.

Removing the parts I needed involved some drilling. Not sure what they call those things, but a drill and a bit of force will get them out.

Granted, it's aluminum, but there is still no greater feeling then pulling apart METAL with your bare hands. The motherboard holder is nearly removed from the case...

... and sonofabitch! the thing is in two pieces!

No matter. Clean off the dust, and superglue will handle the rest.

Meanwhile, the two center... "bays" (for lack of a better term) are cleared to prepare for the motherboard holder.

Superglue dry, we now run into a second problem. Cutting out the cabinet would compromise the cabinet's structural integrity. There wouldn't be enough support for the door for one.

The solution is to mount it vertically.

Figuring out where to cut is trickier than you might think. You don't want the outline of the thing, cause you need to screw it in. So I made some marks and now had to connect the dots..

.. if you can't tell, I realized there was no ruler in the house. I used a notepad as a straight edge.

Drill some starting holes for the jig saw. Keep a running vaccum cleaner close, and the mess stays at a minimum.

Ok... not the prettiest of holes, but the frosted glass will obscure it either way.

The motherboard holder is attached.

This wasn't quite ideal for the hard drives, but it would do.
I had no idea what to do about the power supply, so I walked around the Home Depot for a bit. These "L" shaped brackets and some velcro were just what I needed.

The media center PC is finally disconnected and the cooling tower drained. I waited until the last possible moment so that I could keep TV and music running in the background while I worked.

The board is finally mounted. The end of the project is close, and I can finally see that the idea and the effort were justified. Hooking up everything is going to be CAKE.

The media center PC, fully functioning in its first incarnation. Note the power switch at the very bottom of the cabinet.
Hooking up all the tiny wires for the power LED, HDD LED, reset and power is arguably one of the more frustrating aspects of building or working with a custom rig. Here, I decided to keep things simply by using only the power switch from the original case.

Sadly, the left cabinet is still an eysore. Note the outdated HD-DVD drive. So much for being an early adopter. But the budget for a bluray drive isn't there yet, so the HD-DVD drive stays.

Being that I mostly watch recorded shows rather than rented movies, the next month's budget went to expanding the liquid cooling system. Waterblocks were added for the north and south bridges, as well as the video card. Good excuse to finally mount that 700gig drive I had lying around.
Note that liquid cooling is not here for overclocking, but for silence. The cooling tower has no fans, and relies on its massive surface area to dissipate heat. Only with something like this could you passively cool a Pentium D, nvidia 7600 GT, as well as the major components of the motherboard.
I lament the loss of my previous silent power supply to heat death, cause there are no fanless power supplies on the market anymore. A liquid cooled power supply IS available from koolance, but costs about $600. I don't need silence that badly.
Note that there no 5 1/4 drive bays at the moment. A solution to this problem is still mulling in my head. I want to commandier the right side 'bay,' but it's dominated by the light switches. I'm what I call a "lighting nazi," passionately opposed to overhead lighting and relying heavily instead on indirect 'ambient' lighting. The banks of lights are broken down into 'sections' that can individually be turned on and off. The lights in the cabinet for example, the lights behind the TV, the lamps on top of the display cases, the display cases themselves, etc. There's even a bank of multicolored LED's that can create lighting schemes such as these:

Full-on red is just awesome. The blue lights from the router take away from the effect somewhat, but you get the idea.