tutorial 10
I've just been going crazy with these this week, haven't I? I have four more waiting to be posted but I can't remember what icons go with the coloring, so I'll have to experiment, won't I? (: But keep checking back if you're interested. At this rate, they should be up soon. (:
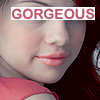
Go from

to
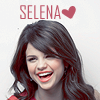
in 5 steps using Adobe Photoshop 7.0.
(Sorry; involves Selective Coloring.)
Crop, resize, etc.
Go to Image >> Adjustments >> Levels >> RGB.
Enter 0 - 2.03 - 255 into Input.

Go to Image >> Adjustments >> Hue/Saturation.
Enter the following settings:
Master: 0, +10, 0.
Reds: 0, +19, 0.
Yellows: 0, -100, 0.
Cyans: 0, -100, 0.
Blues: 0, -100, 0.

Go to Image >> Adjustments >> Curves >> RGB.
Make two points and enter the following settings:
Point 1:
Input: 255.
Output: 255.
Point 2:
Input: 231.
Output: 218.

Go to Layer >> New Adjustment Layer >> Selective Color.
Enter the following settings:
Reds: -28, 0, 0, +1.
Yellows: +100, 0, -42, +100.
Neutrals: +10, 0, -12, +4.
Blacks: -18, 0, -4, +12.
Don't copy exactly; enjoy! (:
Others made with the same:
+ For more Selena Gomez icons see here. (:
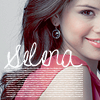
Go from
to
in 5 steps using Adobe Photoshop 7.0.
(Sorry; involves Selective Coloring.)
Crop, resize, etc.
Go to Image >> Adjustments >> Levels >> RGB.
Enter 0 - 2.03 - 255 into Input.
Go to Image >> Adjustments >> Hue/Saturation.
Enter the following settings:
Master: 0, +10, 0.
Reds: 0, +19, 0.
Yellows: 0, -100, 0.
Cyans: 0, -100, 0.
Blues: 0, -100, 0.
Go to Image >> Adjustments >> Curves >> RGB.
Make two points and enter the following settings:
Point 1:
Input: 255.
Output: 255.
Point 2:
Input: 231.
Output: 218.
Go to Layer >> New Adjustment Layer >> Selective Color.
Enter the following settings:
Reds: -28, 0, 0, +1.
Yellows: +100, 0, -42, +100.
Neutrals: +10, 0, -12, +4.
Blacks: -18, 0, -4, +12.
Don't copy exactly; enjoy! (:
Others made with the same:
+ For more Selena Gomez icons see here. (: