almateria ♔ 129
A few people requested tutorials for the DNAngel icons in my recent icon post, and since they're basically the same coloring, I'll be making one tutorial.
Request by akushiro, akupushi, inquisitory, and xxsecretive.
Using PS CS, we'll be making


This tutorial is translatable only to other PS programs.
The icons this tutorial covers are:

is A,
is B,
is C,
is D.
01 Start with your base: A B C D
02 Icon A uses textures from hellodarliing's lens flare texture packs. I don't know which ones I used because, since I erased so much of it, I can't tell xD But anyway, I used two at screen 100%.
03 Paste this texture (by me) and set it to screen 10%.
A had this texture set to screen 25%.
04 Make a new Selective Color adjustment layer, and input these values:
Reds: -100 0 -20 5
Yellows: -100 -10 0 -35
Neutrals: 10 0 0 -15
05 Make a new layer and fill it with #0A0E28. Set it to exclusion 100%.
B and D had this layer set to exclusion 75%.
06 Make a new layer and fill it with #A4E3F5. Set it to color burn 40%.
A had this layer set to color burn 100%, and C had it at 15%.
07 Make a new layer and fill it with #E1A8A8. Set it to softlight 100%.
08 Duplicate your base and bring it to the top. Desaturate it and set it to softlight 65%.
B, C, and D did not use this step.
09 Make a new Hue/Saturation/Lightness adjustment layer, and set master saturation to 15.
A had this layer set to master saturation 30.
10 Paste this texture (by ?, heavily edited by me) and set it to screen 100%.
B, C, and D did not use this step.
11 Make a new Selective Color adjustment layer, and input these values:
Reds: 0 0 0 15
Neutrals: 0 -5 -5 10
12 Make a new Brightness/Contrast adjustment layer, and set brightness to -5 and contrast to 5.
END OF TUTORIAL FOR A
The following is for B only.
13 Make a new Selective Color adjustment layer, input these values, and set the layer to normal 70%:
Reds: 0 0 -30 0
Neutrals: 55 0 0 -35
14 Make a new Hue/Saturation/Lightness adjustment layer, and set master saturation to 15.
15 Make a new Brightness/Contrast adjustment layer, and set brightness to -15 and contrast to 15.
16 Make a new Brightness/Contrast adjustment layer, and set brightness to -12 and contrast to 12.
The following is for C only.
13 Make a new Hue/Saturation/Lightness adjustment layer, and set master saturation to 15.
14 Make a new Brightness/Contrast adjustment layer, and set brightness to -15 and contrast to 15.
15 Paste this texture (by ?) and set it to screen 10%.
16 Make a new Selective Color adjustment layer, and input these values:
Reds: -100 0 0 25
Neutrals: 15 0 0 -20
17 Make a new Brightness/Contrast adjustment layer, and set brightness to -6 and contrast to 10.
The following is for D only.
13 Make a new Selective Color adjustment layer, and input these values:
Reds: 0 0 -20 0
Neutrals: 0 0 0 -30
14 Make a new Hue/Saturation/Lightness adjustment layer, and set master saturation to 15.
15 Make a new Brightness/Contrast adjustment layer, and set brightness to -15 and contrast to 15.
16 Make a new Brightness/Contrast adjustment layer, and set brightness to -12 and contrast to 12.
OMG DONE! This took me forever to type up, so I want results posted NOW. Hope this tutorial helped~
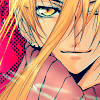
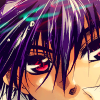
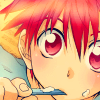
OTHER EXAMPLES FOR THIS TUTORIAL more is always better whut
Like what you see? Why don't you friend us!
Request by akushiro, akupushi, inquisitory, and xxsecretive.
Using PS CS, we'll be making


This tutorial is translatable only to other PS programs.
The icons this tutorial covers are:

is A,

is B,

is C,

is D.
01 Start with your base: A B C D
02 Icon A uses textures from hellodarliing's lens flare texture packs. I don't know which ones I used because, since I erased so much of it, I can't tell xD But anyway, I used two at screen 100%.
03 Paste this texture (by me) and set it to screen 10%.
A had this texture set to screen 25%.
04 Make a new Selective Color adjustment layer, and input these values:
Reds: -100 0 -20 5
Yellows: -100 -10 0 -35
Neutrals: 10 0 0 -15
05 Make a new layer and fill it with #0A0E28. Set it to exclusion 100%.
B and D had this layer set to exclusion 75%.
06 Make a new layer and fill it with #A4E3F5. Set it to color burn 40%.
A had this layer set to color burn 100%, and C had it at 15%.
07 Make a new layer and fill it with #E1A8A8. Set it to softlight 100%.
08 Duplicate your base and bring it to the top. Desaturate it and set it to softlight 65%.
B, C, and D did not use this step.
09 Make a new Hue/Saturation/Lightness adjustment layer, and set master saturation to 15.
A had this layer set to master saturation 30.
10 Paste this texture (by ?, heavily edited by me) and set it to screen 100%.
B, C, and D did not use this step.
11 Make a new Selective Color adjustment layer, and input these values:
Reds: 0 0 0 15
Neutrals: 0 -5 -5 10
12 Make a new Brightness/Contrast adjustment layer, and set brightness to -5 and contrast to 5.
END OF TUTORIAL FOR A
The following is for B only.
13 Make a new Selective Color adjustment layer, input these values, and set the layer to normal 70%:
Reds: 0 0 -30 0
Neutrals: 55 0 0 -35
14 Make a new Hue/Saturation/Lightness adjustment layer, and set master saturation to 15.
15 Make a new Brightness/Contrast adjustment layer, and set brightness to -15 and contrast to 15.
16 Make a new Brightness/Contrast adjustment layer, and set brightness to -12 and contrast to 12.
The following is for C only.
13 Make a new Hue/Saturation/Lightness adjustment layer, and set master saturation to 15.
14 Make a new Brightness/Contrast adjustment layer, and set brightness to -15 and contrast to 15.
15 Paste this texture (by ?) and set it to screen 10%.
16 Make a new Selective Color adjustment layer, and input these values:
Reds: -100 0 0 25
Neutrals: 15 0 0 -20
17 Make a new Brightness/Contrast adjustment layer, and set brightness to -6 and contrast to 10.
The following is for D only.
13 Make a new Selective Color adjustment layer, and input these values:
Reds: 0 0 -20 0
Neutrals: 0 0 0 -30
14 Make a new Hue/Saturation/Lightness adjustment layer, and set master saturation to 15.
15 Make a new Brightness/Contrast adjustment layer, and set brightness to -15 and contrast to 15.
16 Make a new Brightness/Contrast adjustment layer, and set brightness to -12 and contrast to 12.
OMG DONE! This took me forever to type up, so I want results posted NOW. Hope this tutorial helped~
OTHER EXAMPLES FOR THIS TUTORIAL more is always better whut


Like what you see? Why don't you friend us!