alvanista [30]
I love how the layer files were laying on my hardrive for a WEEK before I finally got to it! :')
So, um, anyway, today we're making this awesome Higurashi icon~ Tutorial was requested by aurturius.
We're going from
to
in PSPXI, although it's translatable to whatever has the awesome thing called Color Balance. :]
1. So, let's choose your base first~ We're starting with this one:

Looking nice, but boring and bland, right? Let's fix it then~
2. First, make a new layer, fill it with #e1dcc3 [
] and set it to Multiply, 100%.

3. Duplicate the base, drag to top and set to Screen, 100%.

4. Make a new layer, fill it with #010e25 [
] and set it to Exclusion, 100%.

5. Duplicate the base, drag to top and set to Overlay, 100%.

6. Make a new layer, fill it with #d5e4fd [
] and set it to Burn, 100%.

7. Now~ It looks okay, but a biiit too yellow. So, go to Layers -> Adjustement Layers -> Color Balance.
Set the Midtones Blue to 50 and Highlights Blue to 37.

Now doesn't that look better~
8. Now, take this texture by 77words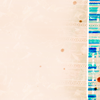
and set it to Multiply, 50%.

9. Duplicate base, drag it to top and set it to Soft Light, 100%.

10. Take this texture by fangirls_inc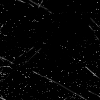
and set it to Screen, 100%.

You're finished~
So, um, anyway, today we're making this awesome Higurashi icon~ Tutorial was requested by aurturius.
We're going from

to

in PSPXI, although it's translatable to whatever has the awesome thing called Color Balance. :]
1. So, let's choose your base first~ We're starting with this one:

Looking nice, but boring and bland, right? Let's fix it then~
2. First, make a new layer, fill it with #e1dcc3 [

] and set it to Multiply, 100%.

3. Duplicate the base, drag to top and set to Screen, 100%.

4. Make a new layer, fill it with #010e25 [

] and set it to Exclusion, 100%.

5. Duplicate the base, drag to top and set to Overlay, 100%.

6. Make a new layer, fill it with #d5e4fd [

] and set it to Burn, 100%.

7. Now~ It looks okay, but a biiit too yellow. So, go to Layers -> Adjustement Layers -> Color Balance.
Set the Midtones Blue to 50 and Highlights Blue to 37.

Now doesn't that look better~
8. Now, take this texture by 77words

and set it to Multiply, 50%.

9. Duplicate base, drag it to top and set it to Soft Light, 100%.

10. Take this texture by fangirls_inc

and set it to Screen, 100%.

You're finished~