almateria (62)
Make 
from
using PSP8. Translatable. Slightly image heavy!
Duplicate base. Set to screen 75%.

=
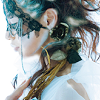
Paste this texture (by me) and set it to overlay 100%.

=
Duplicate base and bring to the top. Set to softlight 100%.

=
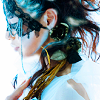
Go to Layers > New Adjustment Layer > Hue/Saturation/Lightness. Set saturation to 30.
=
Set #021046 to exclusion 100%.

=
Set #9CF0FA to burn 55%.

=
Set #FA9CA1 to softlight 100%.

=
Set #FA9CA1 to softlight 100%.

=
Duplicate base and bring to the top. Set to screen 40%.

=
Duplicate base and bring to the top. Set to softlight 100%.

=
Alternately, if you don't use the green/brown gradient, you get this:

Not using the gradient gives your icon a stronger blue color scheme.
Play around with the opacity if your icon is too dark or too light. Please don't copy exactly. Thanks for reading :)
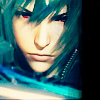
Icons made using this tutorial

Like what you see? Why don't you friend us!

from

using PSP8. Translatable. Slightly image heavy!
Duplicate base. Set to screen 75%.

=

Paste this texture (by me) and set it to overlay 100%.

=

Duplicate base and bring to the top. Set to softlight 100%.

=

Go to Layers > New Adjustment Layer > Hue/Saturation/Lightness. Set saturation to 30.

=

Set #021046 to exclusion 100%.

=

Set #9CF0FA to burn 55%.

=

Set #FA9CA1 to softlight 100%.

=

Set #FA9CA1 to softlight 100%.

=

Duplicate base and bring to the top. Set to screen 40%.

=

Duplicate base and bring to the top. Set to softlight 100%.

=

Alternately, if you don't use the green/brown gradient, you get this:

Not using the gradient gives your icon a stronger blue color scheme.
Play around with the opacity if your icon is too dark or too light. Please don't copy exactly. Thanks for reading :)
Icons made using this tutorial


Like what you see? Why don't you friend us!