Another Full Icon Tutorial
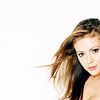
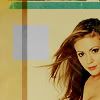
From 
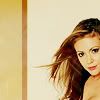
to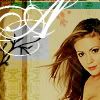
All righty then! Duplicate your starting image, set the new layer to screen and sharpen it. (When I can I sharpen the upper layers and leave the lower one blurred to prevent that over-sharpened look. It doesn't always work but it can help!):
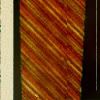
I used THIS texture by
inxsomniax, for all the texture effects in this icon (no resizing)...
@ lighten 100% opacity
@ multiply 100% opacity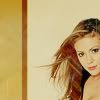
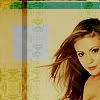
I duplicated the second layer (the screened and sharpened image of Alyssa) dragged it to the top and set it to soft light:
@ Multiply 100% opacity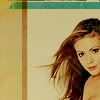
Now it's just a matter of adding those little details that pull the whole thing together.
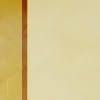
A white square set @ saturation:
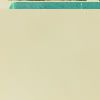
A pattern like the one below which I think is by
oxoniensis, but I'm not 100% positive:
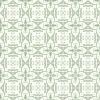
Some parts were deleted and the layer set to Color Burn
Now a torn paper brush by
teh_indy in black @ overlay
Then a couple of brushs (the red one is set to soft light the black one is normal) the ones I used are by
quebelly
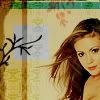
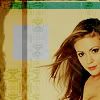
Finally, the final touch! A text layer, Porcelain @ 24pt in White (the text is a capital 'A') and ta da!!
Simple, really!
My resources
Comments appreciated!
to
All righty then! Duplicate your starting image, set the new layer to screen and sharpen it. (When I can I sharpen the upper layers and leave the lower one blurred to prevent that over-sharpened look. It doesn't always work but it can help!):
I used THIS texture by
inxsomniax, for all the texture effects in this icon (no resizing)...
@ lighten 100% opacity
@ multiply 100% opacity
I duplicated the second layer (the screened and sharpened image of Alyssa) dragged it to the top and set it to soft light:
@ Multiply 100% opacity
Now it's just a matter of adding those little details that pull the whole thing together.
A white square set @ saturation:
A pattern like the one below which I think is by
oxoniensis, but I'm not 100% positive:
Some parts were deleted and the layer set to Color Burn
Now a torn paper brush by
teh_indy in black @ overlay
Then a couple of brushs (the red one is set to soft light the black one is normal) the ones I used are by
quebelly
Finally, the final touch! A text layer, Porcelain @ 24pt in White (the text is a capital 'A') and ta da!!
Simple, really!
My resources
Comments appreciated!