My First Tutorial.
So, ellesbelles asked for a banner tutorial for my Keira banner. The thing is, I adapted it from another tutorial, so I don't know how right it would be for me to make my own tutorial for it, though I added my own touches and changed around some of the steps. If you still want me to write up the tutorial, let me know and I will, or I could just link you to the tutorial I read first.
So instead, I'm gonna do a tutorial for an icon. After a long debate, I decided on this one.
Go from this to
with PS 7.
1. First, take your image and crop it down. I used this:
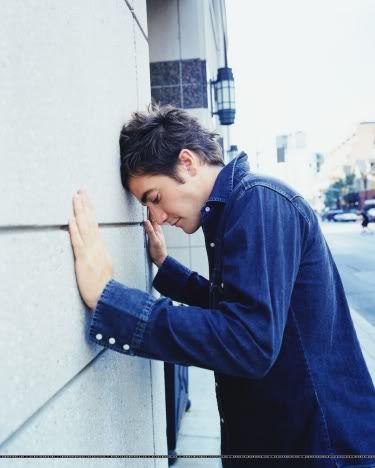
and cropped it down to this:

.
2. Then I took this pattern by graphical_love and set it over the base on "overlay" and 100% opacity.

and got this:

.
3. Then I added borders. You can either do it by creating a new layer, pressing ctrl & A, then going to Edit -> Stroke -> 1 px, color #4995C9. Make sure you select stroke INSIDE.
Or you can draw it with lines. Either way, the end result will be this:

.
4. Then, I went back to the base, duplicated it and dragged it on top, then erased the background with the magic eraser tool and left it on a normal setting at 100% opacity and got this:

.
By leaving it on top of the border, his hand and head lay over it, giving it an effect that I liked.
5. Then, I made a new fill layer on top of all of it and filled it with color #77A1BE and set it to "pin light" at 100% opacity and got this:

.
6. Then it was just a simple matter of the text. In standard font Arial Black, I typed in "TAKE IT ALL" in white, converted it to a raster layer, then stroked around it in black (on the OUTSIDE), 1 px and set it to "overlay" at 80% opacity and 80% fill and got this:

.
7. Then I added "away" in the font blackjack and set it to "linear dodge" at 100% opacity and got:

.
And voila!
Let me know what you think of the tutorial, if it was helpful, etc...and feel free to show me your results when/if you try it out!
For my next tutorial, what should I do?
So instead, I'm gonna do a tutorial for an icon. After a long debate, I decided on this one.
Go from this to
with PS 7.
1. First, take your image and crop it down. I used this:
and cropped it down to this:
.
2. Then I took this pattern by graphical_love and set it over the base on "overlay" and 100% opacity.
and got this:
.
3. Then I added borders. You can either do it by creating a new layer, pressing ctrl & A, then going to Edit -> Stroke -> 1 px, color #4995C9. Make sure you select stroke INSIDE.
Or you can draw it with lines. Either way, the end result will be this:
.
4. Then, I went back to the base, duplicated it and dragged it on top, then erased the background with the magic eraser tool and left it on a normal setting at 100% opacity and got this:
.
By leaving it on top of the border, his hand and head lay over it, giving it an effect that I liked.
5. Then, I made a new fill layer on top of all of it and filled it with color #77A1BE and set it to "pin light" at 100% opacity and got this:
.
6. Then it was just a simple matter of the text. In standard font Arial Black, I typed in "TAKE IT ALL" in white, converted it to a raster layer, then stroked around it in black (on the OUTSIDE), 1 px and set it to "overlay" at 80% opacity and 80% fill and got this:
.
7. Then I added "away" in the font blackjack and set it to "linear dodge" at 100% opacity and got:
.
And voila!
Let me know what you think of the tutorial, if it was helpful, etc...and feel free to show me your results when/if you try it out!
For my next tutorial, what should I do?