TUTORIAL 2: B&W/COLOR
Requirements: Photoshop
Info: Black and white pictures, adding color to certain spots.
We'll be going from this:
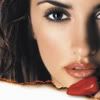
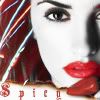
to this:
We'll start off with this photo of Penelope Cruz. The original is too big to display here, so this is a smaller version.
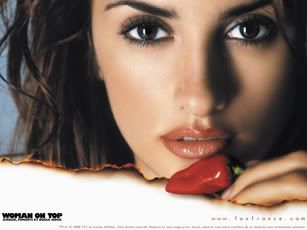
Sharpen it using the Unsharp Mask (Filter --> Sharpen -- Unsharp Mask). It sounds contradictory, but it actually does sharpen the picture. Play around with the settings, although mine is usually set to: amount = 35%, radius = 1.0 pixels, and threshold = 0. Once you're done with that, crop it down to 100x100. If it looks kind of grainy, use the smudge tool with a small sized brush and low strength (e.g. size 11, 13% strength) and use it over her face. Make sure you don't blur the lines of her nose etc. otherwise it'll end up looking blurry instead of the smooth effect you want.

Next, I duplicated the layer and desaturated it (Ctrl + Shift + U, or Image --> Adjustments --> Desaturate). Then, duplicate the layer two times so you end up with three black and white layers. DO NOT delete the colored layer! You'll need it later for adding color. Set the first duplicated layer to screen, and the second duplicated layer to soft light.

Duplicate the colored layer on the very bottom, and bring it on top of the black and white layers. Decide where you want color to show up, and start erasing, focusing on one object. In my case, I decided I wanted her lips, eyes, and the chili to be colored. So, I erased everything but the chili.
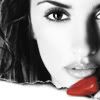
Duplicate the colored layer on the very bottom again (see? Told you not to erase it!), and set it on top of all the layers, including the chili. This time, I wanted her eyes, so I erased everything (including the chili, since it already has its own layer) except the eyes and the eyebrows (rather, eyebrow). It seems pointless to "color" the eyes since they're already black, but she had brown eyeshadow and black eyeliner, so when I added it, it actually gave a little "oomph" to the picture (in other words, it made her eyes darker).
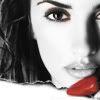
Next, the lips! She has gorgeous full lips (not like Angelina Jolie's, but hey, who does?), so once again, duplicate the colored layer on the very bottom again, and set it on top of all the layers. Erase everything but her lips, making sure you don't take off too much or leave too much on (otherwise she'll look like she went through plastic surgery!). It looks nice and all, but her looks are kind of a dull color, so I want to add a little red.
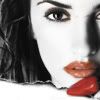
By using variations (Image --> Adjustments --> Variations), you can change the shade. I don't remember what I used, but it was somewhere in the "more red" and "more magenta" family.
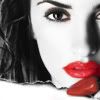
I liked the burnt edge that the original photo had (less work I have to do!), so I duplicate the bottom colored layer AGAIN, brought it to the very top, and erased everything but the burnt edge.
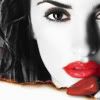
And it's done! But a bit boring, if you ask me, so I added this light layer by disappearicons, set on Lighten.

It was covering some of her face, so I erased the parts that were in the way! :) Next, I added the word "Spicy" using Anglo Text, size 18, tracking at 500. And voila!

I'd love to see anything that you make with this tutorial! :)
Info: Black and white pictures, adding color to certain spots.
We'll be going from this:

to this:
We'll start off with this photo of Penelope Cruz. The original is too big to display here, so this is a smaller version.

Sharpen it using the Unsharp Mask (Filter --> Sharpen -- Unsharp Mask). It sounds contradictory, but it actually does sharpen the picture. Play around with the settings, although mine is usually set to: amount = 35%, radius = 1.0 pixels, and threshold = 0. Once you're done with that, crop it down to 100x100. If it looks kind of grainy, use the smudge tool with a small sized brush and low strength (e.g. size 11, 13% strength) and use it over her face. Make sure you don't blur the lines of her nose etc. otherwise it'll end up looking blurry instead of the smooth effect you want.

Next, I duplicated the layer and desaturated it (Ctrl + Shift + U, or Image --> Adjustments --> Desaturate). Then, duplicate the layer two times so you end up with three black and white layers. DO NOT delete the colored layer! You'll need it later for adding color. Set the first duplicated layer to screen, and the second duplicated layer to soft light.

Duplicate the colored layer on the very bottom, and bring it on top of the black and white layers. Decide where you want color to show up, and start erasing, focusing on one object. In my case, I decided I wanted her lips, eyes, and the chili to be colored. So, I erased everything but the chili.

Duplicate the colored layer on the very bottom again (see? Told you not to erase it!), and set it on top of all the layers, including the chili. This time, I wanted her eyes, so I erased everything (including the chili, since it already has its own layer) except the eyes and the eyebrows (rather, eyebrow). It seems pointless to "color" the eyes since they're already black, but she had brown eyeshadow and black eyeliner, so when I added it, it actually gave a little "oomph" to the picture (in other words, it made her eyes darker).

Next, the lips! She has gorgeous full lips (not like Angelina Jolie's, but hey, who does?), so once again, duplicate the colored layer on the very bottom again, and set it on top of all the layers. Erase everything but her lips, making sure you don't take off too much or leave too much on (otherwise she'll look like she went through plastic surgery!). It looks nice and all, but her looks are kind of a dull color, so I want to add a little red.

By using variations (Image --> Adjustments --> Variations), you can change the shade. I don't remember what I used, but it was somewhere in the "more red" and "more magenta" family.

I liked the burnt edge that the original photo had (less work I have to do!), so I duplicate the bottom colored layer AGAIN, brought it to the very top, and erased everything but the burnt edge.

And it's done! But a bit boring, if you ask me, so I added this light layer by disappearicons, set on Lighten.
It was covering some of her face, so I erased the parts that were in the way! :) Next, I added the word "Spicy" using Anglo Text, size 18, tracking at 500. And voila!
I'd love to see anything that you make with this tutorial! :)