Recipe: Easy Sandwich Bread
So Andrew goes through a lot of bread. A LOT of bread - he was getting through a loaf a week at one point, and since I’m picky about what I buy, it was getting ridiculously expensive. Then I found a recipe that claimed I could turn out a good sandwich bread in two hours.
Well, I do like outrageous claims, so sure, I gave it a try.
And you know? It worked!
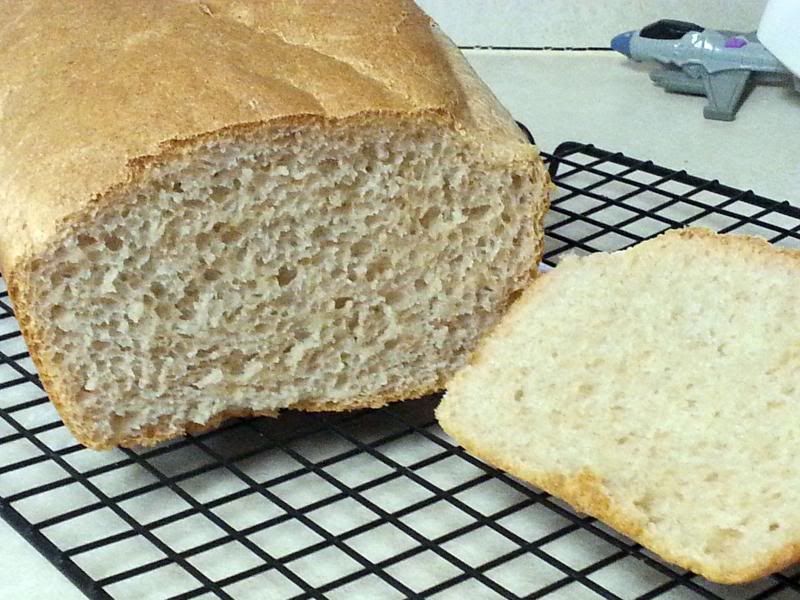
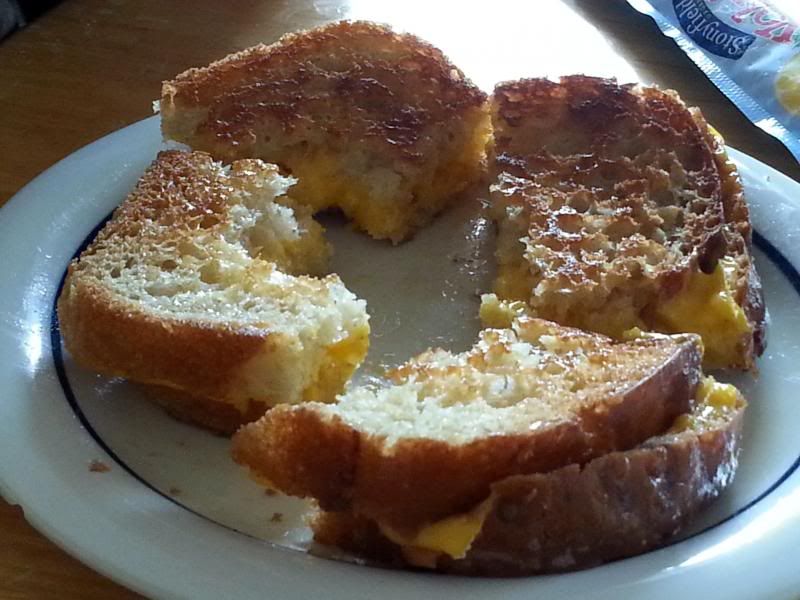
I’ve done the recipe three times now, and it’s worked every time - even the first time, when I messed it up a little and ended up with bread that had more air pockets than sandwich bread really should have. (And even then, it just made for a really pretty grilled cheese and slightly soggier toast.)

Easy Sandwich Bread
Adapted from Cook’s Illustrated, #126
Ingredients:
2 cups (11 ounces) bread flour
6 tablespoons (2 ounces) whole-wheat flour
2-1/4 tsp instant or rapid-rise yeast
1-1/4 cups warm water (120F - roughly 1 minute in the microwave)
2 tbsp unsalted butter, melted
1 tbsp honey
¾ tsp salt, dissolved in 2 tbsp warm water (120F)
Instructions:
1. Mix together the flours and yeast in a large stand-mixer bowl. Add all at once the warm water, melted butter, and honey. Mix with the paddle attachment for 1 minute on slow speed, and then 4 minutes on medium speed, scraping the bowl once mid-way through if necessary. Scrape all the dough down when done mixing, leave the paddle in the bowl, and cover the bowl with plastic wrap. Let the batter rise in a warm place until doubled in size, about 20 minutes.
2. While the dough is rising, adjust the oven rack to the lower-middle position. Spray a 9x5-inch bread pan with vegetable spray.
3. When the batter has finished doubling, reassemble the mixer and add the salt water. Mix until just incorporated, about half a minute, and then mix on medium speed for 1 minute, scraping as necessary.
4. Preheat oven to 375F. Transfer batter to prepared pan, smooth surface, and cover with plastic wrap. Leave to rise in a warm place until about 1” below the level of the pan, about 15-20 minutes. Uncover and let rise another 5-10 minutes, until batter is just below the level of the pan.
5. Bake for 35-40 minutes, or until bread has an internal temperature of 208-210F. Using dish towels, invert bread onto a wire rack.
6. Let cool completely before slicing. Well. Try to let cool completely before slicing. I completely understand if this step is somehow omitted in your baking process. I often forget it in mine.
Notes:
--Instructions for 8-1/2 x 4-1/2 pan: bread should be ½” below pan level after second rise, and even with pan level after third. Bake 40-45 minutes.
--Original recipe had a lot of nonsense about brushing with an egg wash before baking, and with melted butter after. It was nice, but honestly? The bread doesn’t need it, plus it resulted in a sticky crust, which I didn’t like. If you want to repeat the egg wash, it was one egg with 1 tsp water and a pinch of salt.
--A note on crumb and times. Okay, so the first time I made this bread, I was a bit lax about the times, and I totally screwed up the salt water part (I forgot the salt was supposed to be diluted, so I just tossed it in). What ended up happening was that my bread, while totally delicious, was also full of air pockets. That’s not a bad a thing - lots of good bread has those, it’s part of the carbon dioxide process of baking. But in a sandwich bread, it’s not really desirable.
(But it does make for a pretty grilled cheese sandwich.)

The second time, I paid closer attention to the times, the level of the rise, and the salt water - and the bread came out with fewer air pockets and was thus perfect for PB&Js.
So - if you want a bread that has lots of air pockets, I would recommend increasing your rise time. I’d also recommend adding the additional 2 tbsp warm water in with the 1-1/4 cups, and sprinkling the salt on the dough instead of adding it with water. You should end up with bread with more air pockets.
(Further proof that all baking is science in disguise.)
Well, I do like outrageous claims, so sure, I gave it a try.
And you know? It worked!
I’ve done the recipe three times now, and it’s worked every time - even the first time, when I messed it up a little and ended up with bread that had more air pockets than sandwich bread really should have. (And even then, it just made for a really pretty grilled cheese and slightly soggier toast.)

Easy Sandwich Bread
Adapted from Cook’s Illustrated, #126
Ingredients:
2 cups (11 ounces) bread flour
6 tablespoons (2 ounces) whole-wheat flour
2-1/4 tsp instant or rapid-rise yeast
1-1/4 cups warm water (120F - roughly 1 minute in the microwave)
2 tbsp unsalted butter, melted
1 tbsp honey
¾ tsp salt, dissolved in 2 tbsp warm water (120F)
Instructions:
1. Mix together the flours and yeast in a large stand-mixer bowl. Add all at once the warm water, melted butter, and honey. Mix with the paddle attachment for 1 minute on slow speed, and then 4 minutes on medium speed, scraping the bowl once mid-way through if necessary. Scrape all the dough down when done mixing, leave the paddle in the bowl, and cover the bowl with plastic wrap. Let the batter rise in a warm place until doubled in size, about 20 minutes.
2. While the dough is rising, adjust the oven rack to the lower-middle position. Spray a 9x5-inch bread pan with vegetable spray.
3. When the batter has finished doubling, reassemble the mixer and add the salt water. Mix until just incorporated, about half a minute, and then mix on medium speed for 1 minute, scraping as necessary.
4. Preheat oven to 375F. Transfer batter to prepared pan, smooth surface, and cover with plastic wrap. Leave to rise in a warm place until about 1” below the level of the pan, about 15-20 minutes. Uncover and let rise another 5-10 minutes, until batter is just below the level of the pan.
5. Bake for 35-40 minutes, or until bread has an internal temperature of 208-210F. Using dish towels, invert bread onto a wire rack.
6. Let cool completely before slicing. Well. Try to let cool completely before slicing. I completely understand if this step is somehow omitted in your baking process. I often forget it in mine.
Notes:
--Instructions for 8-1/2 x 4-1/2 pan: bread should be ½” below pan level after second rise, and even with pan level after third. Bake 40-45 minutes.
--Original recipe had a lot of nonsense about brushing with an egg wash before baking, and with melted butter after. It was nice, but honestly? The bread doesn’t need it, plus it resulted in a sticky crust, which I didn’t like. If you want to repeat the egg wash, it was one egg with 1 tsp water and a pinch of salt.
--A note on crumb and times. Okay, so the first time I made this bread, I was a bit lax about the times, and I totally screwed up the salt water part (I forgot the salt was supposed to be diluted, so I just tossed it in). What ended up happening was that my bread, while totally delicious, was also full of air pockets. That’s not a bad a thing - lots of good bread has those, it’s part of the carbon dioxide process of baking. But in a sandwich bread, it’s not really desirable.
(But it does make for a pretty grilled cheese sandwich.)

The second time, I paid closer attention to the times, the level of the rise, and the salt water - and the bread came out with fewer air pockets and was thus perfect for PB&Js.
So - if you want a bread that has lots of air pockets, I would recommend increasing your rise time. I’d also recommend adding the additional 2 tbsp warm water in with the 1-1/4 cups, and sprinkling the salt on the dough instead of adding it with water. You should end up with bread with more air pockets.
(Further proof that all baking is science in disguise.)