awmp
in
awmpdotnet
tutorial: tricks and tips for making light textures
originally posted at awmp on 4/17/05
ok, so actually I've finished this tut (for textures like these) weeks ago, but i haven't gotten around to post it, so I'll just do it now... (probably because I had to cancel my tutoring jobs today. lol.)

I'll explain an easy way to achieve these effects in here, so you can make your own light effects :)
it's actually not that hard and with adjusting the settings to your liking you can get stunning results.
I'm gonna show you the main technique and some variations, anything else is up to you. have fun :)
the big advantage of these textures is, that they don't change the colors of your icons too much and as the base color is 50% grey (which is the neutral color for screen and hard light blending mode and therefore not visible) they won't change the general lightness/darkness either. so yay, very handy! ;)
general notes
step 01: getting started
- make a new canvas, I usually start with 500x500px for these sort of things
- fill it with a 50% grey (#808080)
- you have this now (only larger, of course)

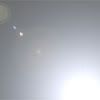
step 02: lens flare
- this is the main trick *g*
- use the lens flare filter (filters - render - lens flair)
- I used these settings (Brightness 100% - 105mm Prime)
- I love the 105mm Prime, but if you want to have a bit more color you may wanna try one of the other options
- the result of this step can look like this, for example
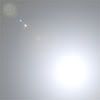
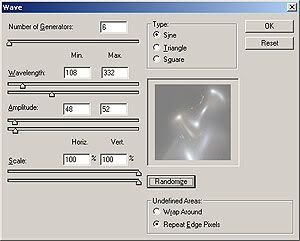
step 03: wave
- time to get more motion into it
- use the wave filter (filter - distort - wave)
- I used these settings (Number of Generators: 3, Wavelength: 127/430, Amplitude: 239/351, Scale: 89/50%, Sine, Repeat Edge Pixels)
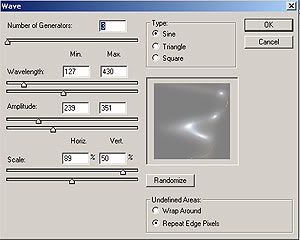
- don't go too high with the Number of Generators, something between 2 and 6 works best
- go crazy with the Wavelength and the Amplitude
- use rather high settings for the Scale
- press randomize until you are satisfied with the result (this is a very nice method to get some variations)
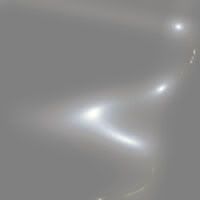
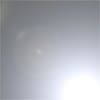
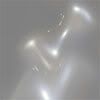
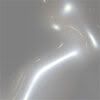
step 04: crop it like it's haaawt
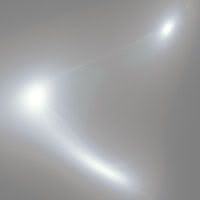
- find a nice cropping area
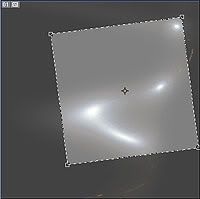
- the result
step 05: level adjusting
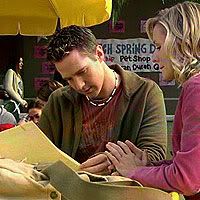
- ok then, at this point I usually open any screencap and crop it to icon size
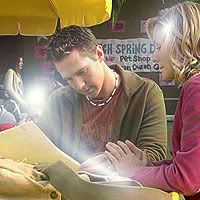
- I add the result from step 4 on a new layer
- and set it to Hard Light mode
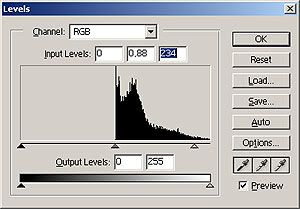
- I adjust the levels (ctrl+L) until I'm pleased with the light effect
- drag the right slider from the right to the left to intensify the light effect
- drag the middle slider to the right to make it generally darker again
- in this case I used these settings (RGB 0/0.88/234)
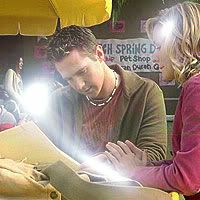
- and the icon with light effect looks like this now
step 06: finals
- set the blending mode back to normal
- if you want desaturate it (so you will have no color influence in your final texture)
- normally I'm also using a Gaussian blur (between 2 and 5) at this point

finished :)
variations
- same method but other settings...
with a higher brightness (160%) when using the lens flare, you can get something like this

using more than one lens flare at the start (with different brightness settings and placements) you can get something like this
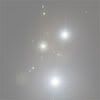
and working with this and changing the wave settings, you'll get (with the little help of randomize *g*)
yippie :)
off to work on the icon requests, and I'm starting to feel bad about still haven't replied to lots of comments. but I'm still planning to do so, very soonish...
and I'm feeling rather sick from too much (lovely though) food today. yay for big family parties *g*
oh, and GIP. lol.
but that's all, I swear.
ok, so actually I've finished this tut (for textures like these) weeks ago, but i haven't gotten around to post it, so I'll just do it now... (probably because I had to cancel my tutoring jobs today. lol.)
I'll explain an easy way to achieve these effects in here, so you can make your own light effects :)
it's actually not that hard and with adjusting the settings to your liking you can get stunning results.
I'm gonna show you the main technique and some variations, anything else is up to you. have fun :)
the big advantage of these textures is, that they don't change the colors of your icons too much and as the base color is 50% grey (which is the neutral color for screen and hard light blending mode and therefore not visible) they won't change the general lightness/darkness either. so yay, very handy! ;)
general notes
- I used Photoshop 7.0
- the pics I'm gonna post are smaller than the actual thing I'm working with
step 01: getting started
- make a new canvas, I usually start with 500x500px for these sort of things
- fill it with a 50% grey (#808080)
- you have this now (only larger, of course)
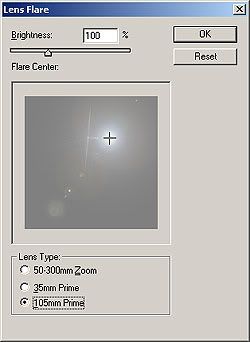
step 02: lens flare
- this is the main trick *g*
- use the lens flare filter (filters - render - lens flair)
- I used these settings (Brightness 100% - 105mm Prime)
- I love the 105mm Prime, but if you want to have a bit more color you may wanna try one of the other options
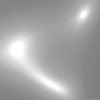
- the result of this step can look like this, for example
step 03: wave
- time to get more motion into it
- use the wave filter (filter - distort - wave)
- I used these settings (Number of Generators: 3, Wavelength: 127/430, Amplitude: 239/351, Scale: 89/50%, Sine, Repeat Edge Pixels)
- don't go too high with the Number of Generators, something between 2 and 6 works best
- go crazy with the Wavelength and the Amplitude
- use rather high settings for the Scale
- press randomize until you are satisfied with the result (this is a very nice method to get some variations)
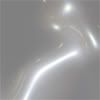
step 04: crop it like it's haaawt
- find a nice cropping area
- the result
step 05: level adjusting
- ok then, at this point I usually open any screencap and crop it to icon size
- I add the result from step 4 on a new layer
- and set it to Hard Light mode
- I adjust the levels (ctrl+L) until I'm pleased with the light effect
- drag the right slider from the right to the left to intensify the light effect
- drag the middle slider to the right to make it generally darker again
- in this case I used these settings (RGB 0/0.88/234)
- and the icon with light effect looks like this now
step 06: finals
- set the blending mode back to normal
- if you want desaturate it (so you will have no color influence in your final texture)
- normally I'm also using a Gaussian blur (between 2 and 5) at this point
finished :)
variations
- same method but other settings...
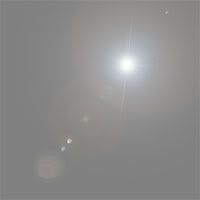
with a higher brightness (160%) when using the lens flare, you can get something like this
using more than one lens flare at the start (with different brightness settings and placements) you can get something like this
and working with this and changing the wave settings, you'll get (with the little help of randomize *g*)
yippie :)
off to work on the icon requests, and I'm starting to feel bad about still haven't replied to lots of comments. but I'm still planning to do so, very soonish...
and I'm feeling rather sick from too much (lovely though) food today. yay for big family parties *g*
oh, and GIP. lol.
but that's all, I swear.