Eighth Tutorial
Eighth Tutorial!
In 8 steps! :)

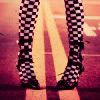
1. Get your prepped base.
(Personally, I sharpened first the base before duplicating it. Set the first duplication to Soft Light@60% to make the contrast better then set the second to Screen@50% to brighten it.)
2. New Adjustment Layer: Selective Color
Yellows: -35, 17, -55, -20
Green: 100, 41, 33, 40
Cyan: 71, 4, -7, 32
White: 81, 42, -27, 27
Neutrals: 16, 18, 4, 7
3. Use the Hue/Saturation adjustment layer and set the saturation to 29
4.New Adjustment Layer: Selective Color
Red: 43, -3, -37, -3
5. Duplicate the base and desaturate it. Set it to Overlay@15%
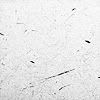
6. I added this grainy texture by blimey-icons set on Multiply@100%
7. New Adjustment Layer: Curves
RGB
Input: 190 Output: 197
Input: 106 Output: 111
Green
Input: 199 Output:195
Input: 164 Output: 159
Input: 125 Output: 114
8. Add whatever you like then it's finished! :)
NOTE: TEXT-LESS ICONS ARE NOT BASES. Please don't take any of the icons used.
Other icons made:

Another note: Please be aware that my next posts after this are already going to be f-locked so if you still want to get updates on my tutorials, please do add me. Thank you. :)
In 8 steps! :)
1. Get your prepped base.
(Personally, I sharpened first the base before duplicating it. Set the first duplication to Soft Light@60% to make the contrast better then set the second to Screen@50% to brighten it.)
2. New Adjustment Layer: Selective Color
Yellows: -35, 17, -55, -20
Green: 100, 41, 33, 40
Cyan: 71, 4, -7, 32
White: 81, 42, -27, 27
Neutrals: 16, 18, 4, 7
3. Use the Hue/Saturation adjustment layer and set the saturation to 29
4.New Adjustment Layer: Selective Color
Red: 43, -3, -37, -3
5. Duplicate the base and desaturate it. Set it to Overlay@15%
6. I added this grainy texture by blimey-icons set on Multiply@100%
7. New Adjustment Layer: Curves
RGB
Input: 190 Output: 197
Input: 106 Output: 111
Green
Input: 199 Output:195
Input: 164 Output: 159
Input: 125 Output: 114
8. Add whatever you like then it's finished! :)
NOTE: TEXT-LESS ICONS ARE NOT BASES. Please don't take any of the icons used.
Other icons made:
Another note: Please be aware that my next posts after this are already going to be f-locked so if you still want to get updates on my tutorials, please do add me. Thank you. :)