Tutorial -9- Sweet Jessica
From 
to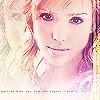
As always, I started off with a regular image. I cropped it down to a square and then resize it to 100 x 100 pixels. I flattened the image and then sharpened it 4 times. Using the SMUDGE tool (hardness 40, opacity 40), I smoothed out the skin, and ONLY the skin. Then I duplicated the image and set the top layer to SCREEN 100% and then desaturated it to -100.

->
->
->
->
I created a new raster layer. Using the PAINT BRUSH tool, I drew over her mouth with the colour #f5a3b8. I set the layer to OVERLAY 100%. I created another new raster layer with #0b193d and set it to EXCLUSION 60%.

->
->
I took this gradient and set it to SOFT LIGHT 100%. I then noticed that her eyes were looking a bit strange. So I created a new raster layer, and using the PAINT BRUSH tool (size 1, opacity 24, hardness 10, color #5b1551) I lightly covered some white areas of her eyes.

->
->
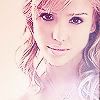
I took this texture, by julia_thorne13, and I set it to SCREEN 100%.
->
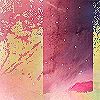
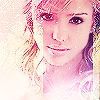
I took this texture, by incripacu, and I set it to OVERLAY 100%. Using the ERASER tool (hardness 6, opacity 5), I carefully erased some of the areas that cover her face and her hair.
->
->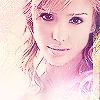
I took this texture, by lostluck_icons, and I set it to OVERLAY 100%. Once again, using the ERASER tool (hardness 6, opacity 5), I carefully erased some of the areas that cover her face and her hair.
->
->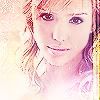
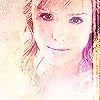
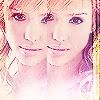
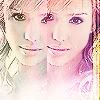
Using the SELECTION tool (shape: rectangle), I selected a rectangular portion of her face - I copy merged this selection. (Edit > Copy Merged). I pasted this selection as a new layer and I moved it to the left. I set this layer to LUMINACE (legacy) 34%. Using the ERASER tool, (hardness 6, opacity 5), I erased some of the areas that cover her face and her hair.
->
->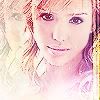
I added some text.
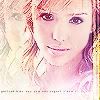
After merging all the layers, I noticed that the final product was a bit ridged, so using the SMUDGE tool (hardness 40, opacity 40) I smoothed out her hair and her skin just a bit.

to
As always, I started off with a regular image. I cropped it down to a square and then resize it to 100 x 100 pixels. I flattened the image and then sharpened it 4 times. Using the SMUDGE tool (hardness 40, opacity 40), I smoothed out the skin, and ONLY the skin. Then I duplicated the image and set the top layer to SCREEN 100% and then desaturated it to -100.
->
->
->
->
I created a new raster layer. Using the PAINT BRUSH tool, I drew over her mouth with the colour #f5a3b8. I set the layer to OVERLAY 100%. I created another new raster layer with #0b193d and set it to EXCLUSION 60%.
->
->
I took this gradient and set it to SOFT LIGHT 100%. I then noticed that her eyes were looking a bit strange. So I created a new raster layer, and using the PAINT BRUSH tool (size 1, opacity 24, hardness 10, color #5b1551) I lightly covered some white areas of her eyes.
->
->
I took this texture, by julia_thorne13, and I set it to SCREEN 100%.
->
I took this texture, by incripacu, and I set it to OVERLAY 100%. Using the ERASER tool (hardness 6, opacity 5), I carefully erased some of the areas that cover her face and her hair.
->
->
I took this texture, by lostluck_icons, and I set it to OVERLAY 100%. Once again, using the ERASER tool (hardness 6, opacity 5), I carefully erased some of the areas that cover her face and her hair.
->
->
Using the SELECTION tool (shape: rectangle), I selected a rectangular portion of her face - I copy merged this selection. (Edit > Copy Merged). I pasted this selection as a new layer and I moved it to the left. I set this layer to LUMINACE (legacy) 34%. Using the ERASER tool, (hardness 6, opacity 5), I erased some of the areas that cover her face and her hair.
->
->
I added some text.
After merging all the layers, I noticed that the final product was a bit ridged, so using the SMUDGE tool (hardness 40, opacity 40) I smoothed out her hair and her skin just a bit.