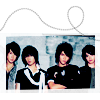
#23 - Fahrenheit Tutorial.
Going from:

to
or
Involves selective coloring... and curves...
Begin with a base:

Now, duplicate your base, desaturate it, and set the layer to SOFTLIGHT:

Create a new layer filled with #d7bf9e and set the layer to SOFTLIGHT:

>
Create a new layer filled with #aac1eb and set the layer to COLOR BURN:

>
Go to Layers>New Adjustment Layer>COLOR BALANCE, enter in:
SHADOWS: 10, -3, 11
MIDTONES: -33, -15, -8
NO HIGHLIGHTS

Go to Layers>New Adjustment Layer>HUE/SATURATON, enter 18 into the Master SATURATION slot:

Go to Layers>New Adjustment Layer>CURVES, enter in:
RGB: 1st point: I:85, O:89 2nd point: I:123, O:144

Go to Layers>New Adjustment Layer>SELECTIVE COLOR, enter in:
REDS: -25, 17, -56, 9
YELLOWS: -23, -16, -12, 0
GREENS: ----
CYANS: 100, -19, 10, 0
BLUES: 100, -18, 11, 0
MAGENTAS: ----
WHITES: ----
NEUTRALS: 12, 2, 3, 0
BLACKS: ----

And the coloring is done! Of course, if you wish to keep going, you can...
Use this brush/mask/whatever that I made from a brush by xonlyashesx (set this picture to screen if you want):

>
Then, using this brush by 77words, stamp it on the icon (onto a new layer preferrably). Or you can set this picture to multiply:

>
Complete! Although I normally would probably add text, or like a heart or something, but I was too lazy to do so, but you can!
Other examples (using the same coloring):


With the added brushes:


You get the idea...
Questions? Comments? Results? Yes, yes, yes!
-Kelsey

to

or

Involves selective coloring... and curves...
Begin with a base:

Now, duplicate your base, desaturate it, and set the layer to SOFTLIGHT:

Create a new layer filled with #d7bf9e and set the layer to SOFTLIGHT:

>

Create a new layer filled with #aac1eb and set the layer to COLOR BURN:

>

Go to Layers>New Adjustment Layer>COLOR BALANCE, enter in:
SHADOWS: 10, -3, 11
MIDTONES: -33, -15, -8
NO HIGHLIGHTS

Go to Layers>New Adjustment Layer>HUE/SATURATON, enter 18 into the Master SATURATION slot:

Go to Layers>New Adjustment Layer>CURVES, enter in:
RGB: 1st point: I:85, O:89 2nd point: I:123, O:144

Go to Layers>New Adjustment Layer>SELECTIVE COLOR, enter in:
REDS: -25, 17, -56, 9
YELLOWS: -23, -16, -12, 0
GREENS: ----
CYANS: 100, -19, 10, 0
BLUES: 100, -18, 11, 0
MAGENTAS: ----
WHITES: ----
NEUTRALS: 12, 2, 3, 0
BLACKS: ----

And the coloring is done! Of course, if you wish to keep going, you can...
Use this brush/mask/whatever that I made from a brush by xonlyashesx (set this picture to screen if you want):

>

Then, using this brush by 77words, stamp it on the icon (onto a new layer preferrably). Or you can set this picture to multiply:

>

Complete! Although I normally would probably add text, or like a heart or something, but I was too lazy to do so, but you can!
Other examples (using the same coloring):


With the added brushes:


You get the idea...
Questions? Comments? Results? Yes, yes, yes!
-Kelsey