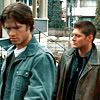
icon: tutorial - dean in 'houses of the holy'
Tutorial 01
This is my first ever tutorial that was requested by
theburnoutkid . Made using PSCS2. It has selective coloring, so therefore it's not translatable outside of Photoshop.
Make this:
1) Start off with your base and duplicate it twice---set both layers to screen

>>>
2) And then do a selective color layer set to:
Reds: -100, 0, 100, 0
Yellows: -100, 0, 100, 0
Greens: 100, 0, -100, 100
Cyans: 100, 0, 0, 0
And put that layer at 50% opacity.

>>>
3) And then do a second selective color layer set to:
Reds: -100, 60, 35, -25
Yellows: -100, 30, 40, 18
Neutrals: 20, -7, -5, -5
And put that layer at 50% opacity as well.

>>>
4) Then select the icon, go to copy>>copy merged>>paste
5) Now time for the adjusting.
With the merged layer selected go to filter>>sharpen>>smart sharpen with these settings:
Amount: 12 %
Radius: 27 pixels
Remove: Lens Blur
Check "more accurate"

>>>
6) Now go to filter>>sharpen>>unsharp mask set at:
Amount: 20%
Radius: 1.0
Threshold: 0

>>>
7) Now I added the text "Bring any quarters?" in Carnivalee Freakshow
And I adjusted the text layer to make it stand out a bit more by going to:
Layer>>layer style>>outer glow
Blend mode: Hard Light
Color: Black (#000000)
Opacity: 50%
(Everything else use default settings)

>>>
And your done!
And please take note that this isn't going to work on every screencap. It'll probably work the best on darker caps (like supernatural caps). And don't copy the tutorial exactly, change a few things (like opacities and selective colors a bit)
Original icon:

Other icons using silimar settings (different selective coloring opacities):


This is my first ever tutorial that was requested by
theburnoutkid . Made using PSCS2. It has selective coloring, so therefore it's not translatable outside of Photoshop.
Make this:

1) Start off with your base and duplicate it twice---set both layers to screen

>>>

2) And then do a selective color layer set to:
Reds: -100, 0, 100, 0
Yellows: -100, 0, 100, 0
Greens: 100, 0, -100, 100
Cyans: 100, 0, 0, 0
And put that layer at 50% opacity.

>>>

3) And then do a second selective color layer set to:
Reds: -100, 60, 35, -25
Yellows: -100, 30, 40, 18
Neutrals: 20, -7, -5, -5
And put that layer at 50% opacity as well.

>>>

4) Then select the icon, go to copy>>copy merged>>paste
5) Now time for the adjusting.
With the merged layer selected go to filter>>sharpen>>smart sharpen with these settings:
Amount: 12 %
Radius: 27 pixels
Remove: Lens Blur
Check "more accurate"

>>>

6) Now go to filter>>sharpen>>unsharp mask set at:
Amount: 20%
Radius: 1.0
Threshold: 0

>>>

7) Now I added the text "Bring any quarters?" in Carnivalee Freakshow
And I adjusted the text layer to make it stand out a bit more by going to:
Layer>>layer style>>outer glow
Blend mode: Hard Light
Color: Black (#000000)
Opacity: 50%
(Everything else use default settings)

>>>

And your done!
And please take note that this isn't going to work on every screencap. It'll probably work the best on darker caps (like supernatural caps). And don't copy the tutorial exactly, change a few things (like opacities and selective colors a bit)
Original icon:

Other icons using silimar settings (different selective coloring opacities):


