Practically Perfect Puffin Painting Tutorial!
Hiiii flist hahaaa I'm doin such a good job of that whole keeping up with stuff thing, aren't I, aaaahahaaa...
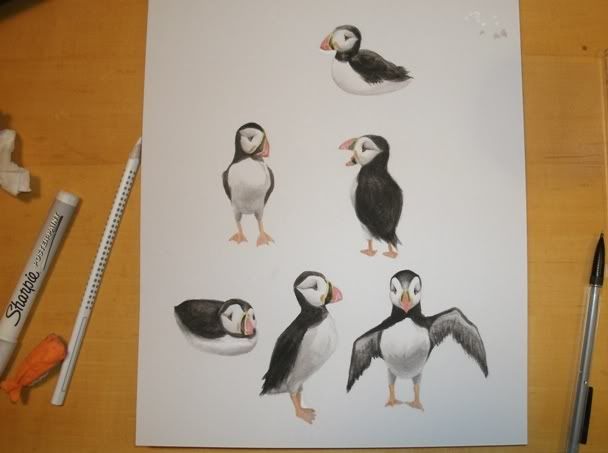
To summarize winter break, I've been traveling, doodling, watching tv, websurfing, and telling myself that I'll make a snowman one of these days. (spoiler alert: I have not gone out to make a snowman yet and it's been over a month) Also, my mom has asked me to do some paintings for possible fabric designs, and so today instead of going online straight away I flopped around reading a bunch of romance manga and then sat down to paint some puffins for her! While doing the last puffin I photographed a tutorial, and I hope it, like the Jack's, makes up for a lack of updates!
preview:
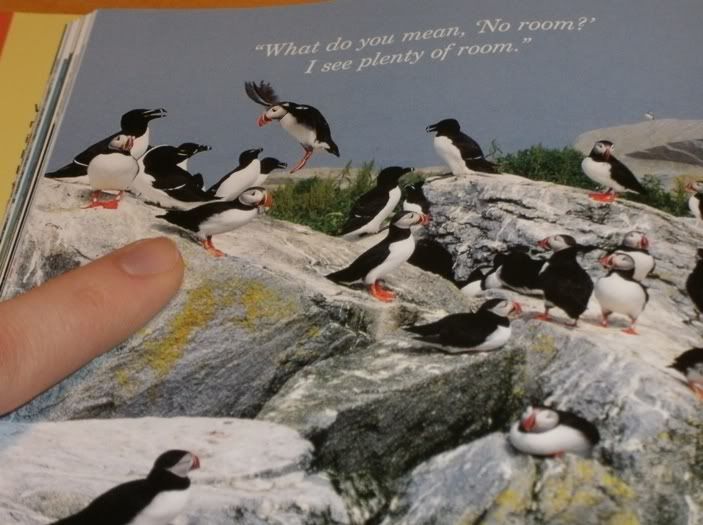
First I chose a reference, in particular the puffin I'm pointing to. My mom let me borrow this little book of puffins with "humorous" captions that functions well as a reference book if nothing else. You may notice me straying from painting every specific detail of Mister Puffie here, and I'd like to defend myself in saying I'm not trying to paint the photograph, I'm trying to paint a passable puffin. Painting a photo directly often leads to flat, wooden compositions, and frankly I dislike the practice. Some of the other puffins on my page up there were cobbled together from multiple references, ie the head of one photo and the body of another. A good artist can take references and not out and out copy them, but make something all their own. I'm actually pretty glad I was drawn to a small photo, so that I could focus on the overall essence of the puffin, not the minutiae. As I said in the Jack tutorial, I am always open for improvisation.
(that said, photoreference is a GOOD IDEA. behold a puffin I painted earlier with no reference)
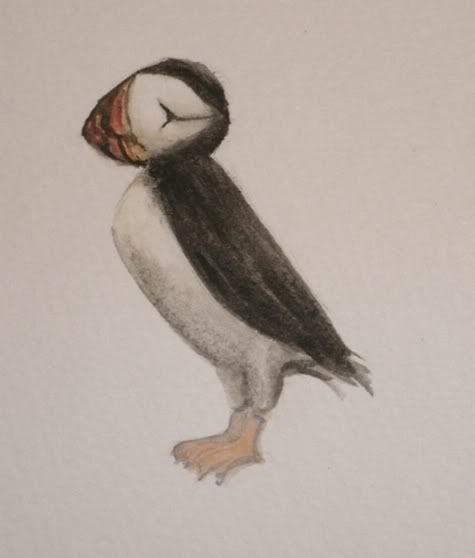
(kinda ok, but compared to its referenced brethren it looks incorrect and, well, bad.)
ANYWAY

I started sketching out the basic form. I have to be careful when I erase with my sushieraser there (the shrimp tail is so great for small erasing jobs, hee) because this is kinda cheapo watercolor paper, and it messes with the texture and quality easily. I decided to point him to the left instead of right like in the photo because I already have a bunch facing towards the right and I wanted some balance.

finished the sketch! I made sure to indicate the beak's different sections carefully, because the colors used wouldn't provide a good line aaaand because I'm super forgetful and would mess it up otherwise like I did to Puffie McNoreference up there.
Time for painting!

These are the specific colors I used. By the time I got to this puffie, I'd had a lot of time to hone my technique, so I didn't waver from these colors at all.

I tended to start with the black feathers first, for whatever reason. It's like when I draw people and have to start with the head; I get into habits.
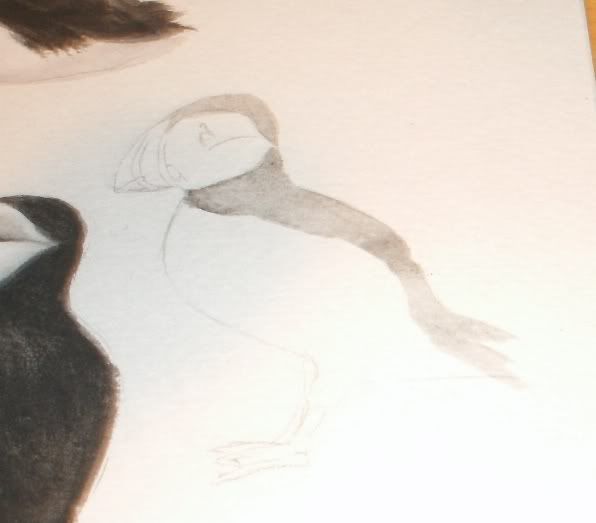
The first coat was finished and it was just too grey and far too wet, and I am an impatient person, SO--
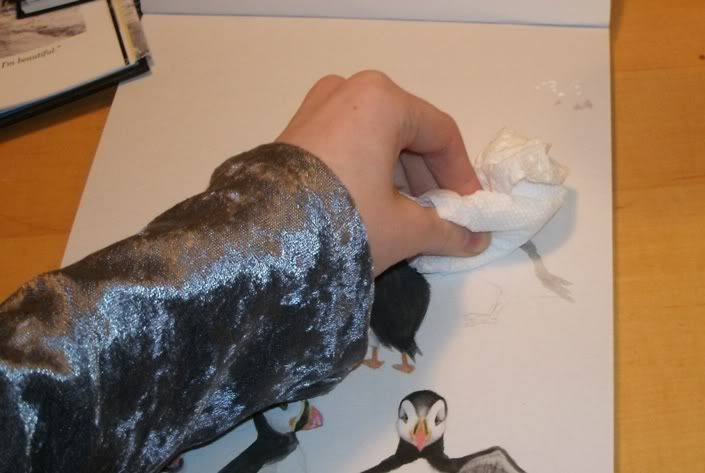
--SQUISHED with paper towel to dry the wet coat quickly. Oh and like my superfab shiny velvet shirt? I sure do |D
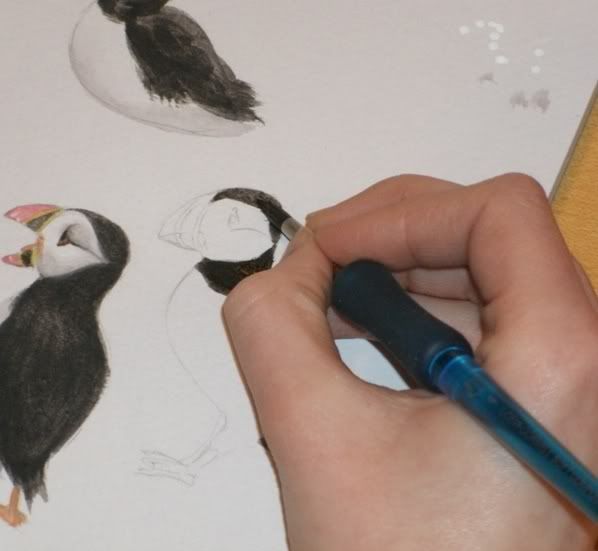
I started painting in a better, darker black with less water on the brush. Guest photograph by my dad because for whatever reason I just couldn't get it to focus right. (Also: I like how I completely ignore and bypass the ~comfort grip~ on my brush hahahaha)
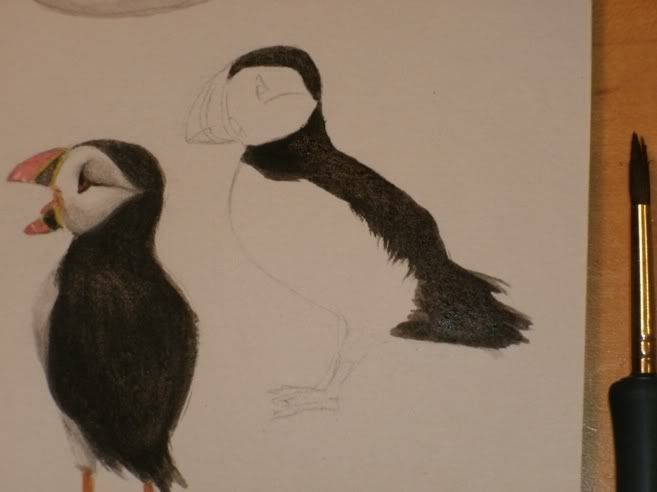
I used a wetter brush to paint the more linear section of feathers, and a drier brush for the more textured ones directly below.
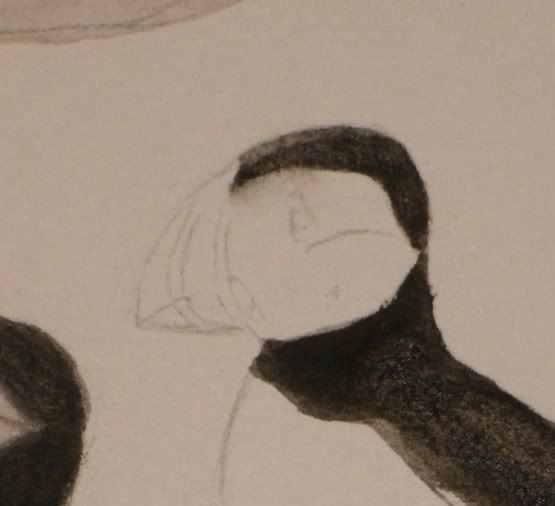
The play of light on the top of Mister Puffie's head was achieved by going over the black with a cleaned wet brush, which takes up pigment. That's also the technique I use for "erasing" watercolor that isn't where I want it to be, which you can see I attempted in that gray splotch above Mister Puffie's eye, but... cheapo paper is unforgiving, so it didn't work too well. (the paper was a christmas present, so I shouldn't complain, but c'mon cheapo paper you're stepping all over my Any Quality Medium Is Okay soapbox! Though on the other hand, the cheapo cake watercolors I'm using, also a christmas gift, are phenomenal and I love them. thank you Mumma--I mean Santa 9u9)
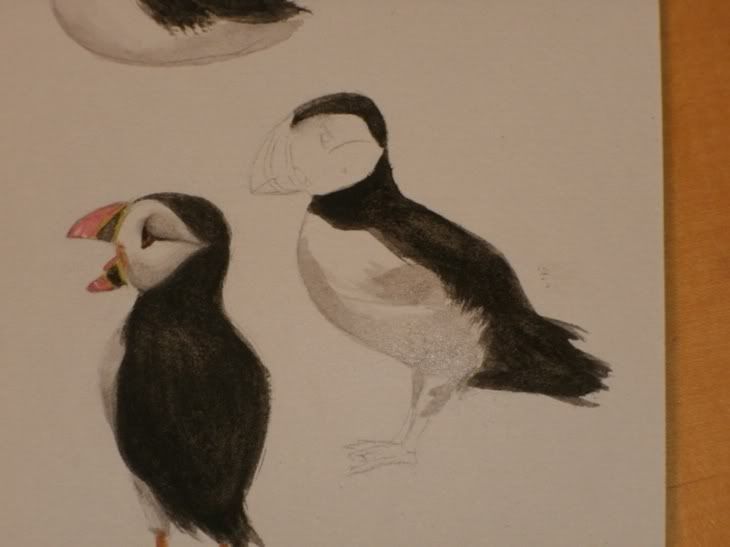
I'll likely go back and add more to the black, but while it was settling and drying I started in on the white breast-feathers. I painted in rough splotches here. (It looks "sparkly" because the paint was still wet and caught the light from the flash haha)
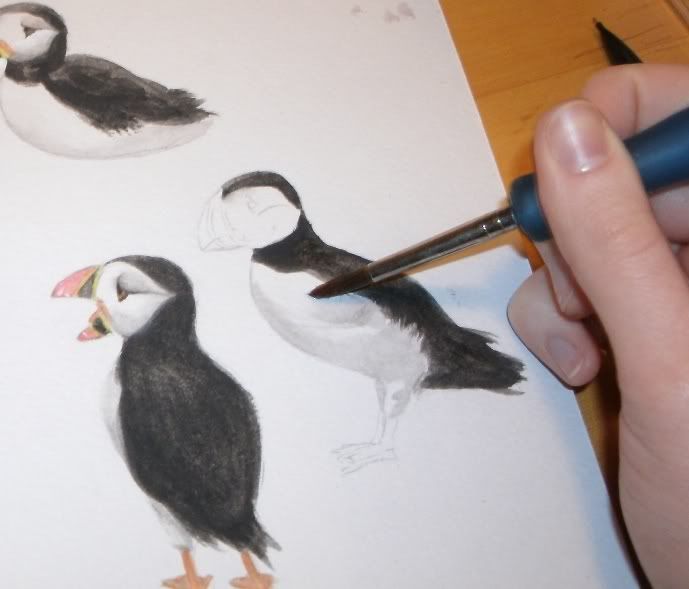
Then I went in with the cleaned wet brush and rubbed around the edges and patted around with my paper towel, which faded them into a nice gradient.

A base coat for the orange accents added.
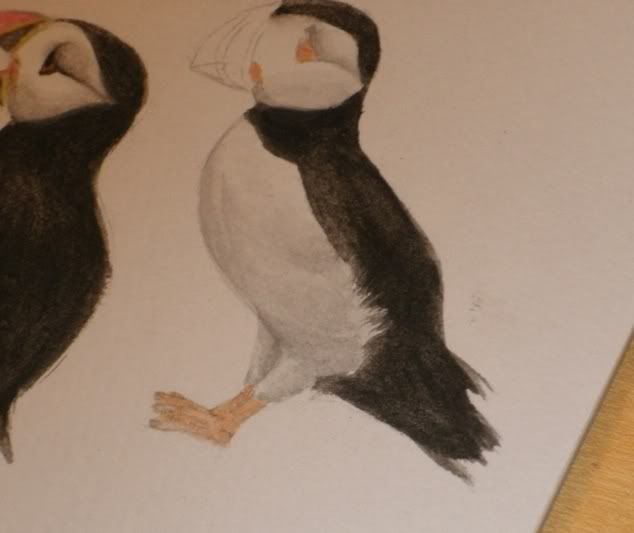
Because blue is opposite orange on the color wheel, it makes for an ideal shadow on that color. I used it mostly on the feet, dabbing it for the nails and webbing, and along the back of the leg. After letting it dry a bit I went back over with orange to blend it better. (learned that from oil painting class! even the class I loathed can teach me a thing or two!)

I had previously put some yellow on the beak, because it's the lightest beak color and can't paint over the other beak colors very well. I started putting in the black. I didn't mind it being too grey or watery, since it doesn't need to be quite as dark as the feathers. In the photos I referenced, at least, the beaks don't appear as dark.
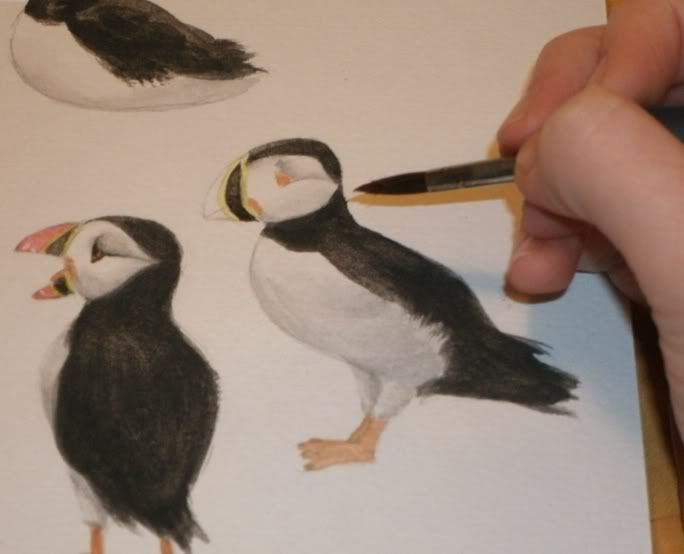
Finished, with a bit of gradient to show roundness and depth.
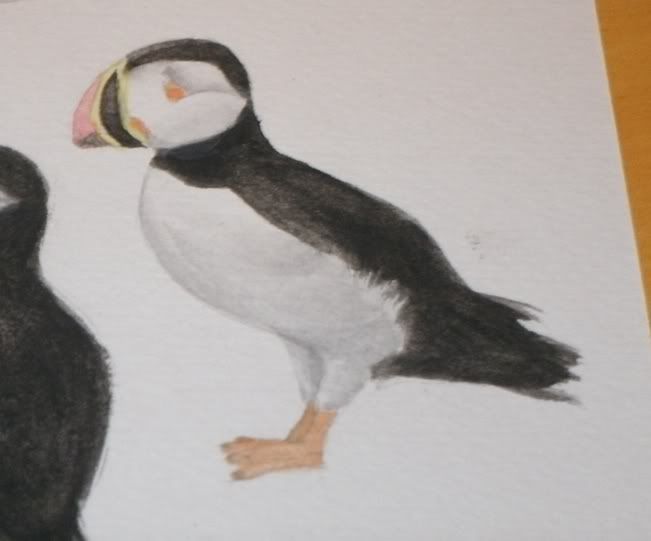
Started in on the red part of the beak, using green as a shadow color. (color wheeeel)

Needed to let the green dry, so I went to do the eye to pass the time. Puffin eyes are fascinating, the black circle in the middle is the actual eye and the orange and black around it are just eyelid! This part was very difficult, because I had to do fine lines with my split-endy old brush. (I don't think it was made to scrape at cake watercolors, and the ends have frayed somewhat.) I could have used a skinnier brush but I am a creature of habit, darnit...

Went along the black with the trusty ol cleaned plain water brush to blur the lines a little and make them less harsh, because they really aren't that dark and thick on the real bird.

Went back to the beak to add some coats of red, blending the green in and intensifying the color.

Dipped a white watercolor pencil into my cup of water and drew in some white accents on the beak. They're barely noticeable even in photos, but really add that extra something.
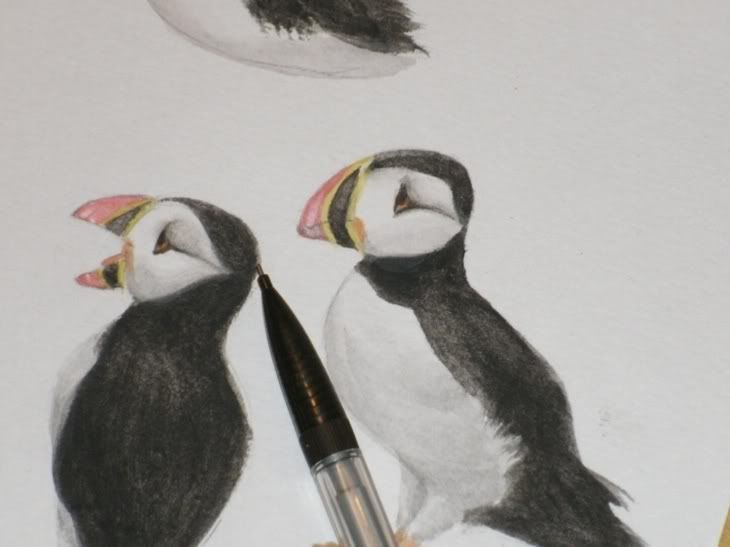
Redrew the line separating the halves of the beak, it had become rather lost in all the coats of paint.

And there we go, Mister Puffie is finished!
Thank you for reading, I hope there was some illuminating stuff in here or something! Till next time! o/
To summarize winter break, I've been traveling, doodling, watching tv, websurfing, and telling myself that I'll make a snowman one of these days. (spoiler alert: I have not gone out to make a snowman yet and it's been over a month) Also, my mom has asked me to do some paintings for possible fabric designs, and so today instead of going online straight away I flopped around reading a bunch of romance manga and then sat down to paint some puffins for her! While doing the last puffin I photographed a tutorial, and I hope it, like the Jack's, makes up for a lack of updates!
preview:


First I chose a reference, in particular the puffin I'm pointing to. My mom let me borrow this little book of puffins with "humorous" captions that functions well as a reference book if nothing else. You may notice me straying from painting every specific detail of Mister Puffie here, and I'd like to defend myself in saying I'm not trying to paint the photograph, I'm trying to paint a passable puffin. Painting a photo directly often leads to flat, wooden compositions, and frankly I dislike the practice. Some of the other puffins on my page up there were cobbled together from multiple references, ie the head of one photo and the body of another. A good artist can take references and not out and out copy them, but make something all their own. I'm actually pretty glad I was drawn to a small photo, so that I could focus on the overall essence of the puffin, not the minutiae. As I said in the Jack tutorial, I am always open for improvisation.
(that said, photoreference is a GOOD IDEA. behold a puffin I painted earlier with no reference)

(kinda ok, but compared to its referenced brethren it looks incorrect and, well, bad.)
ANYWAY

I started sketching out the basic form. I have to be careful when I erase with my sushieraser there (the shrimp tail is so great for small erasing jobs, hee) because this is kinda cheapo watercolor paper, and it messes with the texture and quality easily. I decided to point him to the left instead of right like in the photo because I already have a bunch facing towards the right and I wanted some balance.

finished the sketch! I made sure to indicate the beak's different sections carefully, because the colors used wouldn't provide a good line aaaand because I'm super forgetful and would mess it up otherwise like I did to Puffie McNoreference up there.
Time for painting!

These are the specific colors I used. By the time I got to this puffie, I'd had a lot of time to hone my technique, so I didn't waver from these colors at all.

I tended to start with the black feathers first, for whatever reason. It's like when I draw people and have to start with the head; I get into habits.

The first coat was finished and it was just too grey and far too wet, and I am an impatient person, SO--

--SQUISHED with paper towel to dry the wet coat quickly. Oh and like my superfab shiny velvet shirt? I sure do |D

I started painting in a better, darker black with less water on the brush. Guest photograph by my dad because for whatever reason I just couldn't get it to focus right. (Also: I like how I completely ignore and bypass the ~comfort grip~ on my brush hahahaha)

I used a wetter brush to paint the more linear section of feathers, and a drier brush for the more textured ones directly below.

The play of light on the top of Mister Puffie's head was achieved by going over the black with a cleaned wet brush, which takes up pigment. That's also the technique I use for "erasing" watercolor that isn't where I want it to be, which you can see I attempted in that gray splotch above Mister Puffie's eye, but... cheapo paper is unforgiving, so it didn't work too well. (the paper was a christmas present, so I shouldn't complain, but c'mon cheapo paper you're stepping all over my Any Quality Medium Is Okay soapbox! Though on the other hand, the cheapo cake watercolors I'm using, also a christmas gift, are phenomenal and I love them. thank you Mumma--I mean Santa 9u9)

I'll likely go back and add more to the black, but while it was settling and drying I started in on the white breast-feathers. I painted in rough splotches here. (It looks "sparkly" because the paint was still wet and caught the light from the flash haha)

Then I went in with the cleaned wet brush and rubbed around the edges and patted around with my paper towel, which faded them into a nice gradient.

A base coat for the orange accents added.

Because blue is opposite orange on the color wheel, it makes for an ideal shadow on that color. I used it mostly on the feet, dabbing it for the nails and webbing, and along the back of the leg. After letting it dry a bit I went back over with orange to blend it better. (learned that from oil painting class! even the class I loathed can teach me a thing or two!)

I had previously put some yellow on the beak, because it's the lightest beak color and can't paint over the other beak colors very well. I started putting in the black. I didn't mind it being too grey or watery, since it doesn't need to be quite as dark as the feathers. In the photos I referenced, at least, the beaks don't appear as dark.

Finished, with a bit of gradient to show roundness and depth.

Started in on the red part of the beak, using green as a shadow color. (color wheeeel)

Needed to let the green dry, so I went to do the eye to pass the time. Puffin eyes are fascinating, the black circle in the middle is the actual eye and the orange and black around it are just eyelid! This part was very difficult, because I had to do fine lines with my split-endy old brush. (I don't think it was made to scrape at cake watercolors, and the ends have frayed somewhat.) I could have used a skinnier brush but I am a creature of habit, darnit...

Went along the black with the trusty ol cleaned plain water brush to blur the lines a little and make them less harsh, because they really aren't that dark and thick on the real bird.

Went back to the beak to add some coats of red, blending the green in and intensifying the color.

Dipped a white watercolor pencil into my cup of water and drew in some white accents on the beak. They're barely noticeable even in photos, but really add that extra something.

Redrew the line separating the halves of the beak, it had become rather lost in all the coats of paint.

And there we go, Mister Puffie is finished!
Thank you for reading, I hope there was some illuminating stuff in here or something! Till next time! o/