Hello and Jack Tutorial
A belated hello to new friending meme friends, I hope we have a lovely time together! And really, hi to everyone on my flist, I haven't had a proper update in ages.
On the meme I showed my progress in a project I'm doing making a suit of cards, and asked if anyone was interested in a tutorial on my process. I got quite a few positive votes, so I'll put it here! 'u'/
A preview:
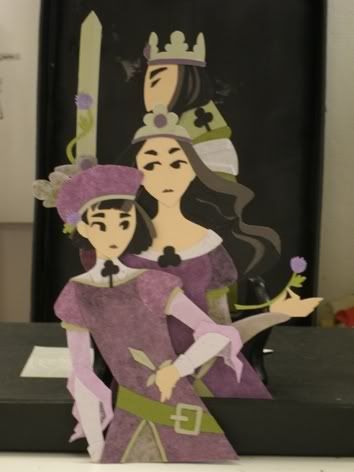
Right! To start out, here's what I had completed before starting:

King, Queen, and not-yet-Jack.
Materials I use:
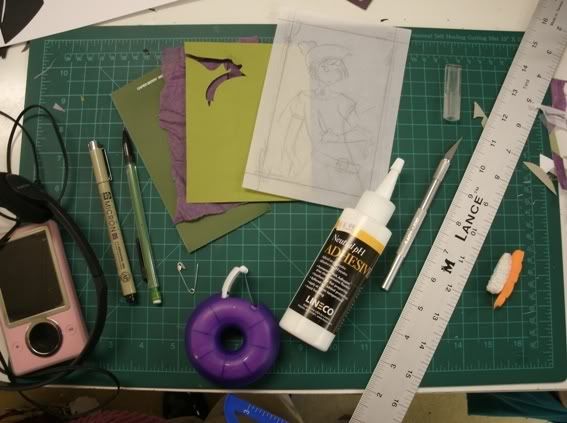
l-r: anti-insanity device UH I mean music player, micron, pencil, safety pin, scotch tape, papers, a sketch of my piece, archival neutral-ph glue, x-acto knife with new blade, ruler/t-square, eraser, and it's all sitting on my self-healing cutting mat. Tweezers might also be a good idea but haha I don't have any, I use my nails.

AND WE'RE OFF!

First I cut the element out of the sketch. You don't need to use translucent vellum paper, though it's a nice discovery of mine. I usually start with the head.
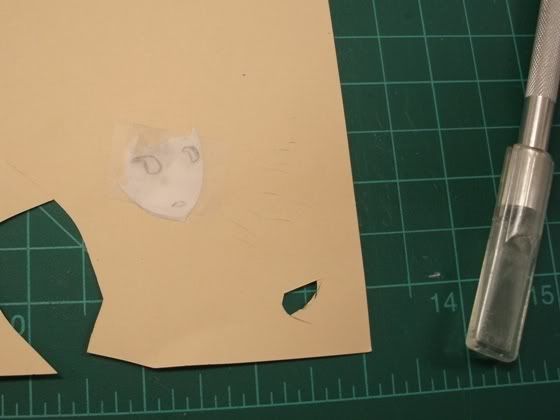
Then I tape it onto the paper I want it cut out of.
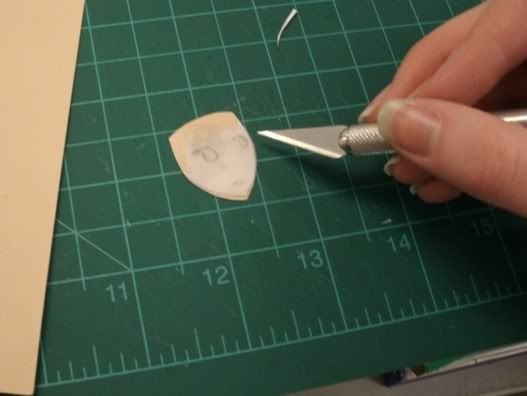
I then cut around the element. It's ok if you don't follow the lines completely, and it's especially ok if part of the element will be underneath something. I know there will be bangs and a hat sitting on top of this head, so I cut to give me something to glue them on.
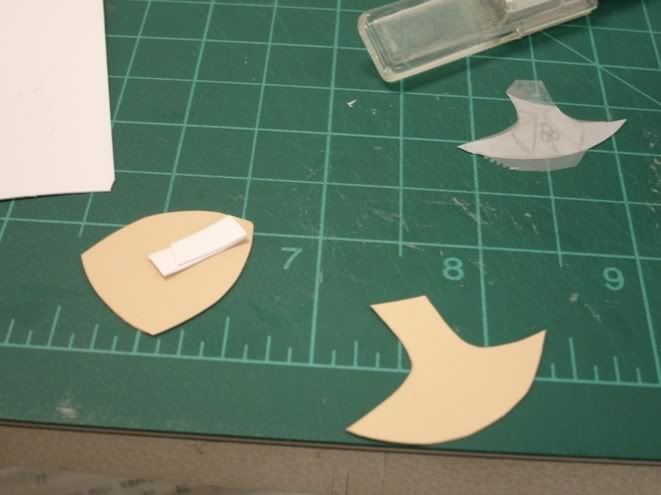
I cut out a neck, then glued some extra cardstock on the back of Jackie's head. I did the same with the queen mum over there, so that there will be a shadow separating the two once they're attached.
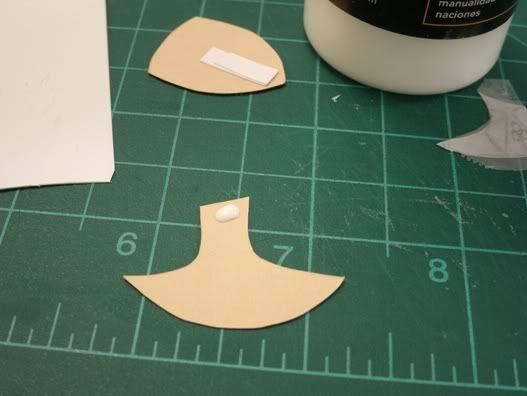
Dabbed some glue on the neck, not the head, because I knew the neck would be stuck to, but I didn't know where the head would fall once I stuck it. Saves glue and mess.
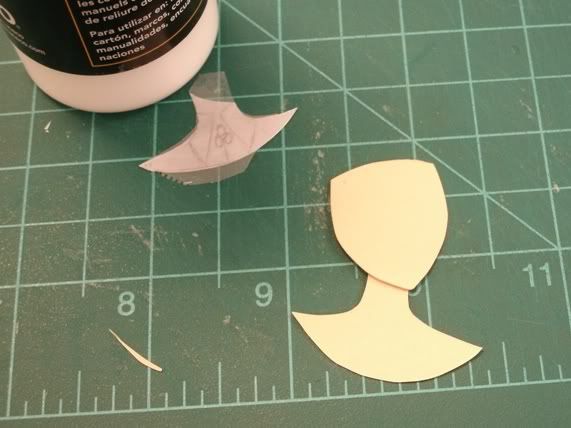
Head and neck joined!

I decided that instead of following the sketch again for his collar, I'd just cut some paper and stick it on, then cut it off. Also I think I'd lost the collar sketch by then ff

Making the collar by cutting a collar shape out of cardstock, then gluing it to the shirt paper. I ended up then gluing that to another piece of cardstock and cutting it to size. This raises it and gives depth to an otherwise flat area. Seen is why I keep a safety pin with me, to dab and spread glue.
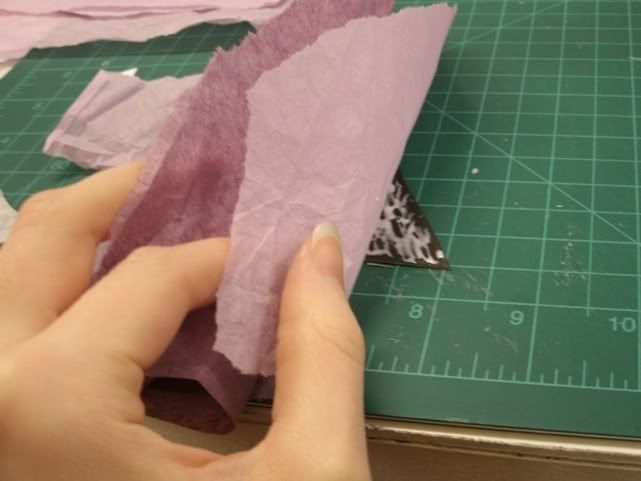
Skipping ahead a bit, I cut the main body piece out of (thick, sob, ow) black card. I then layered two colors of tissue paper on top, aaand...
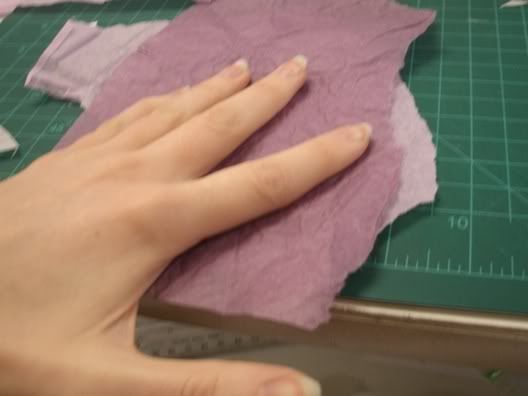
SQUISH

Because it's two layers, not all of the glue seeps to the topmost one. Touchups are necessary.
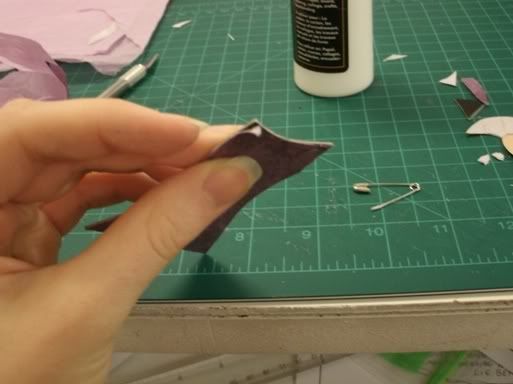
More touching up... the reason I glue the tissue paper down is that I don't have enough thick purple papers to use. That and using cardstock with tissue paper over it makes for a sturdy body. Plus it makes for a wonderful mottled texture!
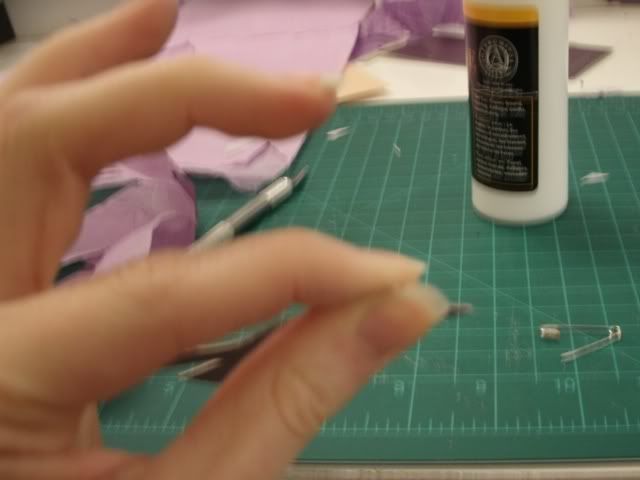
Squeezing and pulling away from the area gets glue all over my fingers, but spreads the glue evenly throughout the section.
Of course all of these steps should be done two-handed, but haha camera...
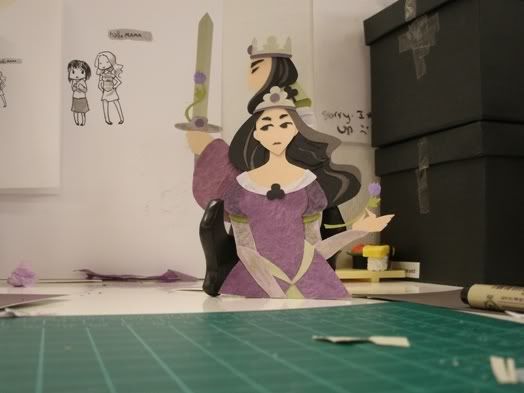
Mum and Dad look on as their son is created. I used a slightly different shade of purple for each of their outfits. Queenie's dress is over white cardstock, and her sleeves are over black. The king's visible sleeve is over white, and the small portion of his robes underneath is over black. This differentiates the areas and makes for some contrast. The papers over the white are double-layered because the white shows through too easily in one layer. However, these two use single colors. Jackie only has two colors mixed because I didn't have a new color to use on him fff
time flies!
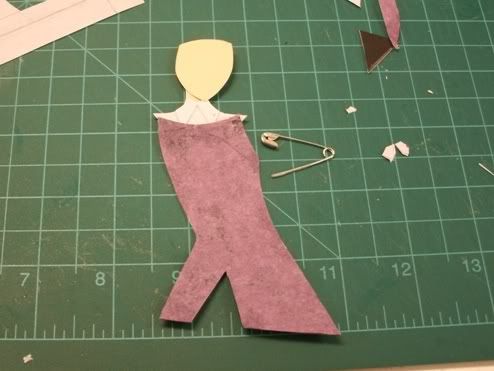
This is what I had done so far. (I repositioned the head slightly, though it was difficult. That glue is rather unforgiving once it dries.)
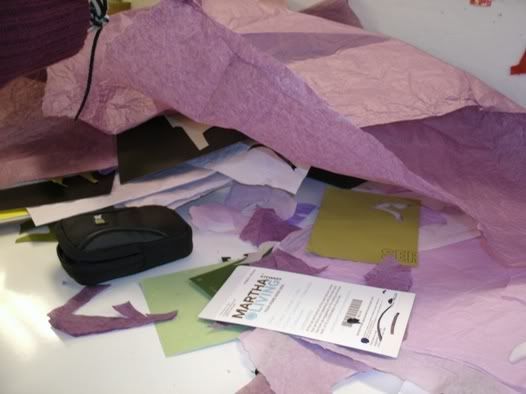
Here's where you DON'T FOLLOW MY EXAMPLE ffff all my papers ended up in a big pile on one half of my desk, I couldn't find anything in a timely manner
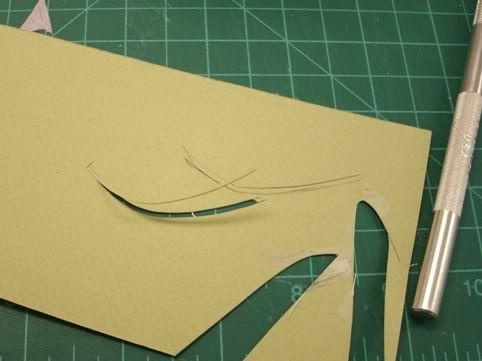
After finally finding the right green, I cut some piping for Jackie's tunic's collar by tracing the edge of the original template and cutting around it.
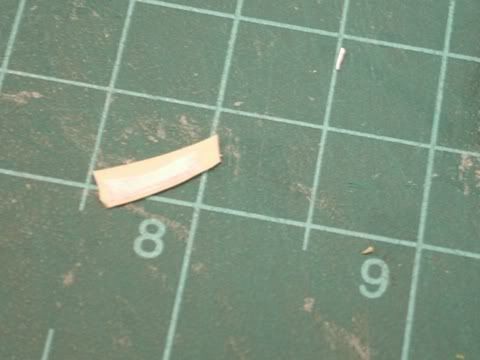
Then I cut trim for his tunic's sleeves (I made those off-camera, tissue paper over white cardstock), and as you can see I paid little attention to the actual sketch template haha... improvisation is always acceptable.
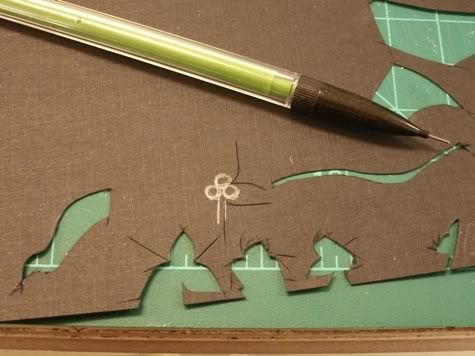
I had completely lost the collar template by then and at any rate I didn't want to cut out a tiny club twice, so I just drew it and cut it out. Be sure to erase pencil lines before doing anything with your cut piece!
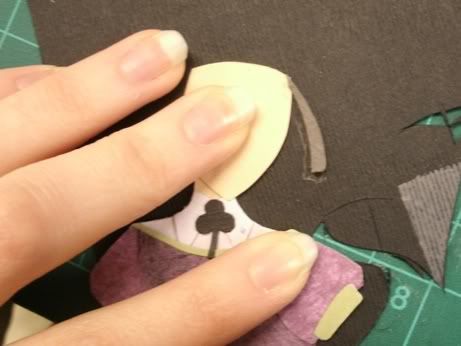
Next I completely improvised his hair hahaha I think I cut from the template maybe three times in the entire thing... If you notice, the parts farther back to the back of his head are glued beneath the parts closer to his face, to give depth. It is VERY IMPORTANT to layer items the way they would be placed naturally. That keeps your piece from looking unnatural, or worse, like an ill-fitting puzzle. That's why I can improvise. If I cut everything out exactly the way it is in my sketch, it would be very flat and probably wouldn't fit right anyhow, haha...
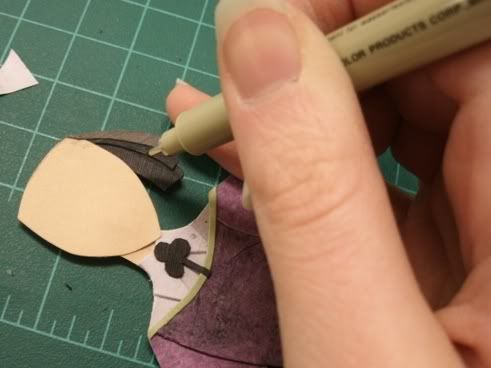
This is more a symptom of this glue, but sometimes it would get little flecks of white in the black hair, and once dried it would not go away. I touched at those areas with a micron,
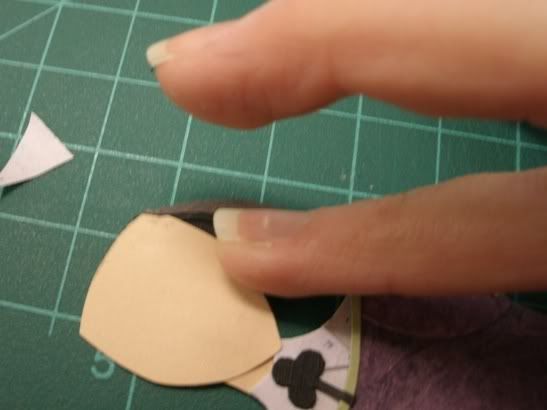
and then rubbed them a little so the ink wouldn't be so bright against the paper. (No idea if that was necessary, though.) Of course, this didn't work on all areas, just the black.
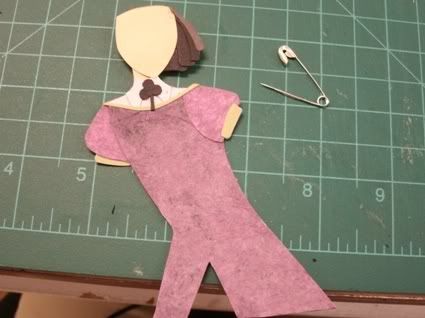
And there's a third of his hair done!
And the time ticked on...
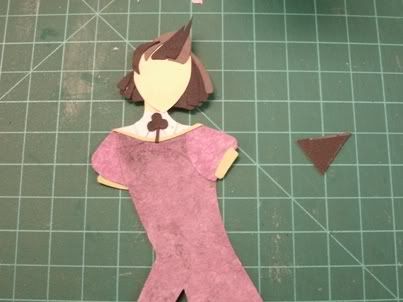
Isn't there some Kpop guy with hair like that? Hahaha... I didn't mind where the bangs ended since I knew his foofy hat would cover them. (I did end up having to snip off the very tip there, though, it stuck out.)
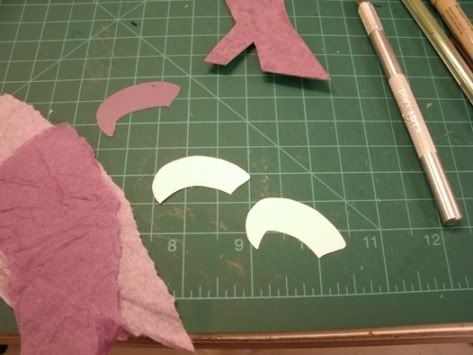
Said foofy tamoshanter took a couple tries to cut right... The tissue paper to cover it is seen on the left.
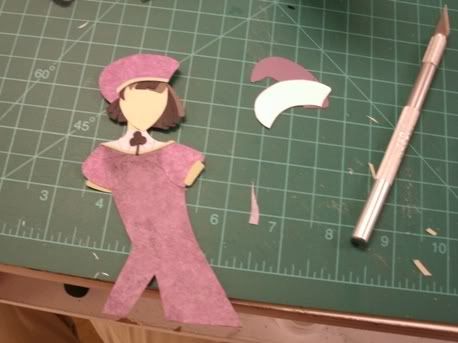
There we go, foofy tamoshanter with greensilver trim to match his parents' crowns!
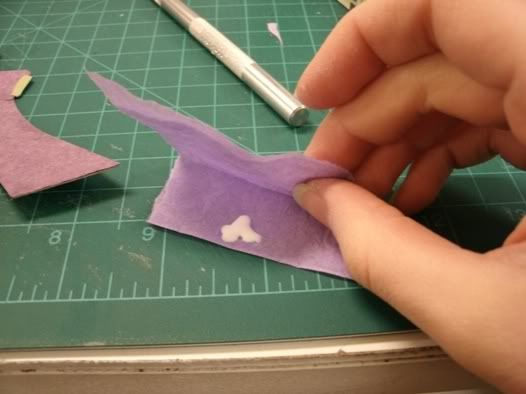
To make the clover-flower tucked behind his ear, I dabbed glue on some tissue paper folded in half, and then folded it again, spreading it around. This made the tissue paper stiffer. Then I cut it out but I can't show you the process on that because
THEN MY CAMERA DIED.
It was about 5:30, and I was hungry, so I just soldiered on and finished his hat and eyes, and I was so irritated at getting one of his eyes right that I wasn't in the mood for picturetaking anyway. Basically I drew two eyes, cut a good one out, and then proceeded to cut a zillion second ones until I got a good one. 8'(
After going away for dinner at 6 and chatting on the net for a bit, I came back at about 8 with renewed zeal and new batteries for the camera.
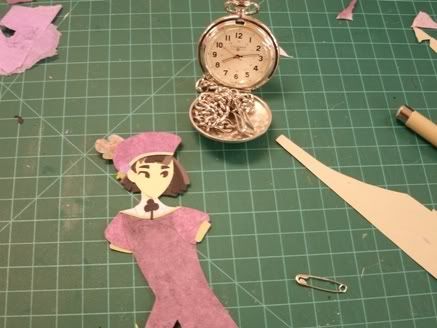
What I had done up until that point
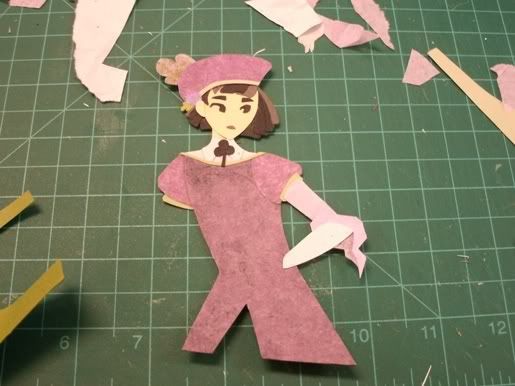
I didn't document these parts because they used previous techniques. The mouth was cut freehand from redviolet paper, and the sleeve used the collar's paper over cardstock, with pinklilac tissue paper glued on top to imitate a sheer sleeve. At the part where it bunches up, it would become less transparent, so I put the tissue paper over white cardstock. You can see inside the hollow of the sheer sleeve, so I covered black cardstock with a couple layers of the tissue paper.
Also note: oooh artificial depth and perspective! His right arm is held up and in front, so it's glued on top, with a rounded edge to imitate coming out of the tunic's sleeve. The left arm will be hanging down, so it can be glued underneath.
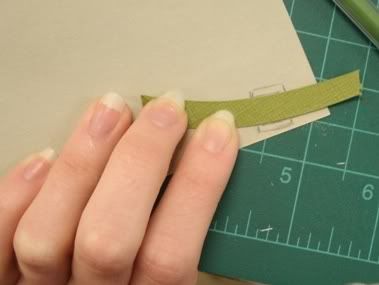
I freehand cut a belt, and laid it over the green paper I used for silver accents to trace out a belt buckle.

It ended up being a little too big, though, so I added an extra bit behind just like a real belt buckle, to make it more believable. Most likely unnecessary but ehh.

As you can see, when I glued his sleeve and hand in, I didn't glue them to his body yet. That's because I hadn't made his dagger, and needed to be able to slip it under!
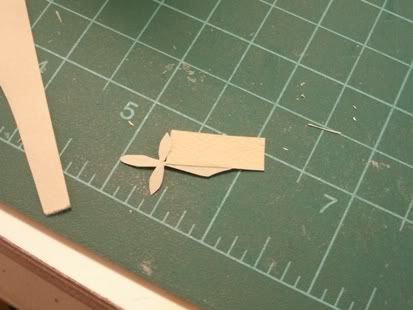
By this time I had lost the dagger's sketch as well, but no matter, I cut a better one freehand anyway. To give it that line down the middle so it'd look less flat, I took a slightly darker, slightly thicker paper and glued it on top so the edge would run down the dagger's middle.
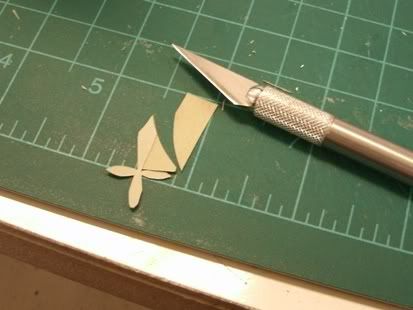
Then I cut it away, flipped it over, and added a "jewel" from the same ~martha stewart home painting~ sample card that provided the king and queen's crown's jewels, for continuity. (I really will use any paper I can get my hands on. The silver-green is a discarded book endpaper. The tissuepaper came from some stuff I unpacked at work this summer. The blacks and grays in the hair are specialty paper samples. His belt is a scrapbooking paper.)
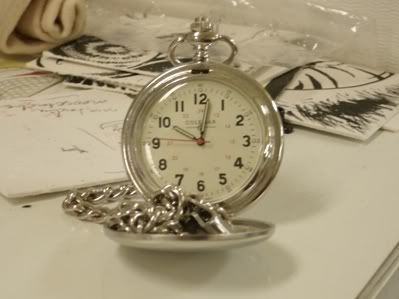
CURSE YOU, TIME
![]()
There we go, dagger glued comfortably into his hand.
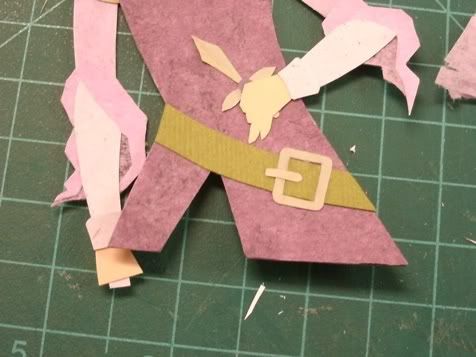
When making the other arm, I didn't care where the hand ended or even to make a real hand, since I knew it would cut off at the line of his tunic.
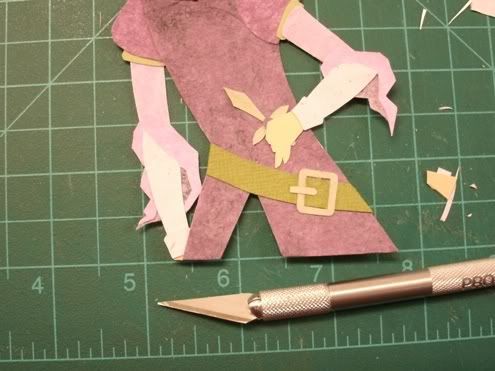
There, glued down and cut off, very neatly.

I realized quite late that derp if the rest of his tunic has piping so should this part, so I squeezed some in. Then I cut some of the same paper used for his belt, and, like the club on his hat and the queen's sleeve, covered it in pinklilac paper, and slipped it behind his tunic for the only part of his pants (most likely pumpkin-pants, the foofy prince he is) that you can see.
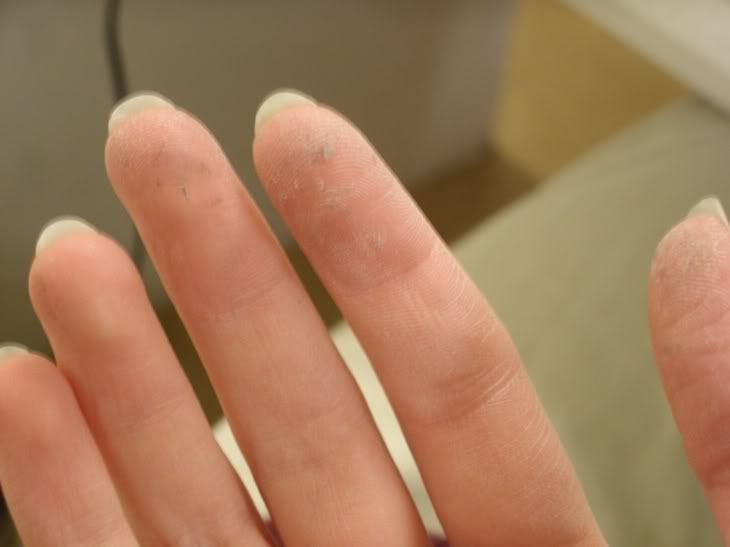
Thus finished, I looked down at my hands. Eugh. And they were both like that, too, I told you this was two-handed! Luckily this glue comes off hands easier than it does paper...
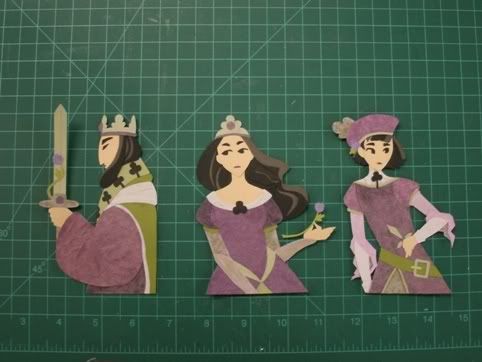
There's the whole family done! Well, done without backgrounds.

For fun, here they are on their backsides. A very different color scheme!
And that was the time when I finally finished and started cleaning up. Whew!
Thank you for reading, everybody! If you have any questions, please, feel free to ask! ;3;/
On the meme I showed my progress in a project I'm doing making a suit of cards, and asked if anyone was interested in a tutorial on my process. I got quite a few positive votes, so I'll put it here! 'u'/
A preview:

Right! To start out, here's what I had completed before starting:

King, Queen, and not-yet-Jack.
Materials I use:

l-r: anti-insanity device UH I mean music player, micron, pencil, safety pin, scotch tape, papers, a sketch of my piece, archival neutral-ph glue, x-acto knife with new blade, ruler/t-square, eraser, and it's all sitting on my self-healing cutting mat. Tweezers might also be a good idea but haha I don't have any, I use my nails.

AND WE'RE OFF!

First I cut the element out of the sketch. You don't need to use translucent vellum paper, though it's a nice discovery of mine. I usually start with the head.

Then I tape it onto the paper I want it cut out of.

I then cut around the element. It's ok if you don't follow the lines completely, and it's especially ok if part of the element will be underneath something. I know there will be bangs and a hat sitting on top of this head, so I cut to give me something to glue them on.

I cut out a neck, then glued some extra cardstock on the back of Jackie's head. I did the same with the queen mum over there, so that there will be a shadow separating the two once they're attached.

Dabbed some glue on the neck, not the head, because I knew the neck would be stuck to, but I didn't know where the head would fall once I stuck it. Saves glue and mess.

Head and neck joined!

I decided that instead of following the sketch again for his collar, I'd just cut some paper and stick it on, then cut it off. Also I think I'd lost the collar sketch by then ff

Making the collar by cutting a collar shape out of cardstock, then gluing it to the shirt paper. I ended up then gluing that to another piece of cardstock and cutting it to size. This raises it and gives depth to an otherwise flat area. Seen is why I keep a safety pin with me, to dab and spread glue.

Skipping ahead a bit, I cut the main body piece out of (thick, sob, ow) black card. I then layered two colors of tissue paper on top, aaand...

SQUISH

Because it's two layers, not all of the glue seeps to the topmost one. Touchups are necessary.

More touching up... the reason I glue the tissue paper down is that I don't have enough thick purple papers to use. That and using cardstock with tissue paper over it makes for a sturdy body. Plus it makes for a wonderful mottled texture!

Squeezing and pulling away from the area gets glue all over my fingers, but spreads the glue evenly throughout the section.
Of course all of these steps should be done two-handed, but haha camera...

Mum and Dad look on as their son is created. I used a slightly different shade of purple for each of their outfits. Queenie's dress is over white cardstock, and her sleeves are over black. The king's visible sleeve is over white, and the small portion of his robes underneath is over black. This differentiates the areas and makes for some contrast. The papers over the white are double-layered because the white shows through too easily in one layer. However, these two use single colors. Jackie only has two colors mixed because I didn't have a new color to use on him fff

time flies!

This is what I had done so far. (I repositioned the head slightly, though it was difficult. That glue is rather unforgiving once it dries.)

Here's where you DON'T FOLLOW MY EXAMPLE ffff all my papers ended up in a big pile on one half of my desk, I couldn't find anything in a timely manner

After finally finding the right green, I cut some piping for Jackie's tunic's collar by tracing the edge of the original template and cutting around it.

Then I cut trim for his tunic's sleeves (I made those off-camera, tissue paper over white cardstock), and as you can see I paid little attention to the actual sketch template haha... improvisation is always acceptable.

I had completely lost the collar template by then and at any rate I didn't want to cut out a tiny club twice, so I just drew it and cut it out. Be sure to erase pencil lines before doing anything with your cut piece!

Next I completely improvised his hair hahaha I think I cut from the template maybe three times in the entire thing... If you notice, the parts farther back to the back of his head are glued beneath the parts closer to his face, to give depth. It is VERY IMPORTANT to layer items the way they would be placed naturally. That keeps your piece from looking unnatural, or worse, like an ill-fitting puzzle. That's why I can improvise. If I cut everything out exactly the way it is in my sketch, it would be very flat and probably wouldn't fit right anyhow, haha...

This is more a symptom of this glue, but sometimes it would get little flecks of white in the black hair, and once dried it would not go away. I touched at those areas with a micron,

and then rubbed them a little so the ink wouldn't be so bright against the paper. (No idea if that was necessary, though.) Of course, this didn't work on all areas, just the black.

And there's a third of his hair done!

And the time ticked on...

Isn't there some Kpop guy with hair like that? Hahaha... I didn't mind where the bangs ended since I knew his foofy hat would cover them. (I did end up having to snip off the very tip there, though, it stuck out.)

Said foofy tamoshanter took a couple tries to cut right... The tissue paper to cover it is seen on the left.

There we go, foofy tamoshanter with greensilver trim to match his parents' crowns!

To make the clover-flower tucked behind his ear, I dabbed glue on some tissue paper folded in half, and then folded it again, spreading it around. This made the tissue paper stiffer. Then I cut it out but I can't show you the process on that because
THEN MY CAMERA DIED.
It was about 5:30, and I was hungry, so I just soldiered on and finished his hat and eyes, and I was so irritated at getting one of his eyes right that I wasn't in the mood for picturetaking anyway. Basically I drew two eyes, cut a good one out, and then proceeded to cut a zillion second ones until I got a good one. 8'(
After going away for dinner at 6 and chatting on the net for a bit, I came back at about 8 with renewed zeal and new batteries for the camera.

What I had done up until that point

I didn't document these parts because they used previous techniques. The mouth was cut freehand from redviolet paper, and the sleeve used the collar's paper over cardstock, with pinklilac tissue paper glued on top to imitate a sheer sleeve. At the part where it bunches up, it would become less transparent, so I put the tissue paper over white cardstock. You can see inside the hollow of the sheer sleeve, so I covered black cardstock with a couple layers of the tissue paper.
Also note: oooh artificial depth and perspective! His right arm is held up and in front, so it's glued on top, with a rounded edge to imitate coming out of the tunic's sleeve. The left arm will be hanging down, so it can be glued underneath.

I freehand cut a belt, and laid it over the green paper I used for silver accents to trace out a belt buckle.

It ended up being a little too big, though, so I added an extra bit behind just like a real belt buckle, to make it more believable. Most likely unnecessary but ehh.

As you can see, when I glued his sleeve and hand in, I didn't glue them to his body yet. That's because I hadn't made his dagger, and needed to be able to slip it under!

By this time I had lost the dagger's sketch as well, but no matter, I cut a better one freehand anyway. To give it that line down the middle so it'd look less flat, I took a slightly darker, slightly thicker paper and glued it on top so the edge would run down the dagger's middle.

Then I cut it away, flipped it over, and added a "jewel" from the same ~martha stewart home painting~ sample card that provided the king and queen's crown's jewels, for continuity. (I really will use any paper I can get my hands on. The silver-green is a discarded book endpaper. The tissuepaper came from some stuff I unpacked at work this summer. The blacks and grays in the hair are specialty paper samples. His belt is a scrapbooking paper.)

CURSE YOU, TIME
There we go, dagger glued comfortably into his hand.

When making the other arm, I didn't care where the hand ended or even to make a real hand, since I knew it would cut off at the line of his tunic.

There, glued down and cut off, very neatly.

I realized quite late that derp if the rest of his tunic has piping so should this part, so I squeezed some in. Then I cut some of the same paper used for his belt, and, like the club on his hat and the queen's sleeve, covered it in pinklilac paper, and slipped it behind his tunic for the only part of his pants (most likely pumpkin-pants, the foofy prince he is) that you can see.

Thus finished, I looked down at my hands. Eugh. And they were both like that, too, I told you this was two-handed! Luckily this glue comes off hands easier than it does paper...

There's the whole family done! Well, done without backgrounds.

For fun, here they are on their backsides. A very different color scheme!

And that was the time when I finally finished and started cleaning up. Whew!
Thank you for reading, everybody! If you have any questions, please, feel free to ask! ;3;/