Make a top hat (Kaitou Kid style) with some photos
These are rough directions to making a top hat. I'm sure there are better ways out there. But I said I post how I did it. Shoot me before I do that again.
Materials:
Directions:
1.) Figure out how wide you want the brim. A reference picture will show you how far you want the brim to go out.
2.) Figure out the size of your skull and cut the appropriate shaped hole for your head (be careful with this piece. You will use it again later. Don't cut it in the middle.)
3.) Take a ruler and measure out from the edge of the hole how far you want the brim to go. Do this all the way around. You should have a rough oval by the time you are done.
4.) Cut out the brim and lay it on the fabric. Be sure the fabric is folded in half but do not lay the brim on the fold itself.
5.) Trace around the outer edge about 1 inch (2.5 cm). Do the same for the inner hole. This fabric will be sewn together on the -outer- edge. You can do it now if you like (sew about 3/4 inch in. not sure of metric conversion)
6.) Remember the circle you cut out before from the center of the brim? That is going to become the top of your hat. Take it and do the same thing you did for the brim (the fabric does not need to be folded in half this time. You only need one piece).
7.) From the left over white fabric you will make the “tube” part of the hat. Decide how high you want your top hat. To make the flat top of your hat fit the tube, you can simply take the fabric you cut out earlier and pin what will be the top part of the tube all the way around until. Be sure to leave a little fabric to sew up the back of the tube. You do want the seam in the back of the hat.
8.) Now that you know how tall the tube is and have matched it to the top of the hat, you can cut it out and sew it up.
9.) Take the brim fabric and turn it right side out. Match up what will be the back of the hat to the back of the tube. Pin this all together taking care to keep the rough edges in.
10.) Take the foam board for the top part of the hat and, here's the cheaty part, while it is inside out, pin the fabric to the foam by piercing into the foam. Do not expect to get those pins back. They hold the top in place.
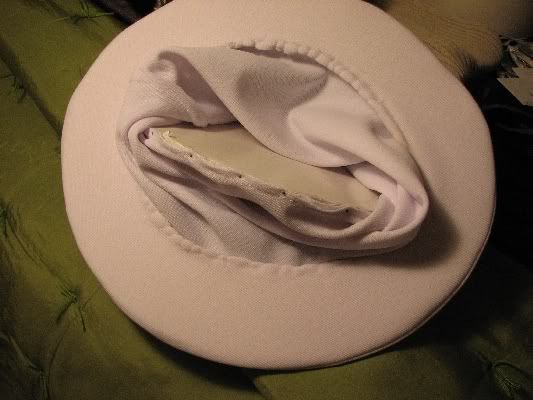
11.) Sew the brim and tube fabric bits together.
12.) Now, slip the brim foam board into the fabric brim. This is why stretchy fabric is necessary.
13.) Hand sew the leftover fabric from the brim up and over with fabric from where the brim and tube were sewn together.
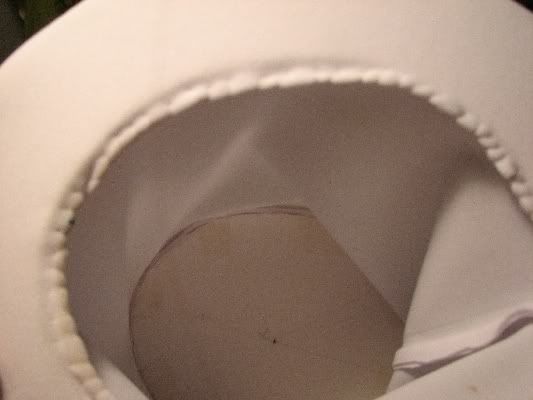
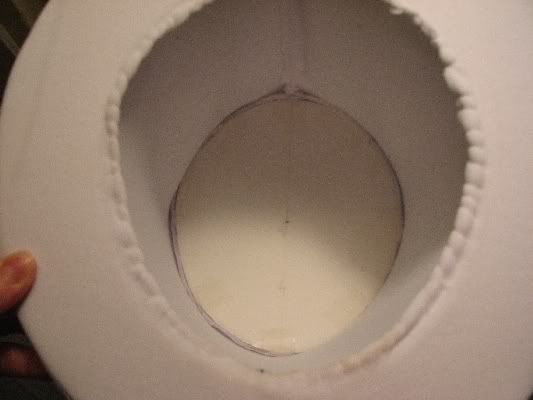
14.) Take a piece of poster board the same height as your fabric tube and roll it up and shove it inside. Use the fabric you just hand sewed to help keep it inside.
15.) Cut the poster board down some so that the two parts overlap and tape them into place so they will stay in a tube shape. For extra security, you can tape the poster board to the foam board on top.
16.) Take the fabric for the band and cut out a piece long enough to wrap around and two or three times as wide as you need. Fold it over and sew into place (I actually hot glued it). For the little bands on the side, I just cut out some more and did much the same, taking care to cover the seam.
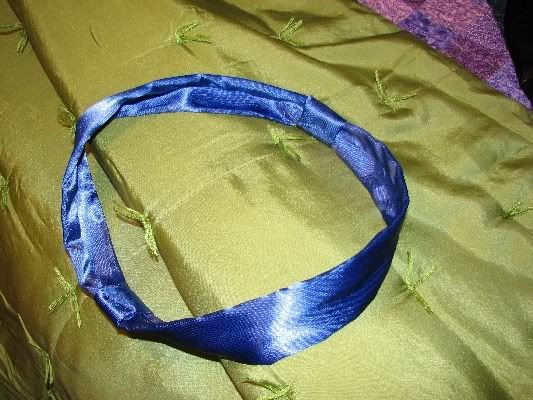
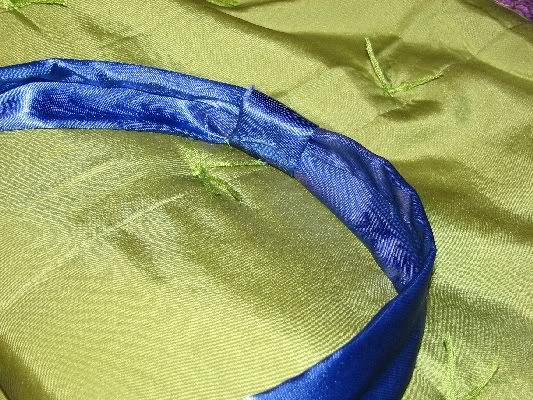
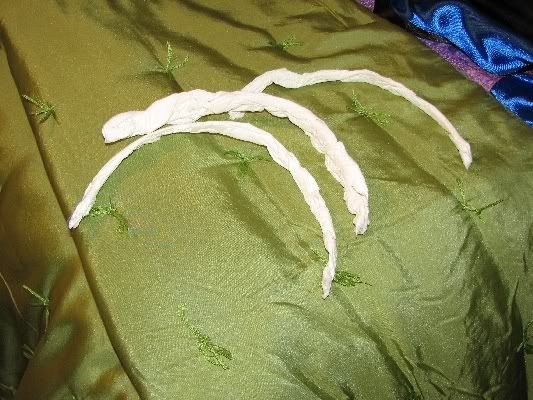
17.) Slip this down over the top of the hat. If you want, you can poof out the band some by shoving some strips of rolled up toilet paper between the hat band and hat.
Confession time: I remember I eyeballed the hat a lot when I made it. There was some trial and error. You may need to tweak it to suit your needs.
Finished product here. I might post some more photos at some future date.
The best thing about this hat is that it is delightfully lightweight.
Materials:
Foam board. The kind that is sandwiched by poster board.
A yard and half (about a meter and half) of stretchy white fabric (or a different color if you are making some other color of top hat).
Some blue fabric of choice for the hat band.
A sheet of poster board.
Thread (to match the fabric)
Sewing machine and a sewing needle. Some hand sewing is necessary (if you do not have a sewing machine, you can hand sew it)
Pins
Scissors
Tape
Directions:
1.) Figure out how wide you want the brim. A reference picture will show you how far you want the brim to go out.
2.) Figure out the size of your skull and cut the appropriate shaped hole for your head (be careful with this piece. You will use it again later. Don't cut it in the middle.)
3.) Take a ruler and measure out from the edge of the hole how far you want the brim to go. Do this all the way around. You should have a rough oval by the time you are done.
4.) Cut out the brim and lay it on the fabric. Be sure the fabric is folded in half but do not lay the brim on the fold itself.
5.) Trace around the outer edge about 1 inch (2.5 cm). Do the same for the inner hole. This fabric will be sewn together on the -outer- edge. You can do it now if you like (sew about 3/4 inch in. not sure of metric conversion)
6.) Remember the circle you cut out before from the center of the brim? That is going to become the top of your hat. Take it and do the same thing you did for the brim (the fabric does not need to be folded in half this time. You only need one piece).
7.) From the left over white fabric you will make the “tube” part of the hat. Decide how high you want your top hat. To make the flat top of your hat fit the tube, you can simply take the fabric you cut out earlier and pin what will be the top part of the tube all the way around until. Be sure to leave a little fabric to sew up the back of the tube. You do want the seam in the back of the hat.
8.) Now that you know how tall the tube is and have matched it to the top of the hat, you can cut it out and sew it up.
9.) Take the brim fabric and turn it right side out. Match up what will be the back of the hat to the back of the tube. Pin this all together taking care to keep the rough edges in.
10.) Take the foam board for the top part of the hat and, here's the cheaty part, while it is inside out, pin the fabric to the foam by piercing into the foam. Do not expect to get those pins back. They hold the top in place.

11.) Sew the brim and tube fabric bits together.
12.) Now, slip the brim foam board into the fabric brim. This is why stretchy fabric is necessary.
13.) Hand sew the leftover fabric from the brim up and over with fabric from where the brim and tube were sewn together.


14.) Take a piece of poster board the same height as your fabric tube and roll it up and shove it inside. Use the fabric you just hand sewed to help keep it inside.
15.) Cut the poster board down some so that the two parts overlap and tape them into place so they will stay in a tube shape. For extra security, you can tape the poster board to the foam board on top.
16.) Take the fabric for the band and cut out a piece long enough to wrap around and two or three times as wide as you need. Fold it over and sew into place (I actually hot glued it). For the little bands on the side, I just cut out some more and did much the same, taking care to cover the seam.


17.) Slip this down over the top of the hat. If you want, you can poof out the band some by shoving some strips of rolled up toilet paper between the hat band and hat.

Confession time: I remember I eyeballed the hat a lot when I made it. There was some trial and error. You may need to tweak it to suit your needs.
Finished product here. I might post some more photos at some future date.
The best thing about this hat is that it is delightfully lightweight.