Natasha Romanoff Wallpaper Tutorial
How to make this wallpaper:
In Photoshop CS5.
1) Open a document with whatever size you like, I chose 1920x1080. Fill the background with #faefef.
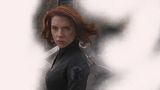
2) Paste your first picture of the character of your choice and erase much of the background, don't erase it all. Resize if necessary.
Your canvas should look similar to this but with your own character:
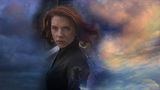
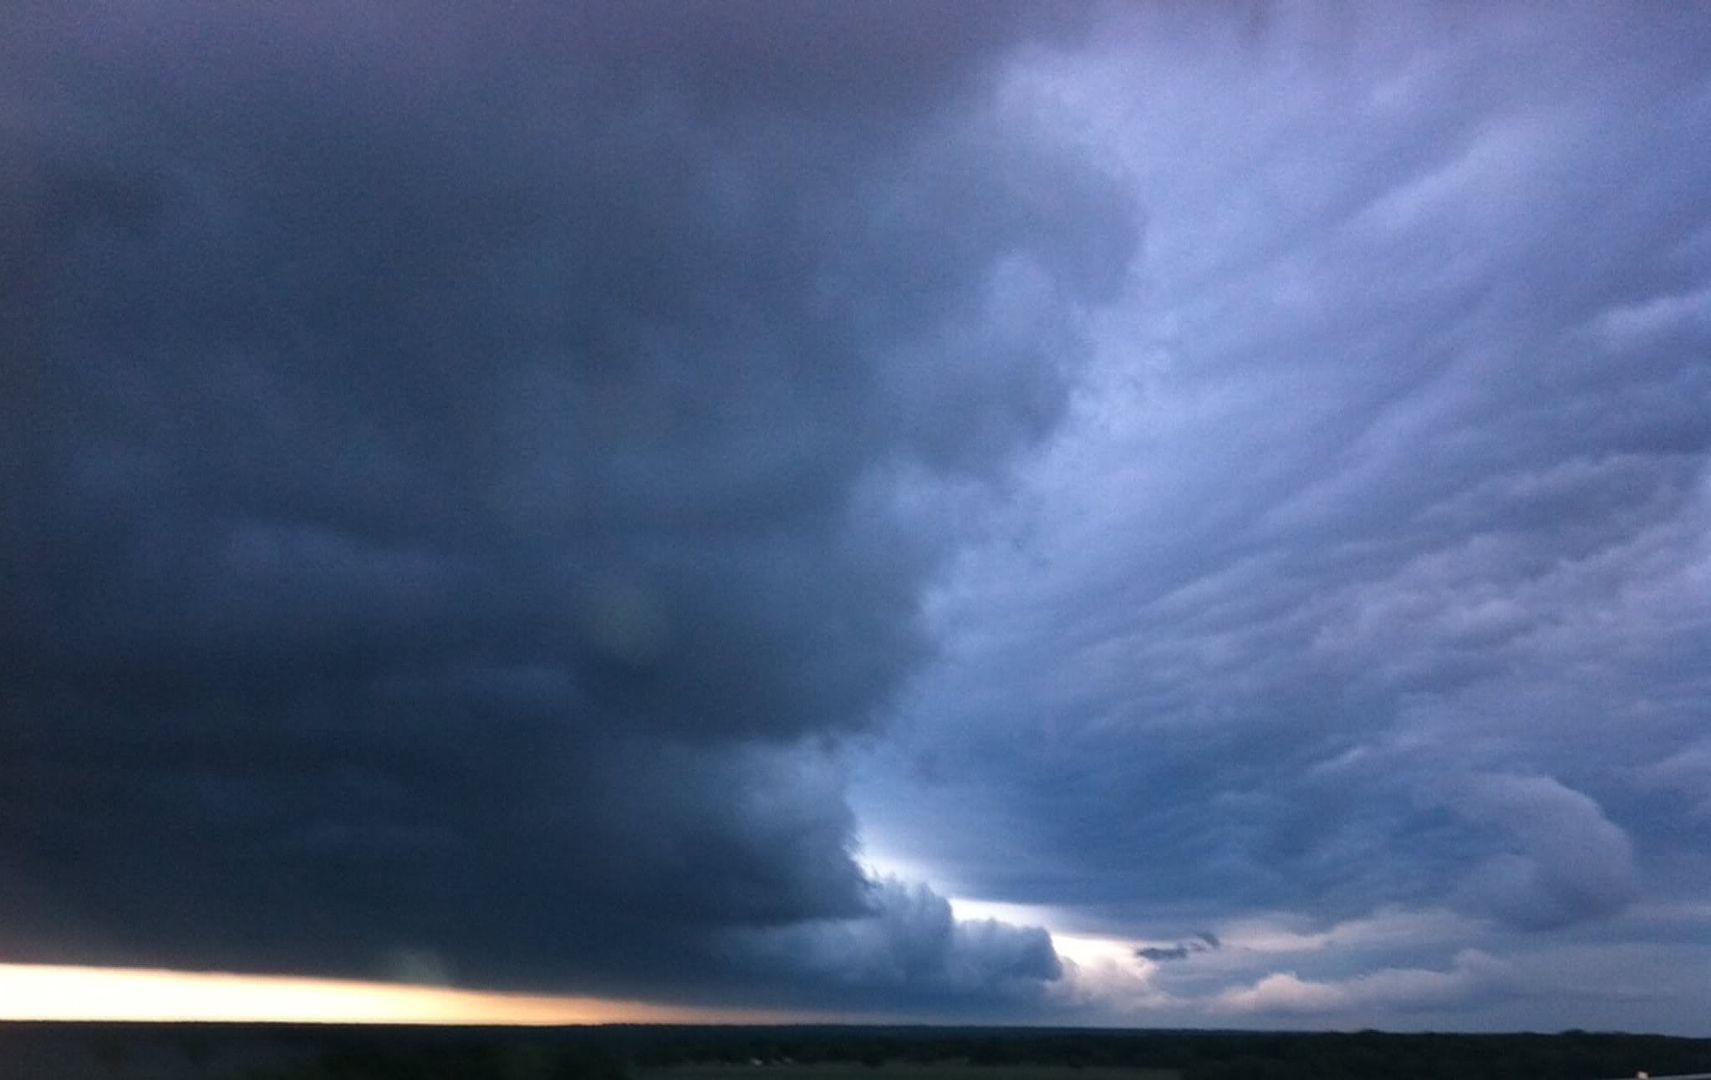
3) Add this stock and set it to Hard Light, 100%. Resize if necessary. Erase whatever is on your character.
4) Add this stock and set it to Multiply, 100%. Resize if necessary. Erase whatever is on your character.
Should now look something like this:
5) Add another picture of your character and scale down to about half the size of the main pic. Erase all around and place to the right of your main character.
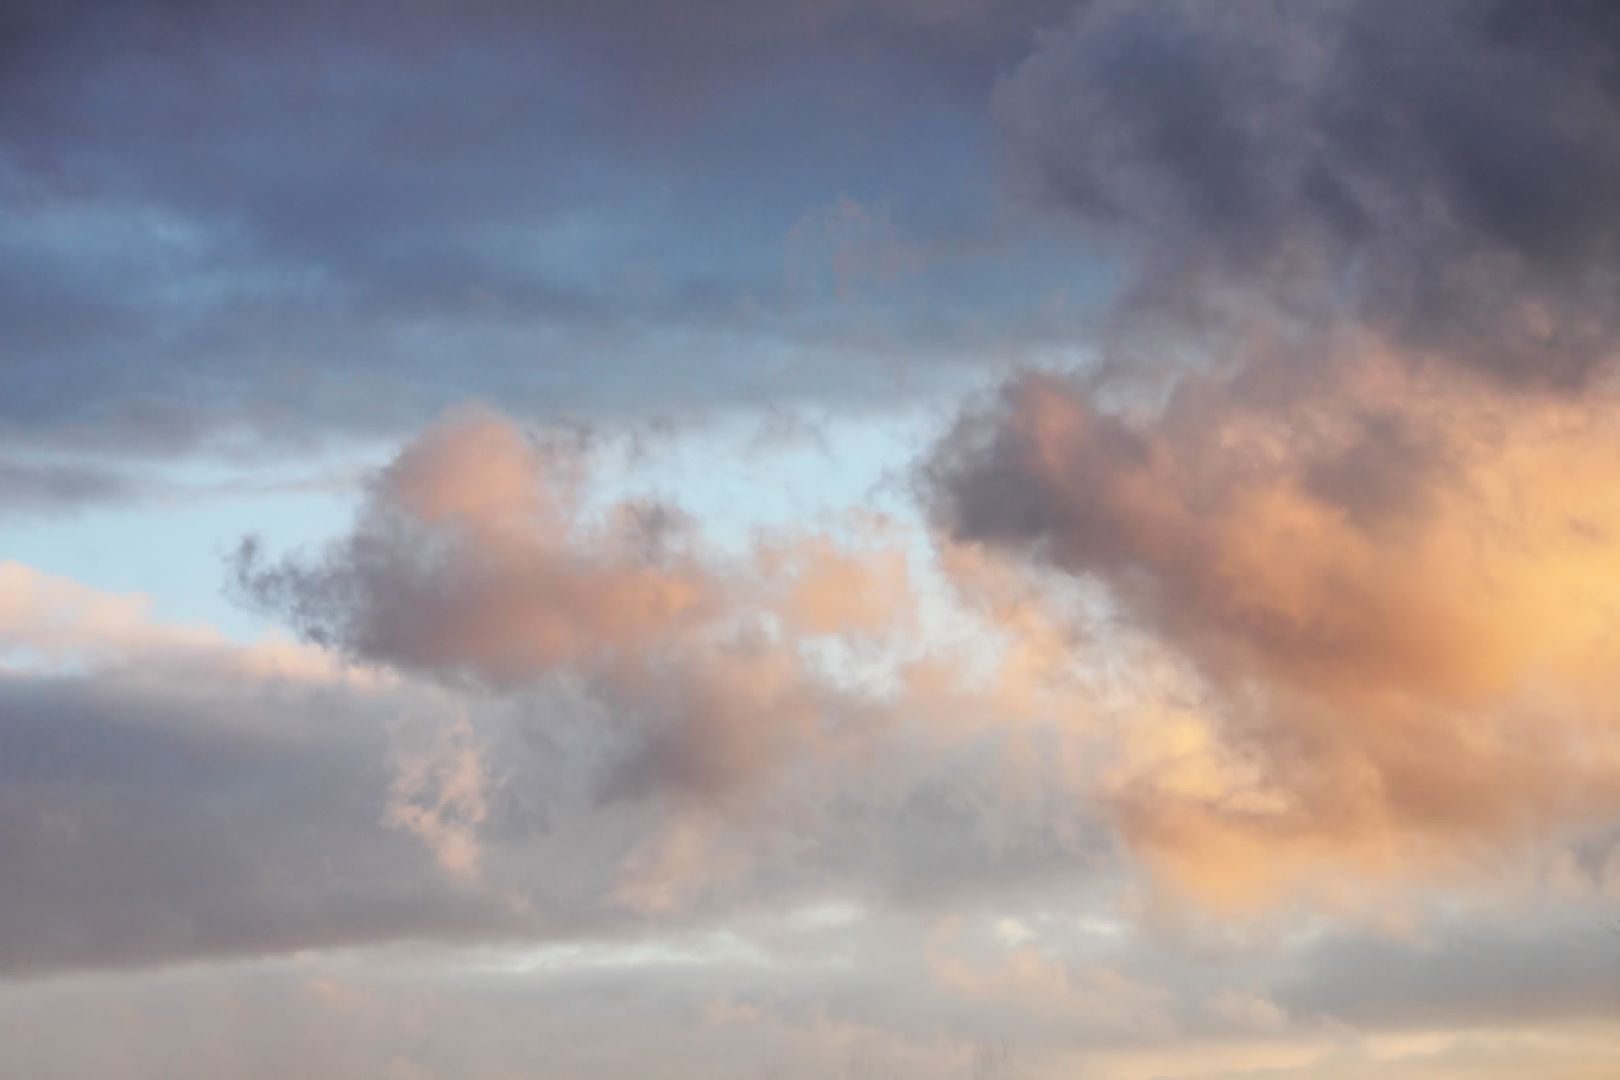
6) Add this stock. Set to Soft Light, 100%. Resize if necessary. Erase what you don't like.
7) Add this stock. Set to Screen, 23%. Resize if necessary. Erase what you don't like.
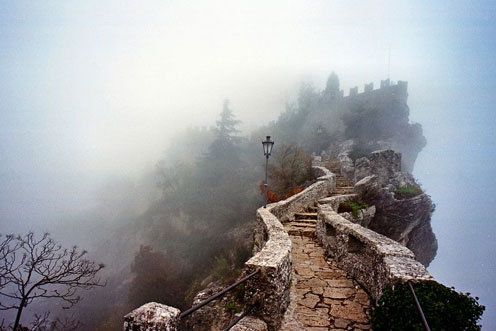
8) Add this stock. Set to Hard Light, 100%. Resize to half the size of the main picture. Erase what you don't like.
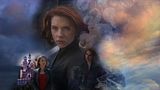
9) Add another pic of your character. Resize to one quarter of the size of the main picture. Erase what you don't like.
Should look something similar to this:
10) Add another pic of your character. Resize to half the main picture. Erase what you don't like. (With the picture I used, I had to duplicate it twice, both set on Screen, 100% to lighten up the picture.)
11) Add the last pic of your character. Resize to about one quarter of the main picture. Erase what you don't like.
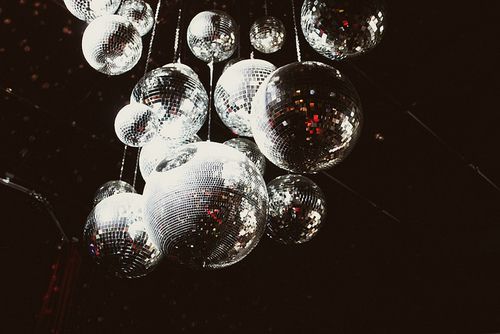
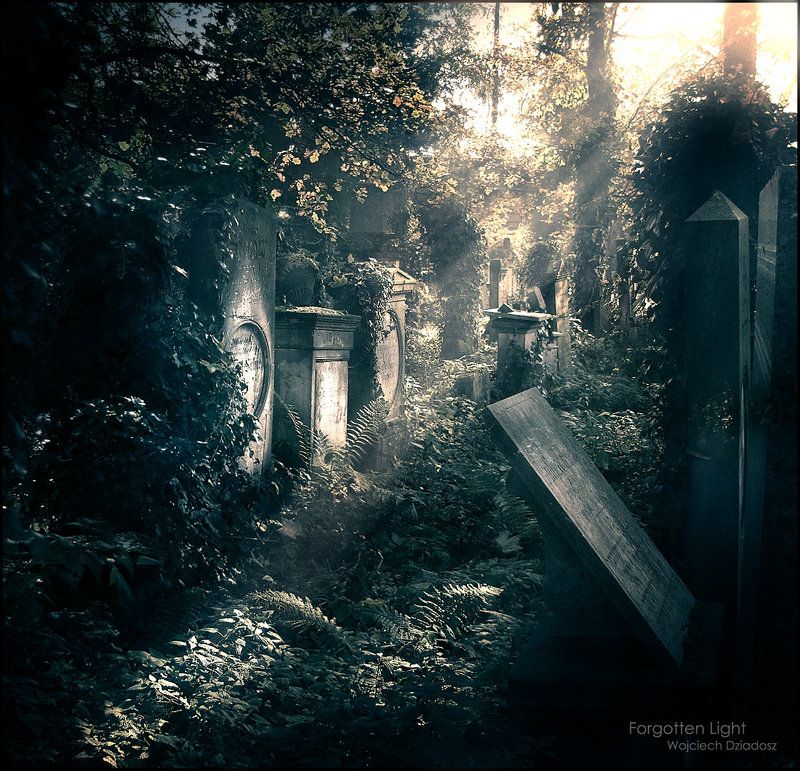
12) Add this stock to the left of your document. Resize to the height of your document. Set to Soft Light, 17%. Erase whatever is in front of your characters.
13) Add this clock. Resize only if necessary. I put it in between three of the pics that I used but had to duplicate it 3 times all set to Multiply, 100%.
Should look something similar to this:
14) Add these skulls. Set to Screen, 7%.
15) Add these cobwebs. Resize if necessary. Place on the left side. Set to Screen, 11%. Duplicate the layer, Flip Horizontally. Drag the duplicated layer to the other side.
16) Add this stock to your document. Place on the right bottom side and set to Soft Light, 39%. Erase what you don't like.
Should look something similar to this:
17) Duplicate the background and bring it to front. Set it to Soft Light, 100%.
Should look something similar to this:
18) Duplicate the background copy and set it to Normal, 100%. Erase parts of the layer to allow the work you've just done to peak through.
Should look something similar to this:
19) Create a stamp. Use Gaussian Blur at a low level to slightly blur the document. Set this layer to Soft Light, 100%.
20) Create another stamp. Use the same Gaussian Blur level. Set this layer to Normal, 47% or whatever opacity looks best for you.
21) Create another stamp. Use a filter of your choice to finish your art or leave as is. I used Topaz Clean and set the layer at about 50%.
Should look something similar to this:
22) Text: Natasha Romanoff: Papyrus, 30 pt. Black.
The Black Widow: Heroes Assemble 3D Italic, 48 pt. Black.
23) I felt that this needed a little more color to it so I chose Madness Reigns texture and blurred it completely with Gaussian blur. Resize to whatever your canvas size is. Set this to Soft Light, 100%.
24) Watermark your work, if you do, and you are finished.
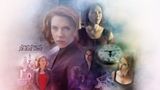
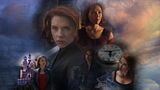
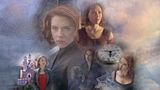
Finished Product:
Not credited in tutorial: Deviantart: MysticMorning, and Thy Darkest Hour, and Shadowplay: Aditsa (Taken off the last time I was in the stock area) Screencaps: Me.

In Photoshop CS5.
1) Open a document with whatever size you like, I chose 1920x1080. Fill the background with #faefef.
2) Paste your first picture of the character of your choice and erase much of the background, don't erase it all. Resize if necessary.
Your canvas should look similar to this but with your own character:

3) Add this stock and set it to Hard Light, 100%. Resize if necessary. Erase whatever is on your character.
4) Add this stock and set it to Multiply, 100%. Resize if necessary. Erase whatever is on your character.
Should now look something like this:

5) Add another picture of your character and scale down to about half the size of the main pic. Erase all around and place to the right of your main character.
6) Add this stock. Set to Soft Light, 100%. Resize if necessary. Erase what you don't like.
7) Add this stock. Set to Screen, 23%. Resize if necessary. Erase what you don't like.
8) Add this stock. Set to Hard Light, 100%. Resize to half the size of the main picture. Erase what you don't like.
9) Add another pic of your character. Resize to one quarter of the size of the main picture. Erase what you don't like.
Should look something similar to this:

10) Add another pic of your character. Resize to half the main picture. Erase what you don't like. (With the picture I used, I had to duplicate it twice, both set on Screen, 100% to lighten up the picture.)
11) Add the last pic of your character. Resize to about one quarter of the main picture. Erase what you don't like.
12) Add this stock to the left of your document. Resize to the height of your document. Set to Soft Light, 17%. Erase whatever is in front of your characters.
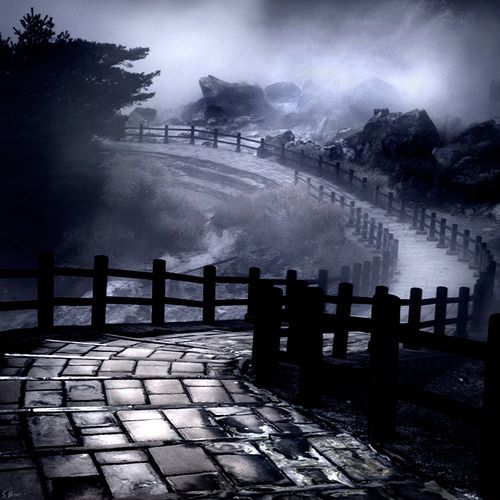
13) Add this clock. Resize only if necessary. I put it in between three of the pics that I used but had to duplicate it 3 times all set to Multiply, 100%.
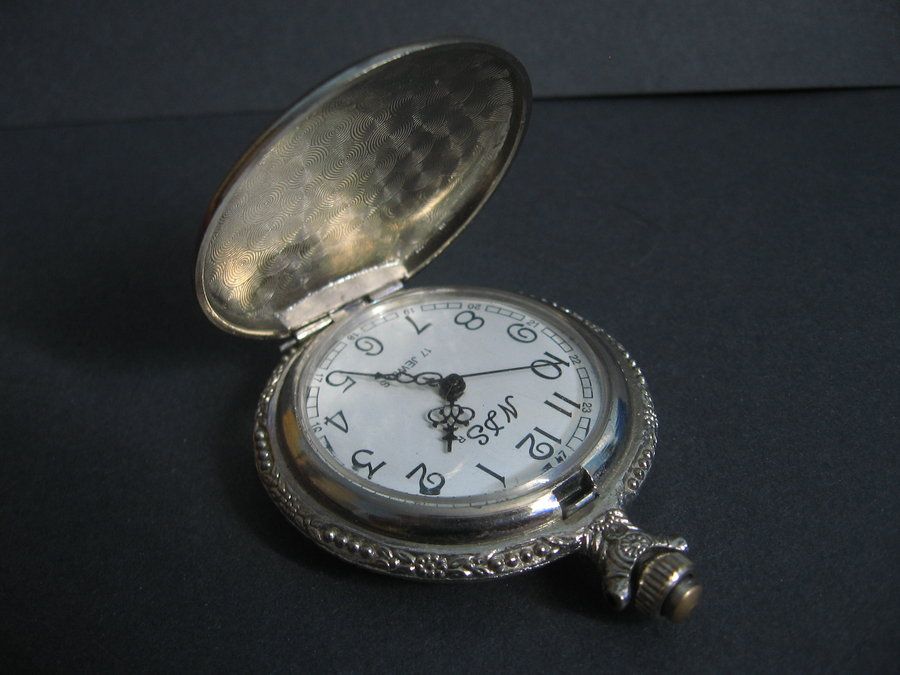
Should look something similar to this:

14) Add these skulls. Set to Screen, 7%.
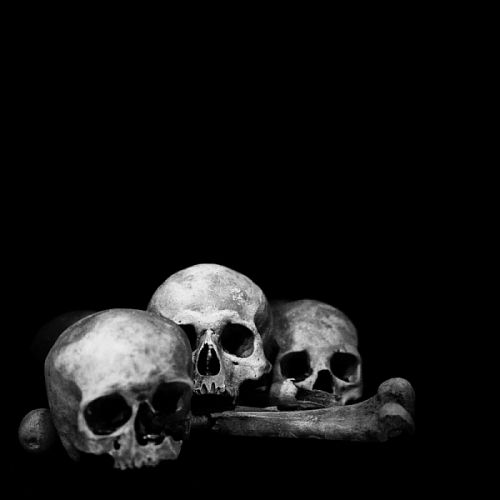
15) Add these cobwebs. Resize if necessary. Place on the left side. Set to Screen, 11%. Duplicate the layer, Flip Horizontally. Drag the duplicated layer to the other side.
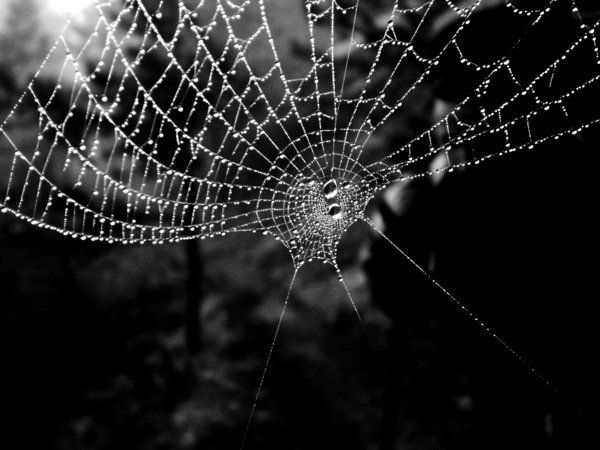
16) Add this stock to your document. Place on the right bottom side and set to Soft Light, 39%. Erase what you don't like.
Should look something similar to this:

17) Duplicate the background and bring it to front. Set it to Soft Light, 100%.
Should look something similar to this:

18) Duplicate the background copy and set it to Normal, 100%. Erase parts of the layer to allow the work you've just done to peak through.
Should look something similar to this:

19) Create a stamp. Use Gaussian Blur at a low level to slightly blur the document. Set this layer to Soft Light, 100%.
20) Create another stamp. Use the same Gaussian Blur level. Set this layer to Normal, 47% or whatever opacity looks best for you.
21) Create another stamp. Use a filter of your choice to finish your art or leave as is. I used Topaz Clean and set the layer at about 50%.
Should look something similar to this:
22) Text: Natasha Romanoff: Papyrus, 30 pt. Black.
The Black Widow: Heroes Assemble 3D Italic, 48 pt. Black.
23) I felt that this needed a little more color to it so I chose Madness Reigns texture and blurred it completely with Gaussian blur. Resize to whatever your canvas size is. Set this to Soft Light, 100%.
24) Watermark your work, if you do, and you are finished.
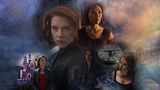
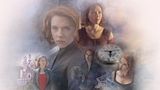
Finished Product:
Not credited in tutorial: Deviantart: MysticMorning, and Thy Darkest Hour, and Shadowplay: Aditsa (Taken off the last time I was in the stock area) Screencaps: Me.