coloring tutorial #14 - Kaoru ~ stop this song
Request by nalazhar =3~
Going from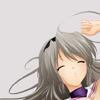
to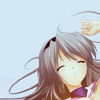
And going from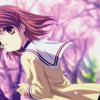
to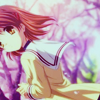
Made in Photoshop CS. Uses Selective Coloring, Color Balance and Channel Mixer, not translatable.
Okay so this two colorings were used in my Clannad batch from last post, there are no textures involved this time, buuuut there are a lot of color layers xD.
Let's start with the first icon shall we? =D
1.-Get the base ready.
2.-Duplicate it and go to Filter > Blur > Gaussian Blur. Set the radius to 1.0. Set this layer to Soft Light at 50%.
3.-Make a new Color Balance adjustment layer with these settings:
Midtones: -9 -5 +10
Shadows: -4 0 -4
4.-Make a new Selective Coloring adjustment layer with these settings:
Whites: +1 0 -31 0
Neutrals: -12 -6 0 +5
5.-Make a new layer and fill it with #DFDFDF, set it to Multiply at 10%
6.-Make a new layer and fill it with #5E0000, set it to Exclusion at 50%
7.-Make a new layer and fill it with #5E4D00, set it to Screen at 25%
8.-Make a new layer and fill it with #50005E, set it to Soft Light at 25%
9.-Make a new layer and fill it with #B2DAFF, set it to Color Burn at 34%
10.-Make a new Channel Mixer adjustment layer with these settings:
Red: +96 +8 +2 0
Greens: +2 +102 0 0
Blues: 0 -4 +108 0
11.-Duplicate your base and bring it all the way to the top, set it to Soft Light at 40&
12.-Make a new Hue/Saturation adjustment layer and set the Saturation to 5
13.-Make a new selective Coloring adjustment layer with these settings:
Yellows: 0 +23 -7 0
Cyans: +28 0 0 -26
Neutrals: -3 +2 -7 0
14.-Make a new Color Balance layer with these settings:
Midtones: +4 0 -13
15.-Make a glowy dot using a soft round brush with an orange color and just paint over the icon xD. Mine is near the neck, set it to Screen and adjust the oppacity to your liking.
Samples:

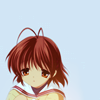

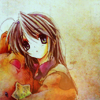

Okay first one is done, let's get on to the next~
1.-The baaaaase is reaaady lol
2.-Follow step 2 from above 8D (yeah I'm lazy to write it again xDDD)
3.-Make a new selective coloring adjustment layer with these settings:
Whites: -14 -22 +17 +10
Neutrals: -7 -7 +5 0
4.-Make a new Hue/Saturation adjustment layer and set the Saturation to 5.
5.-Make a new Color Balance adjustment layer with these settings:
Midtones: +4 -8 -20
Highlights: 0 -1 +6
6.-Make a new layer and fill it with #E2DEDF, set it to Multiply at 25%
7.-Make a new layer and fill it with #EE8AA3, set it to Exclusion at 10%
8.-Make a new layer and fill it with #4F0000, set it to Exclusion at 65%
9.-Make a new layer and fill it with #004F4C, set it to Exclusion at 15%
10.-Make a new layer and fill it with #47004F, set it to Exclusion at 10%
11.-Make a new layer and fill it with #AFFEFF, set it to Color Burn at 20%
12.-Make a new layer and fill it with #FFAFAF, set it to Soft Light at 45%
13.-Make a new Channel Mixer layer with these settings:
Reds: 106 0 -8 0
Greens: +2 +102 0 0
Blues: -8 +10 +98 0
14.-Make a new Selective Coloring adjustment layer with these settings:
Neutrals: 0 +12 +10 0
15.-Duplicate your base and drag it to the top, set it to Soft Light at 100%
16.-Now make two glowy dots with a soft round brush, one in brown and one in dark blue, set them to Screen and adjust the oppacity to your liking.
Ta-dah! All done, hope you liked them guys ♥
Samples:


•Watch for future updates? help us get to 100 watchers =3
• Affiliate?
Going from

to

And going from

to

Made in Photoshop CS. Uses Selective Coloring, Color Balance and Channel Mixer, not translatable.
Okay so this two colorings were used in my Clannad batch from last post, there are no textures involved this time, buuuut there are a lot of color layers xD.
Let's start with the first icon shall we? =D
1.-Get the base ready.
2.-Duplicate it and go to Filter > Blur > Gaussian Blur. Set the radius to 1.0. Set this layer to Soft Light at 50%.
3.-Make a new Color Balance adjustment layer with these settings:
Midtones: -9 -5 +10
Shadows: -4 0 -4
4.-Make a new Selective Coloring adjustment layer with these settings:
Whites: +1 0 -31 0
Neutrals: -12 -6 0 +5
5.-Make a new layer and fill it with #DFDFDF, set it to Multiply at 10%
6.-Make a new layer and fill it with #5E0000, set it to Exclusion at 50%
7.-Make a new layer and fill it with #5E4D00, set it to Screen at 25%
8.-Make a new layer and fill it with #50005E, set it to Soft Light at 25%
9.-Make a new layer and fill it with #B2DAFF, set it to Color Burn at 34%
10.-Make a new Channel Mixer adjustment layer with these settings:
Red: +96 +8 +2 0
Greens: +2 +102 0 0
Blues: 0 -4 +108 0
11.-Duplicate your base and bring it all the way to the top, set it to Soft Light at 40&
12.-Make a new Hue/Saturation adjustment layer and set the Saturation to 5
13.-Make a new selective Coloring adjustment layer with these settings:
Yellows: 0 +23 -7 0
Cyans: +28 0 0 -26
Neutrals: -3 +2 -7 0
14.-Make a new Color Balance layer with these settings:
Midtones: +4 0 -13
15.-Make a glowy dot using a soft round brush with an orange color and just paint over the icon xD. Mine is near the neck, set it to Screen and adjust the oppacity to your liking.
Samples:


Okay first one is done, let's get on to the next~
1.-The baaaaase is reaaady lol
2.-Follow step 2 from above 8D (yeah I'm lazy to write it again xDDD)
3.-Make a new selective coloring adjustment layer with these settings:
Whites: -14 -22 +17 +10
Neutrals: -7 -7 +5 0
4.-Make a new Hue/Saturation adjustment layer and set the Saturation to 5.
5.-Make a new Color Balance adjustment layer with these settings:
Midtones: +4 -8 -20
Highlights: 0 -1 +6
6.-Make a new layer and fill it with #E2DEDF, set it to Multiply at 25%
7.-Make a new layer and fill it with #EE8AA3, set it to Exclusion at 10%
8.-Make a new layer and fill it with #4F0000, set it to Exclusion at 65%
9.-Make a new layer and fill it with #004F4C, set it to Exclusion at 15%
10.-Make a new layer and fill it with #47004F, set it to Exclusion at 10%
11.-Make a new layer and fill it with #AFFEFF, set it to Color Burn at 20%
12.-Make a new layer and fill it with #FFAFAF, set it to Soft Light at 45%
13.-Make a new Channel Mixer layer with these settings:
Reds: 106 0 -8 0
Greens: +2 +102 0 0
Blues: -8 +10 +98 0
14.-Make a new Selective Coloring adjustment layer with these settings:
Neutrals: 0 +12 +10 0
15.-Duplicate your base and drag it to the top, set it to Soft Light at 100%
16.-Now make two glowy dots with a soft round brush, one in brown and one in dark blue, set them to Screen and adjust the oppacity to your liking.
Ta-dah! All done, hope you liked them guys ♥
Samples:


•Watch for future updates? help us get to 100 watchers =3
• Affiliate?