icon tutorial #4: diego luna
This tutorial use selective coloring and lots of layers and textures (okay.. not that many). But I really like the effect that it creates. This icon was made in Photoshop 7.
Remember that tutorials are guidelines. Every image is different and may require to you delete or alter some steps!

We are going to be using the following image from the movie Y Tu Mama Tambien. Scandalous, I know. :)
1) First, create a new 100x100 workspace and postion the image wherever you want it to be.

2) Create a new selective color layer. Please remember every image is different and you may need to alter the selective color attributes to fit your image.
REDS [-100, 0, +100, +27]
YELLOWS [0, 0, +100, +100]
WHITES [0, 0, 0, -68]
NEUTRALS [-2, 0, +10, -10]
BLACKS [0, 0, 0, +100]

3)Create a new layer and fill it with #F78E57. Set the layer to Soft Light and the opacity to 50%.

-->
4) Take the following texture, from rainharbour.net. Set this layer to Color Burn and the opacity to 50%.

-->
5) Use a swirly light brush (this one is created from me and avaliable here). I rotated this image a little bit (Using CTRL + T) and then moved it to the position I wanted. Just play around with this till it is somewhere you like. Then set the layer to Screen, keeping the opacity at 100%.

-->
6) Using a texture by withaghost (this texture is larger than 100x100), I set the layer to Darken and the opacity to 80%. Then I moved the layer around until I liked how the texture affected the underlying layers.

-->
6b) This step is not used in this icon, but may be necessary!! If you feel that the image you are working with is too dark, DUPLICATE your image layer and move it right above the last texture layer. Set the layer to either Overlay or Soft Light and play around with the opacity. Sometimes it helps to covert the layer to grayscale (hit CTRL + SHIFT + U).
7) Now go to your brushes and select a Soft Round brush, between 45-100 px. I used 65 px. From your swatches, select Pure Red (#ED1C24). Create a new layer and set it to Screen. Using the brush, put one dot anywhere in the workspace. Then using the Move tool, position the dot where it works best on the workspace. (This is usually just to the side of the main focus of the icon.)

-->
8) Next I used a texture by girlboheme and set it to Darken and kept the opacity at 100%. After I put the paperclip over the area I wanted, I took the eraser tool and erased the dark edge on the right. You'll need to play around with this layer.

-->
9) Create a new layer UNDERNEATH the paperclip layer. Take your Marquee tool and draw a box and fill it with White (#FFFFFF). Hit CTRL + T and rotate the image a bit to your liking. Then move it right under the paper clip!

10) If you feel that your icon needs a little something extra, throw in some tiny text! This brush is by ohpaintbrush.
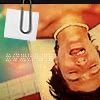
And there you have it!
Other icons made with this tutorial (+ my Cowboy Bebop icon):

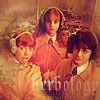

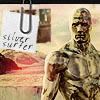
You can move around the paperclip layer, or delete it completely. Sometime you may need to lower or raise the opacities for some layers. Just play around with the layers!
Comments are greatly appreciated. :) If there is any other icon you would like to see a tutorial for just leave a comment and I'll try my best!
ps.. join cinematiclims! ;D
Remember that tutorials are guidelines. Every image is different and may require to you delete or alter some steps!

We are going to be using the following image from the movie Y Tu Mama Tambien. Scandalous, I know. :)

1) First, create a new 100x100 workspace and postion the image wherever you want it to be.

2) Create a new selective color layer. Please remember every image is different and you may need to alter the selective color attributes to fit your image.
REDS [-100, 0, +100, +27]
YELLOWS [0, 0, +100, +100]
WHITES [0, 0, 0, -68]
NEUTRALS [-2, 0, +10, -10]
BLACKS [0, 0, 0, +100]

3)Create a new layer and fill it with #F78E57. Set the layer to Soft Light and the opacity to 50%.

-->

4) Take the following texture, from rainharbour.net. Set this layer to Color Burn and the opacity to 50%.

-->

5) Use a swirly light brush (this one is created from me and avaliable here). I rotated this image a little bit (Using CTRL + T) and then moved it to the position I wanted. Just play around with this till it is somewhere you like. Then set the layer to Screen, keeping the opacity at 100%.

-->

6) Using a texture by withaghost (this texture is larger than 100x100), I set the layer to Darken and the opacity to 80%. Then I moved the layer around until I liked how the texture affected the underlying layers.

-->

6b) This step is not used in this icon, but may be necessary!! If you feel that the image you are working with is too dark, DUPLICATE your image layer and move it right above the last texture layer. Set the layer to either Overlay or Soft Light and play around with the opacity. Sometimes it helps to covert the layer to grayscale (hit CTRL + SHIFT + U).
7) Now go to your brushes and select a Soft Round brush, between 45-100 px. I used 65 px. From your swatches, select Pure Red (#ED1C24). Create a new layer and set it to Screen. Using the brush, put one dot anywhere in the workspace. Then using the Move tool, position the dot where it works best on the workspace. (This is usually just to the side of the main focus of the icon.)

-->

8) Next I used a texture by girlboheme and set it to Darken and kept the opacity at 100%. After I put the paperclip over the area I wanted, I took the eraser tool and erased the dark edge on the right. You'll need to play around with this layer.

-->

9) Create a new layer UNDERNEATH the paperclip layer. Take your Marquee tool and draw a box and fill it with White (#FFFFFF). Hit CTRL + T and rotate the image a bit to your liking. Then move it right under the paper clip!

10) If you feel that your icon needs a little something extra, throw in some tiny text! This brush is by ohpaintbrush.

And there you have it!
Other icons made with this tutorial (+ my Cowboy Bebop icon):
You can move around the paperclip layer, or delete it completely. Sometime you may need to lower or raise the opacities for some layers. Just play around with the layers!
Comments are greatly appreciated. :) If there is any other icon you would like to see a tutorial for just leave a comment and I'll try my best!
ps.. join cinematiclims! ;D