A tutorial. Woot?!
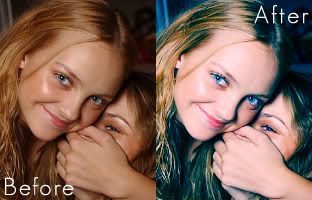
OK I finally got my but around to creating another tutorial. This one I started by playing with a different tutorials effect made by galassia and can be found here. So please go take a look at that. So on to what we are making:
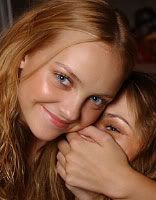
So let's get started, first I grabbed this picture off of runway_models, I cropped it down a bit and resized it.
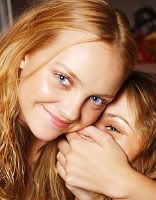
Next we need to light it, because it is a bit on the dark side. Now the first image you will see below I simply duplicated the image and set it to screen but I thought it was too brown/yellow when I did that, so instead I duplicated the first layer, and went image>adjustment>variations. I clicked cyan once and blue once to get away from the brown tones but depending on your image this may differ. After this step merge the two layers
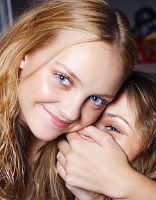
Ok next create a new layer and fill it with #005291, I set it to Exclusion at 42%.
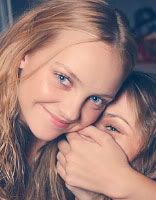
Now create another new layer and fill it with #C7EDF8, I set it to Color burn at around 81%
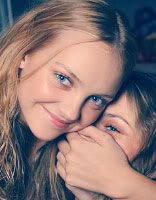
New layer, this time fill it with #F5E0F4, set it to Color burn at 52%
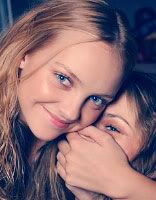
Next we are going to create a new hue/saturation adjustment layer. (Layers>New Adjustment layer>Hue/Saturation. All's we are going to do is up the saturation to about 28, you might change this later on when you get nearer to finish if something else would better suite your image.
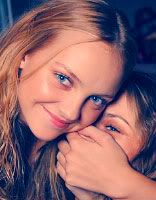
Next we are going to duplicate our merged bottom layer and bring it all the way to the top. Set the layer mode to screen and toy around with the opacity until it looks alright, I put mine at 43%
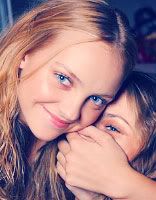
Next we are going to duplicate the screen layer we created in the previous step, keep the opacity the same but change the layer mdoe to Softlight
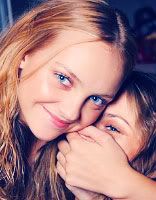
Next we are going to create a new color balance adjustment layer. (Layers>New Adjustment layer>Color Balance)
Before I tell you specifics, we want to look at our image and see what we want to highlight. For me in the shadows, I want a more of a greenish/cyan feel, in the midtones a really suddle blue/purple feel, and in the highlights I want to see a bit more blue.
Settings:
Midtones
+8 -13 +13
Highlights
+2 0 +20
Shadows
-43 +71 +23
And that get's us the final result:
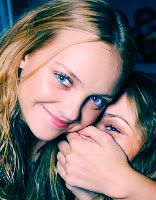
I haven't had the chance to test this out so please be aware this will definately not be the same on all images. Also, you should really try to work in colorbalance on your own, seeing if you can get the colors you want by observing your image first and deciding what they are.
Thanks so much for trying out my tut! Please please leave comments with any suggestions, questions, or your results too!
My other tutorials:


So let's get started, first I grabbed this picture off of runway_models, I cropped it down a bit and resized it.

Next we need to light it, because it is a bit on the dark side. Now the first image you will see below I simply duplicated the image and set it to screen but I thought it was too brown/yellow when I did that, so instead I duplicated the first layer, and went image>adjustment>variations. I clicked cyan once and blue once to get away from the brown tones but depending on your image this may differ. After this step merge the two layers


Ok next create a new layer and fill it with #005291, I set it to Exclusion at 42%.

Now create another new layer and fill it with #C7EDF8, I set it to Color burn at around 81%

New layer, this time fill it with #F5E0F4, set it to Color burn at 52%

Next we are going to create a new hue/saturation adjustment layer. (Layers>New Adjustment layer>Hue/Saturation. All's we are going to do is up the saturation to about 28, you might change this later on when you get nearer to finish if something else would better suite your image.

Next we are going to duplicate our merged bottom layer and bring it all the way to the top. Set the layer mode to screen and toy around with the opacity until it looks alright, I put mine at 43%

Next we are going to duplicate the screen layer we created in the previous step, keep the opacity the same but change the layer mdoe to Softlight

Next we are going to create a new color balance adjustment layer. (Layers>New Adjustment layer>Color Balance)
Before I tell you specifics, we want to look at our image and see what we want to highlight. For me in the shadows, I want a more of a greenish/cyan feel, in the midtones a really suddle blue/purple feel, and in the highlights I want to see a bit more blue.
Settings:
Midtones
+8 -13 +13
Highlights
+2 0 +20
Shadows
-43 +71 +23
And that get's us the final result:

I haven't had the chance to test this out so please be aware this will definately not be the same on all images. Also, you should really try to work in colorbalance on your own, seeing if you can get the colors you want by observing your image first and deciding what they are.
Thanks so much for trying out my tut! Please please leave comments with any suggestions, questions, or your results too!
My other tutorials:


