Tutorial #2 RukixUruha
This tut is for my lovely dovey
silver881
It's VERY simple!
Pleas note that you can get many different results if you use this tut, some of them might be good and some might be bad!
Experement as much as you can!
I got this result cause as you can see my pic was too pinkish if you have an image with too much of any other color try playing with the curves!
How to go
From: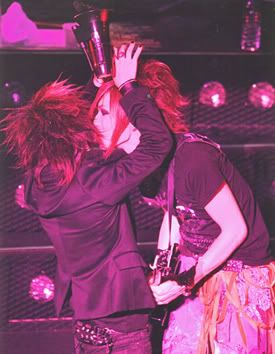
To: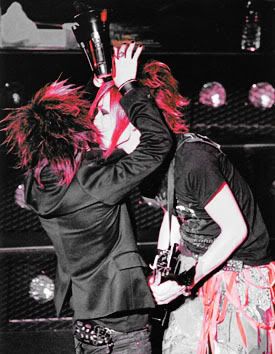
01. Corp/resize your image:

02. Duplicate the image and set it to Screen 50%, Then Duplicate again and set it to Softlight 100%

===>
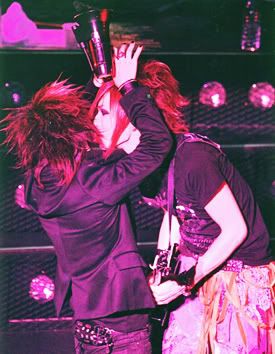
03. Go to Layer ===> New Adjustment Layer ===> Curves
RED: 2 points
-POINT 1: Input: 224 , Output: 196
-POINT2: Input: 83 , Output: 35
GREEN: 1 point
-POINT 1: Input: 61 , Output: 66
BLUE: 1 point
- POINT 1: Input: 77 , Output: 56

===>
04. Go Layer ===> New Adjustment Layer ===> Selective Color
Red: (This one is optional~ I just didn't want the red color to be too bright)
cyan: +100
magenta: 0
yellow: 0
black: 0
Neutrals:
cyan: 0
magenta: -20
yellow: 0
black: +15
Blacks:
cyan: 0
magenta: 0
yellow: 0
black: +41

===>
05. Lats step, which is the most important! all the previous steps where to prepare the image for this.
Go Layer ===> New Adjustment Layer ===> Hue/Saturation
Now in my case I just wanted the pink/red to show , so I started chooseing the colors that i didn't want and set them to saturation -100.

===>
CONGRATULATIONS! You are done~
other examples:
you could get these if you play around~
Only one cause im lazy!
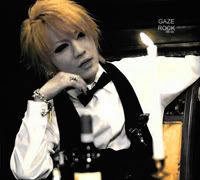
NOW show me what YOU got!
If you have any questions don't hesitate to ask! I'll help as much as i can <3
silver881
It's VERY simple!
Pleas note that you can get many different results if you use this tut, some of them might be good and some might be bad!
Experement as much as you can!
I got this result cause as you can see my pic was too pinkish if you have an image with too much of any other color try playing with the curves!
How to go
From:

To:

01. Corp/resize your image:

02. Duplicate the image and set it to Screen 50%, Then Duplicate again and set it to Softlight 100%

===>

03. Go to Layer ===> New Adjustment Layer ===> Curves
RED: 2 points
-POINT 1: Input: 224 , Output: 196
-POINT2: Input: 83 , Output: 35
GREEN: 1 point
-POINT 1: Input: 61 , Output: 66
BLUE: 1 point
- POINT 1: Input: 77 , Output: 56

===>

04. Go Layer ===> New Adjustment Layer ===> Selective Color
Red: (This one is optional~ I just didn't want the red color to be too bright)
cyan: +100
magenta: 0
yellow: 0
black: 0
Neutrals:
cyan: 0
magenta: -20
yellow: 0
black: +15
Blacks:
cyan: 0
magenta: 0
yellow: 0
black: +41

===>

05. Lats step, which is the most important! all the previous steps where to prepare the image for this.
Go Layer ===> New Adjustment Layer ===> Hue/Saturation
Now in my case I just wanted the pink/red to show , so I started chooseing the colors that i didn't want and set them to saturation -100.

===>

CONGRATULATIONS! You are done~
other examples:
you could get these if you play around~
Only one cause im lazy!

NOW show me what YOU got!
If you have any questions don't hesitate to ask! I'll help as much as i can <3