Tutorial #14: Twilight
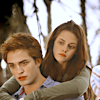
How to go from

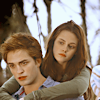
to
in PSP XI
+no selective coloring
+eight steps
+uses color layers, channel mixer, levels, and color balance
+.PSD
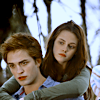
Other examples
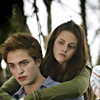
1. Prepare your base. For icons, crop to 100x100 pixels. I used the below picture from Twilight.
2. Add a new raster layer. Fill with #f4f39c, a light yellow, and set to soft light 32%.
3. Add a channel mixer layer. Use these settings:
red 125, -30, 0, 0
green -15, 115, 0, 0
blue -100, 150, 70
(If your picture has any pinks or purples that you want to keep in it, you'll need to erase those areas on this layer, as it will turn them all to red.)
4. Add a levels layer. Use these settings:
RGB 0, 128, 255
red 0, 84, 255
green 0, 105, 255
blue 0, 128, 255
I know that levels in other programs work a little differently, so basically all I did was up the reds and greens a teeny bit.
5. Add a new raster layer. Fill with #240d06, a dark brown, and set to exclusion 30%.
6. Add a color balance layer. Use the below settings:
midtones -33, 21, 21
shadows 42, 20, 12
highlights 0, 0, 31
7. Add a new color balance layer. Use the below settings:
shadows 0, 0, 23
8. Add another color balance layer. Use these settings:
highlights 11, 0, 0
(I probably could have combined steps 6, 7, and 8 into one layer, but I like to separate them so I can tell what each layer is doing more easily.)
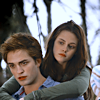
And you're done!
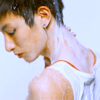
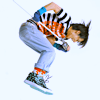
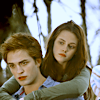
Other icons made using this coloring or similar
+comments are love
+I'd love to see what you make!
+.PSD
Join wonderplanet?
to
in PSP XI
+no selective coloring
+eight steps
+uses color layers, channel mixer, levels, and color balance
+.PSD
Other examples
1. Prepare your base. For icons, crop to 100x100 pixels. I used the below picture from Twilight.
2. Add a new raster layer. Fill with #f4f39c, a light yellow, and set to soft light 32%.
3. Add a channel mixer layer. Use these settings:
red 125, -30, 0, 0
green -15, 115, 0, 0
blue -100, 150, 70
(If your picture has any pinks or purples that you want to keep in it, you'll need to erase those areas on this layer, as it will turn them all to red.)
4. Add a levels layer. Use these settings:
RGB 0, 128, 255
red 0, 84, 255
green 0, 105, 255
blue 0, 128, 255
I know that levels in other programs work a little differently, so basically all I did was up the reds and greens a teeny bit.
5. Add a new raster layer. Fill with #240d06, a dark brown, and set to exclusion 30%.
6. Add a color balance layer. Use the below settings:
midtones -33, 21, 21
shadows 42, 20, 12
highlights 0, 0, 31
7. Add a new color balance layer. Use the below settings:
shadows 0, 0, 23
8. Add another color balance layer. Use these settings:
highlights 11, 0, 0
(I probably could have combined steps 6, 7, and 8 into one layer, but I like to separate them so I can tell what each layer is doing more easily.)
And you're done!
Other icons made using this coloring or similar
+comments are love
+I'd love to see what you make!
+.PSD
Join wonderplanet?