☆ COLORING TUTORIAL #5
It should be translatable, with all the colour layers and blending mode. :)
.about
Bright, natural tone. Results may vary so you can make adjustments. I've tried to use colour layers, so this whole tutorial has mostly those. :D
from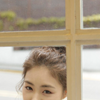
to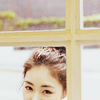
STEP 1 Crop your base. Here's mine, Lee Yeon Hee picture from Soompi.

STEP 2 Duplicate image (CTRL+J), set to SCREEN at OPACITY 75%, to lighten the dull image. Duplicate the image again, this time set it to SOFT LIGHT at OPACITY 100% to give it a more constrast look. And duplicate the image another time and set to SOFT LIGHT at OPACITY 75% for extra contrast. This step depends on the image you use, so you will have to readjust to suit it.

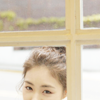
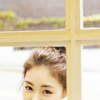
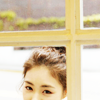
normal -> screen 75% -> soft light 100% -> soft light 75%
STEP 3 Layer -> New Fill Layer -> Solid Color
You will notice that it'll take a part of the red away, and fill it in place with a slight blue-green colour.
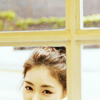
Fill #290404 (dark maroon), set blending mode to DIFFERENCE at OPACITY 20%
STEP 4 Layer -> New Fill Layer -> Solid Color
Setting this layer to soft light will give this image a bright tint of purple.
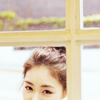
Fill #cb98d8 (light violet), set blending mode to SOFT LIGHT at OPACITY 60%
STEP 5 Layer -> New Fill Layer -> Solid Color
It'll give off a dull blue-ish look in most of the white-colored areas. It really looks dull right now, but we'll make admendments later.
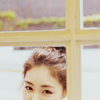
Fill #261c26 (dark violet), set blending mode to LUMINOSITY at OPACITY 10%
STEP 6 Layer -> New Fill Layer -> Solid Color
This layer lightens the darker shades of the image, for example, the hair.
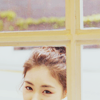
Fill #e6e6e6 (light gray), set blending mode to LUMINOSITY at OPACITY 10%
STEP 7 Layer -> Layer -> New Fill Layer -> Solid Color
This colour layer will return a little yellow-ish colour back to the image.
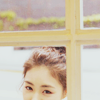
Fill #c5c29f (light grayish yellow), set blending mode to SOFT LIGHT at OPACITY 15%
STEP 8 Duplicate your cropped base and drag it to the very top. Desaturate it (SHIFT+CTRL+U) and set blending mode to SOFT LIGHT at OPACITY 75%. It'll reduce a part of the dullness and give more contrast to it, and give off the soft look at the same time.
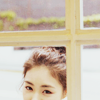
STEP 9 I've created a new layer and stamped all images together (SHIFT+CTRL+ALT+E). This is similar to merging all layers. Then, I've done some sharping work on the image (eg, hair) with the Sharp Tool, or you can sharpen it by going to the Filter menu->Sharpen->Sharpen, depending on how sharpened you want your image to look.

STEP 10 You will have to adjust all layers' opacities according to your preference and the image itself. For another example below, I've used a texture from a set I haven't yet posted. I then set it to screen.


FIN.
Other examples :



More examples :
example by ritsuka182

comment; very much appreciated! Results from this tutorial are more than welcome!

credit; wildsheepz is most appreciated, please read terms of usage

rule; no claiming / no redistribution of tutorials or links

download; available at request, the tutorial isn't that hard though.

updates; feel free to friend me
.about
Bright, natural tone. Results may vary so you can make adjustments. I've tried to use colour layers, so this whole tutorial has mostly those. :D
from

to

STEP 1 Crop your base. Here's mine, Lee Yeon Hee picture from Soompi.

STEP 2 Duplicate image (CTRL+J), set to SCREEN at OPACITY 75%, to lighten the dull image. Duplicate the image again, this time set it to SOFT LIGHT at OPACITY 100% to give it a more constrast look. And duplicate the image another time and set to SOFT LIGHT at OPACITY 75% for extra contrast. This step depends on the image you use, so you will have to readjust to suit it.


normal -> screen 75% -> soft light 100% -> soft light 75%
STEP 3 Layer -> New Fill Layer -> Solid Color
You will notice that it'll take a part of the red away, and fill it in place with a slight blue-green colour.

Fill #290404 (dark maroon), set blending mode to DIFFERENCE at OPACITY 20%
STEP 4 Layer -> New Fill Layer -> Solid Color
Setting this layer to soft light will give this image a bright tint of purple.

Fill #cb98d8 (light violet), set blending mode to SOFT LIGHT at OPACITY 60%
STEP 5 Layer -> New Fill Layer -> Solid Color
It'll give off a dull blue-ish look in most of the white-colored areas. It really looks dull right now, but we'll make admendments later.

Fill #261c26 (dark violet), set blending mode to LUMINOSITY at OPACITY 10%
STEP 6 Layer -> New Fill Layer -> Solid Color
This layer lightens the darker shades of the image, for example, the hair.

Fill #e6e6e6 (light gray), set blending mode to LUMINOSITY at OPACITY 10%
STEP 7 Layer -> Layer -> New Fill Layer -> Solid Color
This colour layer will return a little yellow-ish colour back to the image.

Fill #c5c29f (light grayish yellow), set blending mode to SOFT LIGHT at OPACITY 15%
STEP 8 Duplicate your cropped base and drag it to the very top. Desaturate it (SHIFT+CTRL+U) and set blending mode to SOFT LIGHT at OPACITY 75%. It'll reduce a part of the dullness and give more contrast to it, and give off the soft look at the same time.

STEP 9 I've created a new layer and stamped all images together (SHIFT+CTRL+ALT+E). This is similar to merging all layers. Then, I've done some sharping work on the image (eg, hair) with the Sharp Tool, or you can sharpen it by going to the Filter menu->Sharpen->Sharpen, depending on how sharpened you want your image to look.

STEP 10 You will have to adjust all layers' opacities according to your preference and the image itself. For another example below, I've used a texture from a set I haven't yet posted. I then set it to screen.


FIN.
Other examples :


More examples :
example by ritsuka182

comment; very much appreciated! Results from this tutorial are more than welcome!

credit; wildsheepz is most appreciated, please read terms of usage

rule; no claiming / no redistribution of tutorials or links

download; available at request, the tutorial isn't that hard though.

updates; feel free to friend me