Tutorial #8
This is a tutorial of Panic! At The Disco -- I'm leaving the "!" in because I like it =) --
From this:
To this: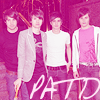
Program: Adobe Photoshop CS4
Translatable: Yes!
Steps: 5-6
Step #1
Find a picture and resize, crop, etc. DO NOT sharpen it yet!
I used this picture from here and cropped it to 100x100.

Step #2
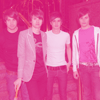
Create a new fill layer, Layer> New Fill Layer> Solid Color.
Fill it with #d01470 or a magenta color.
Set this layer to SCREEN, opacity 100%.
Step #3
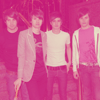
Create a new fill layer, Layer> New Fill Layer> Solid Color.
Fill it with #120331 or a dark navy blue.
Set this layer to EXCLUSION, opacity 100%.
Step #4
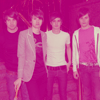
Create a new fill layer, Layer> New Fill Layer> Solid Color.
Fill it with #b3d6f3 or a sky blue.
Set this layer to COLOR BURN, opacity 100%.
Step #5
Duplicate your base layer (ctrl-j) and drag it to the top.
Set this layer to SCREEN, opacity 100%.
Now, sharpen you SCREEN layer once, Filter> Sharpen> Sharpen.
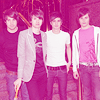
Step #6 (Optional)
I added some text to mine. You don't have to, but if you do...
I used font "Avant Que...", size 6pt, #ffe7f6.

And you're done! Please comment if you liked this tutorial, I'd really appreciate it!
Thanks! =)
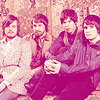
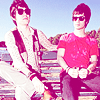
Other Examples:

From this:
To this:
Program: Adobe Photoshop CS4
Translatable: Yes!
Steps: 5-6
Step #1
Find a picture and resize, crop, etc. DO NOT sharpen it yet!
I used this picture from here and cropped it to 100x100.
Step #2
Create a new fill layer, Layer> New Fill Layer> Solid Color.
Fill it with #d01470 or a magenta color.
Set this layer to SCREEN, opacity 100%.
Step #3
Create a new fill layer, Layer> New Fill Layer> Solid Color.
Fill it with #120331 or a dark navy blue.
Set this layer to EXCLUSION, opacity 100%.
Step #4
Create a new fill layer, Layer> New Fill Layer> Solid Color.
Fill it with #b3d6f3 or a sky blue.
Set this layer to COLOR BURN, opacity 100%.
Step #5
Duplicate your base layer (ctrl-j) and drag it to the top.
Set this layer to SCREEN, opacity 100%.
Now, sharpen you SCREEN layer once, Filter> Sharpen> Sharpen.
Step #6 (Optional)
I added some text to mine. You don't have to, but if you do...
I used font "Avant Que...", size 6pt, #ffe7f6.
And you're done! Please comment if you liked this tutorial, I'd really appreciate it!
Thanks! =)
Other Examples: