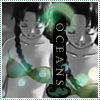
Icon Tutorial No. 2: Tenten
Tutorial based off of my First Place win at Week 34 win at

kunoichi_stills. 10 steps, pretty icon ^__^
Level: Easy
Program: Adobe Photoshop 7.0 (may be tranferrable)
Go from this to

1. Start with this image of Tenten. We're going to have to crop it twice, both at 96x96 px, so open a blank document at that size so you can shift the images easier.
(Helpful Hint No. 1: Preset your measurements (Where Can I Do This?)
Now crop the image so you have one of Tenten where her torso is mostly showing...
You should have something like this:

Copy this image onto the blank document (CTRL A>>CTRL C>>CTRL V) and click undo so you can crop again.
... and another where the focus is on her face.
You should have something like this:

Copy this image onto the blank document also.
Once both pictures are on the blank document, shift the facial-focus one to the right so that the spaces are about equal, with more on the body/torso side.
You should have something like this:

2. Sharpen the facial-focus picture (FILTER>>SHARPEN>>SHARPEN).
You should have something like this:

3. Use the "Shape" tool and make a slim rectangle in #000000 between the two pictures.
You should have something like this:

4. Next step includes selecting Tenten's bikini so that's the only color that shows after we desaturize the icon. Use the magic wand tool and zoom in so you can see the lines better. If you keep getting a part of her skin or the background, remember that it's OK--you can later erase it. (Use This)
(Helpful Hint No. 2: Remember that when selecting, the magic wand tool only focuses on one layer. Thus, if you try to grab pieces of torso-Tenten while being selected on facial-Tenten, you won't be able to pick anything up.)
Once you've selected all the color on one side, copy the selected part and paste it (CTRL C>>CTRLV). This automatically creates a new layer, so you should now have two layers of bikini. Erase any parts you don't want, then add a new layer BELOW the two you just made (of the bikini) and fill it in with #000000. (You Should See) Set the black layer to HUE at 100% opacity.
You should have something like this:

5. Light texture time! Use these (1, 2) textures by Ianthinae and paste them on top (CTRL A>>CTRL C>>CTRL V, respectively). Erase part of the first texture so it's not blocking Tenten's eye; move the second to the right so only a bit of it shows. (You Should See) Set both of these layers to SCREEN at 100% opacity.
You should have something like this:

6. Text now! Rotate your icon counterclockwise (IMAGE>>ROTATE CANVAS>>90 CCW) and type in the letter O in Carpenter ICG in #5CA888 and 48 pt. Change the Blending Options so it has OUTER GLOW.
You should have something like this:

7. Now add the word "O C E A N S" (with a space between each letter) in Felix Tilting in #FDFBF0 and 10 pt. Move it so the O is slightly overlapping the previous O. Change the Blending Options so it has 2 pt STROKE in #000000.
You should have something like this:

8. Add this brush by BigRockShow in #5CA888 and change the Blending Options so it has 2 pt STROKE in #000000. You may need to move this layer beneathe the "O C E A N S" one if it's covering too much text.
You should have something like this:

9. Rotate your icon back to its original stage (IMAGE>>ROTATE CANVAS>>90 CW)
You should have something like this:

10. Save the image now, preferably as a png. and open a blank 100x100 document. Open your just saved icon and paste it onto the blank document (CTRL A>>CTRL C>>CTRL V). Now add this dotted border brush by me in #5CA888. Viola! All done!
Your finished product should look like this:

_________
Was this tutorial helpful? Confusing? Too hard? Feedback would be wonderful!
[x] Like what you see? FRIEND wicked_avis to stay updated on fresh tutorials, icons, textures, and more!