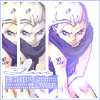
Icon Tutorial No. 6: Ino
Another Naruto tutorial, also requested by 
moonnkeh. As always, 10 steps for a nice icon. Enjoy!
Level: Easy
Program: Adobe Photoshop 7.0
Go from this to this:
1. Start with this picture of Ino and crop it at 96x96 px so there's a large space next to her.
(Helpful Hint No. 1: Preset your measurements (Where Can I Do This?))
You should see something like this:
2. Duplicate the layer (CTRL A>>CTRL C>>CTRL V) and sharpen the layer (FILTER>>SHARPEN>>SHARPEN). Set this layer to 30% opacity.
You should see something like this:
3. Use the rectangle marquee tool (top left on toolbar) and select Ino's face and body (use unsharpened layer because sharpened layer is too grainy). Copy the layer and paste it onto to the top (CTRL C>>CTRL V). Repeat this step, except this time only select half of Ino's face.
You should see something like this:
4. Use the rectangle tool and make two thing slivers dividing each layer in #FFFFFF.
You should see something like this:
5. Use this edited (I changed the coloring so the light is blue) light texture by
myrasis and set it on top at SCREEN, 100%.
You should see something like this:
6. Use the rectangle tool and completely cover the middle Ino in #FFFFFF. Set this layer to HUE at 50% opacity.
You should see something like this:
7. Using the rectangle tool, make a rectangle on the side in #A0A9FF. Set this rectangle to 85% opacity.
You should see something like this:
8. Type in the words 'fighting' and 'flower' separately in #FFFFFF, 5pt Felix Tilting, and move it onto the rectangle. You typed the words separately so you can move the words more easily. Then type the word 'Ino' in Carpenter ICG in #A0A9FF then changing blending options so there's a 2 pt #FFFFFF stroke.
You should see something like this:
9. Add some tiny text in #FFFFFF around the words. Save the document as a .png and close it.
You should see something like this:
10. Open a new 100x100 document and open your just saved icon. Then use this brush by moi and add a border in #A0A9FF. Paste on your icon (it'll be perfectly centered so don't move it!) and viola! All done!
Your finished icon should look like this:
_________
Was this tutorial helpful? Confusing? Too hard? Feedback would be wonderful!
[x] Like what you see? FRIEND
wicked_avis to stay updated on fresh tutorials, icons, textures, and more!

moonnkeh. As always, 10 steps for a nice icon. Enjoy!
Level: Easy
Program: Adobe Photoshop 7.0
Go from this to this:

1. Start with this picture of Ino and crop it at 96x96 px so there's a large space next to her.
(Helpful Hint No. 1: Preset your measurements (Where Can I Do This?))
You should see something like this:

2. Duplicate the layer (CTRL A>>CTRL C>>CTRL V) and sharpen the layer (FILTER>>SHARPEN>>SHARPEN). Set this layer to 30% opacity.
You should see something like this:

3. Use the rectangle marquee tool (top left on toolbar) and select Ino's face and body (use unsharpened layer because sharpened layer is too grainy). Copy the layer and paste it onto to the top (CTRL C>>CTRL V). Repeat this step, except this time only select half of Ino's face.
You should see something like this:

4. Use the rectangle tool and make two thing slivers dividing each layer in #FFFFFF.
You should see something like this:

5. Use this edited (I changed the coloring so the light is blue) light texture by

myrasis and set it on top at SCREEN, 100%.
You should see something like this:

6. Use the rectangle tool and completely cover the middle Ino in #FFFFFF. Set this layer to HUE at 50% opacity.
You should see something like this:

7. Using the rectangle tool, make a rectangle on the side in #A0A9FF. Set this rectangle to 85% opacity.
You should see something like this:

8. Type in the words 'fighting' and 'flower' separately in #FFFFFF, 5pt Felix Tilting, and move it onto the rectangle. You typed the words separately so you can move the words more easily. Then type the word 'Ino' in Carpenter ICG in #A0A9FF then changing blending options so there's a 2 pt #FFFFFF stroke.
You should see something like this:

9. Add some tiny text in #FFFFFF around the words. Save the document as a .png and close it.
You should see something like this:

10. Open a new 100x100 document and open your just saved icon. Then use this brush by moi and add a border in #A0A9FF. Paste on your icon (it'll be perfectly centered so don't move it!) and viola! All done!
Your finished icon should look like this:

_________
Was this tutorial helpful? Confusing? Too hard? Feedback would be wonderful!
[x] Like what you see? FRIEND

wicked_avis to stay updated on fresh tutorials, icons, textures, and more!