2 Photoshop CS2 Tutorials
As always, both for Photoshop CS2.
Tutorial requested by wickedgirl23.
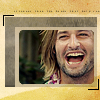
First I took this image from an imagepack from radon_ and after making the image into a layer, (right click layer>layer from background) selected around the middle section with the magic wand tool.
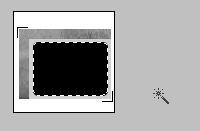
Delete it. I cleaned up the little black bits with a layer mask.
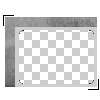
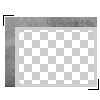
=
Now for the image. I took this picture and cropped it like this.

I did the autos (colour, contrast, levels) and I sharpened it. The sharpening was a bit harsh so I faded that, and I also faded the auto colour because it made it too blue.

Now, I c&p'ed the base image to the frame image underneath the layer.

Next I used this texture by ashke_icons set to Multiply 100%. (it's the same texture I used on the original too)
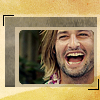
Added a tiny text brush by ? and I'm done.


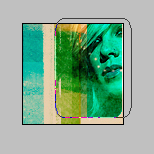
I took this picture and cropped it like this and sharpened it.

Next I took this this textures by colortone and set it to hard light 100%.

Next I applied a layer mask to the texture and then took the custom tool set to the rounded corner rectangle, and filled it with black.
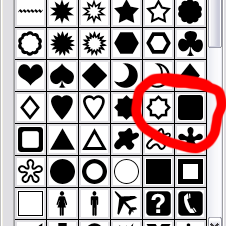
then delete the path by right clicking on the path and selecting "delete path"

Then I applied a gradient map (#ffffff to #e90d87) adjustment layer.

I thought it was too pale, so I duplicated the base, dragged it to the top and set it to Soft Light 100%

Then I added some text. "p!nk" in #fcdeef, Marcelle Script.

Optional, but I added a stroke to the text in 2px, #e7388b.

DO NOT COPY EXACTLY
Tutorial requested by wickedgirl23.
First I took this image from an imagepack from radon_ and after making the image into a layer, (right click layer>layer from background) selected around the middle section with the magic wand tool.
Delete it. I cleaned up the little black bits with a layer mask.
=
Now for the image. I took this picture and cropped it like this.
I did the autos (colour, contrast, levels) and I sharpened it. The sharpening was a bit harsh so I faded that, and I also faded the auto colour because it made it too blue.
Now, I c&p'ed the base image to the frame image underneath the layer.
Next I used this texture by ashke_icons set to Multiply 100%. (it's the same texture I used on the original too)
Added a tiny text brush by ? and I'm done.
I took this picture and cropped it like this and sharpened it.
Next I took this this textures by colortone and set it to hard light 100%.
Next I applied a layer mask to the texture and then took the custom tool set to the rounded corner rectangle, and filled it with black.
then delete the path by right clicking on the path and selecting "delete path"
Then I applied a gradient map (#ffffff to #e90d87) adjustment layer.
I thought it was too pale, so I duplicated the base, dragged it to the top and set it to Soft Light 100%
Then I added some text. "p!nk" in #fcdeef, Marcelle Script.
Optional, but I added a stroke to the text in 2px, #e7388b.
DO NOT COPY EXACTLY