Paper Bag Floors - A Tutorial
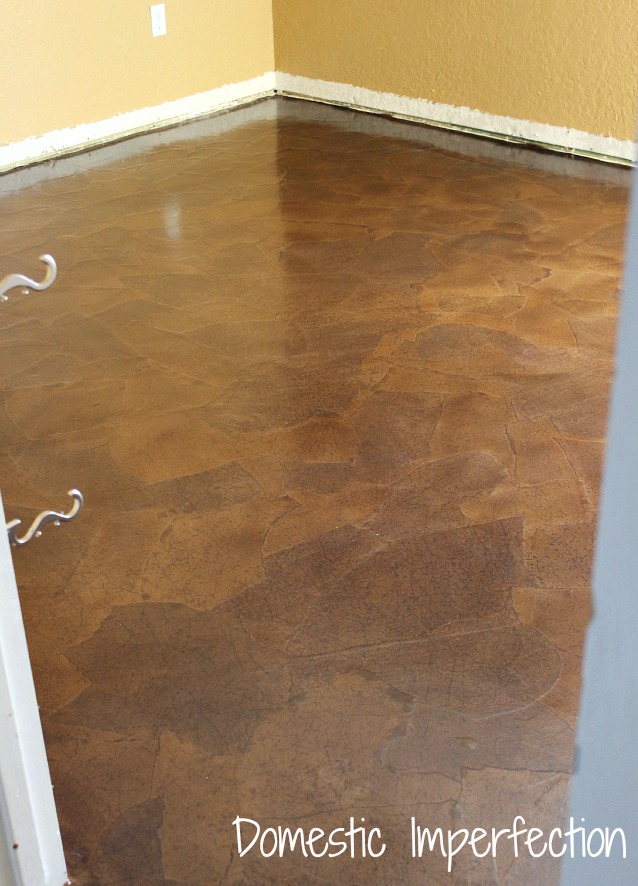
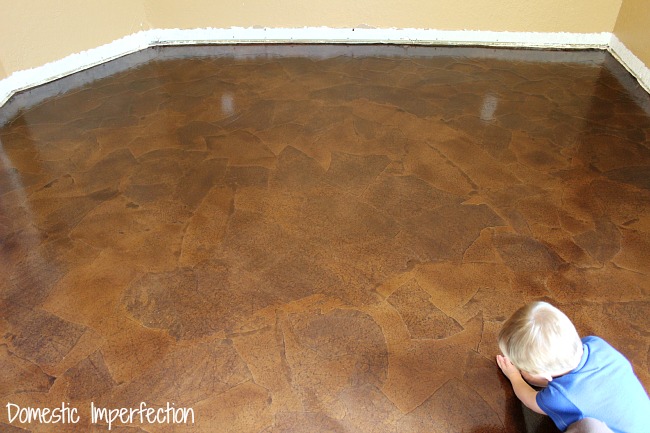
Those of you that are looking for an affordable, attractive, totally doable flooring solution have come to the right place! You may remember in January I posted my plans for remodeling the boy’s room. I mentioned in that post that I wanted to do paper flooring, mostly because it was cheap and I thought it looked great. But mostly because it was cheap. My boys room is about 10 x 12 and I did the whole thing for about $80, but I have enough supplies left over that the next room will cost about $30. Most of you are probably wondering what the heck paper on a floor looks like and I don’t blame you, it’s kind of a weird idea. Here is what the finished product looks like…
The tutorial I used can be found over here at Lovely Crafty Home. She did a great job and it is full of useful information both in the post and the comments. The difference here is that I did mine on a concrete subfloor while she did hers on plywood. People have not been having success on concrete floors, but I went ahead and tried anyway. So here is the tutorial…well, part tutorial and part anti-tutorial (just like most of my projects). I thought I had completely ruined it halfway through and was going to have to live with hideous floors or start over, but I managed to save it. Hopefully I can keep you from making the same mistake!
Before we get started with the tutorial/story, let me give you a materials list. You will need… (these are links)
- A roll of brown paper. I bought this “builders paper” from Home Depot (cause I didn’t plan ahead), but most people recommend this Kraft paper from Amazon
- A gallon of Elmers glue
- Oil based stain (I used one quart for a 10 X 12 room). I used this one by Minwax, in “provincial”
- Water based floor polyurethane, I used this one by Rust Oleum
- Something to apply the stain and polyurethane, I used a 9′ Shur-Line “deck pad” and “mopped” it on
If you are doing this on a wood floor then that is all you need, if you are doing this on concrete than you may also need…
- a small amount of concrete to patch holes from carpet tacks
- a pole sander and sandpaper
The first thing I did was empty the boy’s room and rip out all the trim. (We were planning on replacing the trim anyway, but even if you aren’t I would remove it and then replace it when the floor is complete, that would be much easier than trying to work around it.) I wasn’t planning on starting the renovation that day, I just got a wild hair and started moving furniture and tearing stuff apart. Elijah got in on the fun, he actually removed most of the trim after I showed him how. How cool is that? His future wife is going to sing my praises, I’m sure of it.
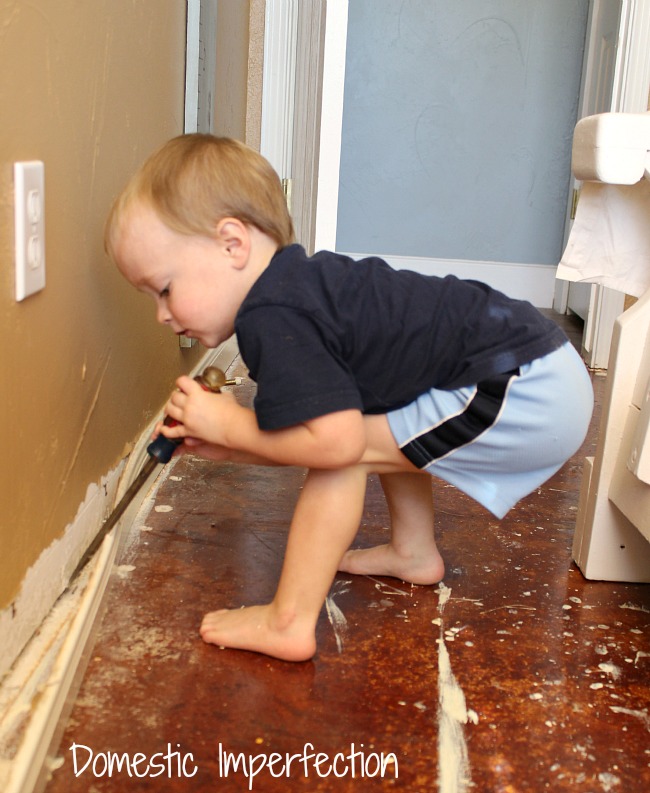
Adam is going to flip when he sees that picture, he’s a total stickler about shoes (and I’m not at all). So as Elijah and I were in the process of rebelliously barefoot DIYing when Adam happened to call and ask how our day was going. I was like “umm great…Elijah and I have emptied his room and started ripping out trim, and in the process completely destroyed the house. Then Adam paused and said…
Next we prepped the floors. First I mixed up some concrete and patched the holes left from the carpet tacks.

Then I (well, Adam) took a pole sander and sanded the concrete floors.

I’m not sure this was necessary, but our floors were previously polished and I was worried that they would be too “slick” to hold the paper on properly. Plus the floor had a ton of previous concrete patches and impossible to remove paint splotches and I wanted to even those out a little. After you do this (and even if you don’t) make sure to clean the floors thoroughly and let them dry before you start.
Then we started ripping the paper. What you want to do is rip the paper into natural looking pieces, kinda like stones. Mine were about 12 inches or so in diameter. Don’t cut them, just rip…they don’t have to be perfect or even close.

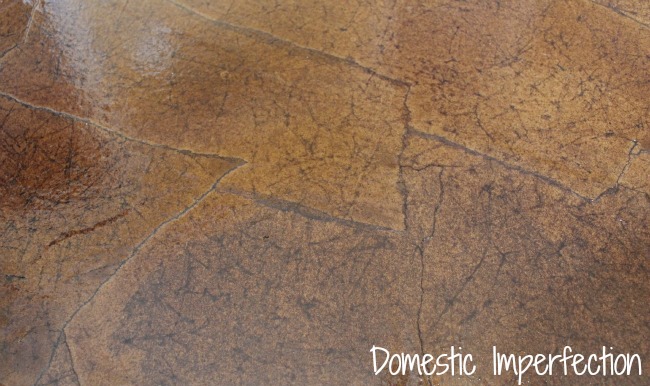
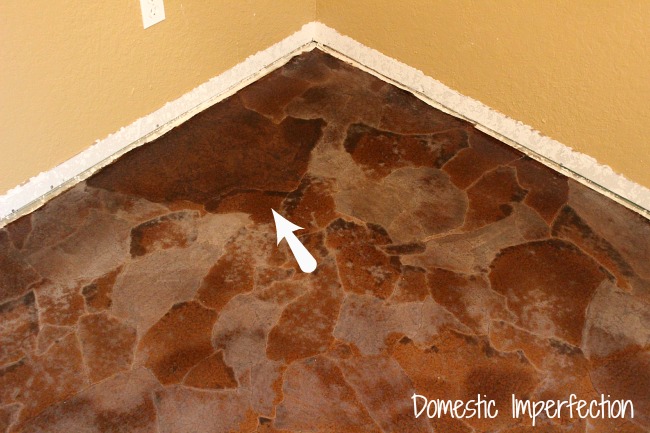
We learned later and what I would recommend doing is after you rip a piece, ball it up and wrinkle the crud out of it, then flatten it out and move onto the next piece. You want to wrinkle them so that when you add stain the wrinkles will show through and give it that awesome textured “old leather” look, like this…
Then you are ready to mix your glue. For my floors I did 50% water and 50% Elmers gluemixture. If you are doing this on a wood floor then I think a 3 to 1 water and glue ratio is the one you want. Don’t mix all your glue at once, gluing the paper to the floor will take longer than you think and you don’t want it to dry out.
And so, we began gluing.

I really thought in my head that I would be able to slap these puppies down and be done in a night. Truth is it took Adam and I five nights of both of us working to be complete. We just chatted, watched Netflix on the laptop, and had a jolly good time. That might be exaggerating a bit, mostly I just scolded him every five minutes for trying to glue a straight edge piece in the middle of the floor. He loved that, as you can imagine, but after the first twelve or so times I started to get responses like this…
Umm…maybe. They weren’t dirty yet…at least not enough to justify adding more clothes to the dirty laundry pile. Back me up here. (If you are not getting these “Hey Girl” photos then you will want to check out this post).
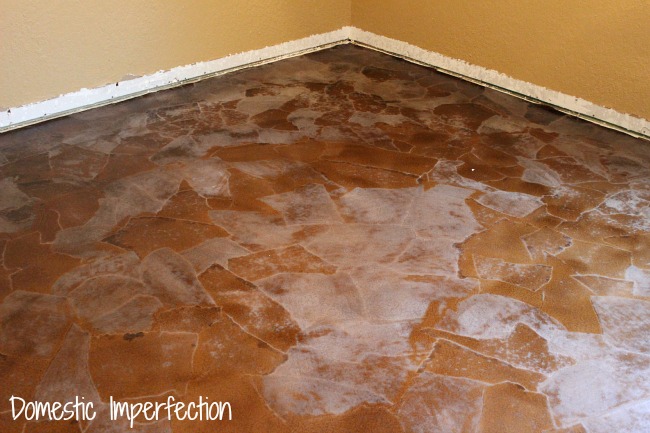
The easiest way I found to apply that paper is like so: Take your piece of paper and hold it over the bowl. Use your hands to scoop up some glue and spread it evenly over both sides. Then lay your paper down on the floor and smooth flat, working from the inside out to remove any bubbles. Keep in mind that the paper will shrink as it dries, so give each piece a decent amount of overlap.


You could leave your floor this “natural” color if you want and skip the whole staining process, but I think the stain looks great and really gives it depth and character. Plus staining is the quickest part of this whole process (if you do it correctly). I applied the stainwith with a “mop”, actually I used this by Shur Line. It worked great and went on really quickly ..I snuck this in while my kids were busy watching an episode of Dinosaur Train (so less than 30 minutes).

Make sure and “feather” the stain so that you don’t end up with any lines, it will dry just like you put it on. Also be aware that you will get a little bleed under the edges of the paper, like this…

I’m honestly not sure how you would avoid this, you are just going to have to embrace the imperfection.
After I had finished staining I let it sit for two days before I added the first coat of poly, and even then it was slightly tacky. I added the polyurethane the same way I added the stain, but I was extra careful to make it a thin coat…at least I thought. When it was dried I came back and it looked like this…
About 50% of it had dried white. Crap. I wasn’t sure what to do. I didn’t know this when I started, but the “builders paper” that I used has two sides and they look different after they are on the floor. It looked as though the poly had dried white only on one side of the paper. I tried to sand it off on places, but that wasn’t working so I did something that I was sure was going to be a terrible idea…I stained over the poly.
It worked, and you couldn’t see where it used to be white and where it didn’t. So I “mopped” stain over the whole floor again and let it dry for FOUR days this time. Even after four days it was still tacky and I couldn’t step on it to re-poly. So this time I worked backwards…I started at the doorway and added a THIN layer with a small foam brush (by hand), let it dry, and then stepped on that to do the next section. I was terrified that after all that work it would dry white again, but it didn’t, not even a little. Phew.
After that I added about ten more layers of poly with the mop. This didn’t take as long as you would think, It only needed to dry about an hour between coats and took about 20-30 minutes each coat. As an added bonus, the water based poly has almost no smell at all, so your not going to need to air out your house or feel lightheaded while doing this. Now, you should let the final coat cure for about a week before you put anything on it, but I was so antsy to get the kids out of my bedroom that we put everything back the next day. We did get a few scratches, but I just added some poly over them and it looks fine. It looks better than fine actually, it looks freakin awesome.

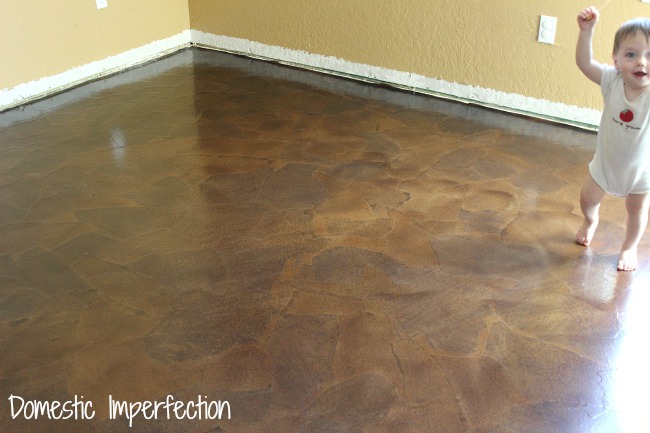

So there you have it. It’s a bit shinier than I would have liked, but I do think it has dulled down a bit since I took these photos (about two weeks ago.) If you have any questions feel free to leave it in a comment below and I will do my best to answer you, or you could visit the brown paper flooring FAQ page over at An Oregon Cottage.
http://www.domesticimperfection.com/2013/03/paper-bag-floors-a-tutorial/