[PS/PSP] The Killer Eye Tutorial - Parts 1 & 2
Normally, I don't like writing tutorials because I end up over-explaining everything into a muddled mess. So of course, caveat emptor to the poor suckers that attempt to follow this, which is only my adapation of a deleted tutorial. If something doesn't make sense, PLEASE just try to play around first, because I'm really not a very nice person when it comes to stupid questions. And feel free to show off your results! ^_~
Killer Eye Tutorial - PART 1
How to make dazzling eyes
Going from this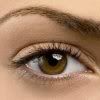
to this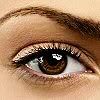
or this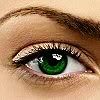
Tutorial Key
BOTH Users = black font
Photoshop Users = blue font
PaintShop Pro Users = red font
Before You Start...
If you start with a bigger or higher quality base, this will make it infinitely easier on you. If the light reflection on the eye is NOT covering the pupil, this will be infinitely easier as well. Darker-coloured/black eyes can be tricky, but you can always re-colour a lighter eye into something you like better. Blue, gray, and hazel eyes will always have the most dramatic difference, but I will show you how it looks with even a simple brown eye.
1. I grabbed this image from Getty and mirrored it and used the Cloning Tool
to get rid of the stamp (not shown).
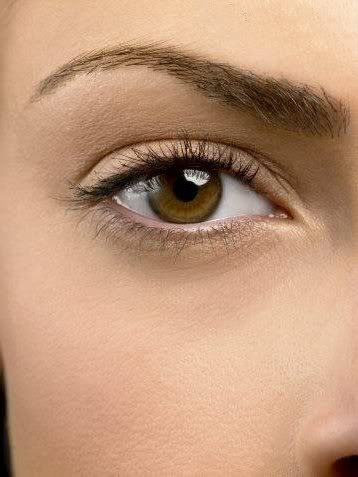
2. Now crop the eye squarely (keeping the box Maintain Aspect Ratio checked is helpful). Smart Resize it to down to 100x100 (or smaller, if you know you'll be shrinking it further later). This will be your BASE.

3. BASE - Sharpen once. Then...
----PhotoShop Users - Fade Sharpen 70%
----PaintShop Pro Users - Sharpness >> Unsharpen Mask (Radius: 2.00, Strength: 30, Clipping: 5)
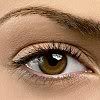
4. [OPTIONAL STEP - Re-colouring the eye. If you aren't changing the colour, skip to Step #6.]
NEW LAYER - Create a New Layer. Now this part might be a little tricky. The object is to select the iris only, since that's where the colour's going; the pupil must stay black. Also, if there's a reflective bit (the white spot), that needs to remain white also.
--Using the Freehand Selection (aka. Lasso)
works best, although I'm lazy and like using the Selection Tool
with circle selection type. Most likely, you will end up needing to erase bits and pieces anyway.
--Now pick a colour you like (for me, medium to darker works better) and Flood Fill
the selected area. For this example, I used #008000. Set the layer to "Hue" opacity 100%. (I also like Hue (Legacy), if the color's a bit too strong or weird-looking.)
Flood-Filled LayerSet to HueSet to Hue(Legacy)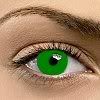
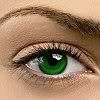
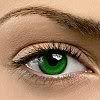
5. MERGE ALL LAYERS.
6. BASE - Zoom in 400%. (Or more, if you need to. 800% is easier for me.) :P
7. BASE - Set your Dodge Tool
to these settings: Size 3-5 Soft; Range: Highlights; Exposure 23%. Use only on the inner iris.
NormalHueHue(Legacy)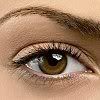
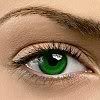
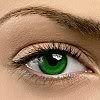
8. BASE - Select the Burn Tool
and change your settings to these: Size 3-5 Soft; Range: Shadows, Exposure 20%. Only use the Burn Tool on the outer edges of the iris to make the eye stand out.
NormalHueHue(Legacy)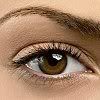
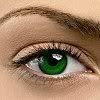
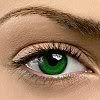
9. BASE - Now grab your Sharpen Tool
and change the settings to these: Strength: 40-50%; Soft Brush. First, use it on the little white reflective gleam in the eye. Then, you can sharpen the rest of the iris and a little bit of the eyelid. (Trust me, it'll look funky if you don't do a quick light swipe across the eyelid and only the eyelid.)
NormalHueHue(Legacy)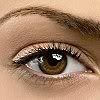
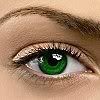
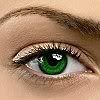
10. Duplicate the layer, then set it to Soft Light 100%.
NormalHueHue(Legacy)
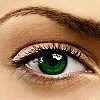

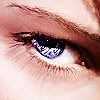
OTHER EXAMPLES
using this technique
Before
After (Re-Colour)
Before
After
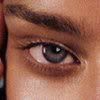
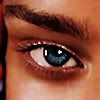
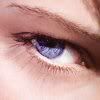
Before
After
Before
After


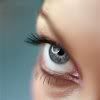
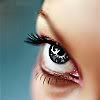
Killer Eye Tutorial - PART 2
More than meets just the eyes
Going from this
to this
Tutorial Key
BOTH Users = black font
Photoshop Users = blue font
PaintShop Pro Users = red font
1. Again, I just quickly grabbed a pic from Getty, so we'll see together if this works or not. ^_~ And once more, I mirrored the picture and used the Cloning Tool
to stamp out the tag.
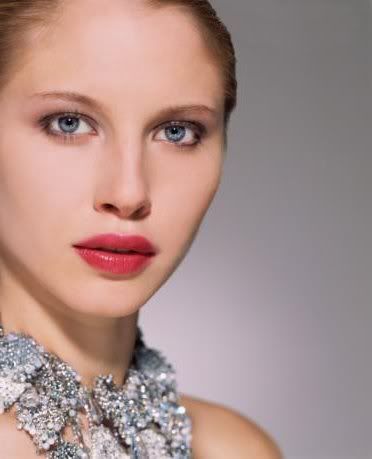
2. Crop her squarely and Smart Resize it to down to 100x100. This will be your BASE.

3. BASE - Sharpen your base ONCE.

4. BASE - Zoom in 500%. (Or more, if you need to see what you're doing, like me.)
5. BASE - Time to smooth out her skin. Everyone has their own theory on the best way to do this. Personally, I hate trying to smudge, because I always screw it up. Instead, I like to use the Soften Brush
on these settings:
Use this on all areas of the skin, carefully avoiding the eyes, hair, lips, and sides of the nose (you need those shadows for dimension).

6. BASE - Sharpen your base. Then...
----PhotoShop Users - Fade Sharpen 70%
----PaintShop Pro Users - Sharpness >> Unsharpen Mask (Radius: 2.00, Strength: 30, Clipping: 5)

7. BASE - Let's touch up her skin again. Use your preferred technique, which for me means the Soft Brush again, same settings as Step #5.

8. BASE - Duplicate the base, Desaturate this new layer, then set it to Soft Light 100%.

9. SOFT LIGHT LAYER - Duplicate the Soft Light layer and set this new layer to Screen 67% opacity.

10. SOFT LIGHT LAYER - Duplicate the Soft Light layer again, bring it to the top, and just leave it at 100% opacity.

11. ALL - Now, Copy Merge ALL of the layers and then Paste As New Layer on top.
12. TOP LAYER - Get your Dodge Tool
(same settings as above: Size 3-5 Soft; Range: Highlights; Exposure 23%). Use the Dodge Tool to lighten the eyes and lips and jewelry. We want them to sparkle!

13. TOP LAYER - Sharpen Tool
(same settings: Strength: 40-50%; Soft Brush). Use this tool to sharpen the eyes, lips, and jewelry.

14. NEW LAYER - Create a new layer on top. Scribble a white line onto the gleam of the lips, using a size 3 Brush. (Missing step: I think you set this layer to Soft Light? Any other setting seems to have ridiculous results. Or just skip this step altogether. It won't make *that* big of a difference.)

15. MERGE ALL LAYERS.
16. BASE - Time for the Burn Tool
(same settings as above: Size 3-5 Soft; Range: Shadows, Exposure 20%). Use it lightly over the red of cheeks, neck, and lips.

Now, personally, this is a little bit too "zombied" for my tastes, but this can be especially effective when you're applying this technique to darker or olive-skinned people, or to pictures that have warmer colors to them. Experiment with a few different faces, and you'll see what I mean.
More examples to come when I get off my butt and get around to them.
[Note:] This tutorial is adapted from a Photoshop tutorial that was previously located here, but was deleted when the boards were reset. I have not been able to track down the original author, but this tutorial was the *only* version of this "dodgey" eye look that I actually liked. THAT is why I'm re-making it and posting it here; not because I have any desire to step on toes or take the credit. All I did was keep some poorly scribbled notes on how to do it.
Killer Eye Tutorial - PART 1
How to make dazzling eyes
Going from this
to this
or this
Tutorial Key
BOTH Users = black font
Photoshop Users = blue font
PaintShop Pro Users = red font
Before You Start...
If you start with a bigger or higher quality base, this will make it infinitely easier on you. If the light reflection on the eye is NOT covering the pupil, this will be infinitely easier as well. Darker-coloured/black eyes can be tricky, but you can always re-colour a lighter eye into something you like better. Blue, gray, and hazel eyes will always have the most dramatic difference, but I will show you how it looks with even a simple brown eye.
1. I grabbed this image from Getty and mirrored it and used the Cloning Tool
to get rid of the stamp (not shown).
2. Now crop the eye squarely (keeping the box Maintain Aspect Ratio checked is helpful). Smart Resize it to down to 100x100 (or smaller, if you know you'll be shrinking it further later). This will be your BASE.
3. BASE - Sharpen once. Then...
----PhotoShop Users - Fade Sharpen 70%
----PaintShop Pro Users - Sharpness >> Unsharpen Mask (Radius: 2.00, Strength: 30, Clipping: 5)
4. [OPTIONAL STEP - Re-colouring the eye. If you aren't changing the colour, skip to Step #6.]
NEW LAYER - Create a New Layer. Now this part might be a little tricky. The object is to select the iris only, since that's where the colour's going; the pupil must stay black. Also, if there's a reflective bit (the white spot), that needs to remain white also.
--Using the Freehand Selection (aka. Lasso)
works best, although I'm lazy and like using the Selection Tool
with circle selection type. Most likely, you will end up needing to erase bits and pieces anyway.
--Now pick a colour you like (for me, medium to darker works better) and Flood Fill
the selected area. For this example, I used #008000. Set the layer to "Hue" opacity 100%. (I also like Hue (Legacy), if the color's a bit too strong or weird-looking.)
Flood-Filled LayerSet to HueSet to Hue(Legacy)
5. MERGE ALL LAYERS.
6. BASE - Zoom in 400%. (Or more, if you need to. 800% is easier for me.) :P
7. BASE - Set your Dodge Tool
to these settings: Size 3-5 Soft; Range: Highlights; Exposure 23%. Use only on the inner iris.
NormalHueHue(Legacy)
8. BASE - Select the Burn Tool
and change your settings to these: Size 3-5 Soft; Range: Shadows, Exposure 20%. Only use the Burn Tool on the outer edges of the iris to make the eye stand out.
NormalHueHue(Legacy)
9. BASE - Now grab your Sharpen Tool
and change the settings to these: Strength: 40-50%; Soft Brush. First, use it on the little white reflective gleam in the eye. Then, you can sharpen the rest of the iris and a little bit of the eyelid. (Trust me, it'll look funky if you don't do a quick light swipe across the eyelid and only the eyelid.)
NormalHueHue(Legacy)
10. Duplicate the layer, then set it to Soft Light 100%.
NormalHueHue(Legacy)
OTHER EXAMPLES
using this technique
Before
After (Re-Colour)
Before
After
Before
After
Before
After
Killer Eye Tutorial - PART 2
More than meets just the eyes
Going from this
to this
Tutorial Key
BOTH Users = black font
Photoshop Users = blue font
PaintShop Pro Users = red font
1. Again, I just quickly grabbed a pic from Getty, so we'll see together if this works or not. ^_~ And once more, I mirrored the picture and used the Cloning Tool
to stamp out the tag.
2. Crop her squarely and Smart Resize it to down to 100x100. This will be your BASE.
3. BASE - Sharpen your base ONCE.
4. BASE - Zoom in 500%. (Or more, if you need to see what you're doing, like me.)
5. BASE - Time to smooth out her skin. Everyone has their own theory on the best way to do this. Personally, I hate trying to smudge, because I always screw it up. Instead, I like to use the Soften Brush
on these settings:
Use this on all areas of the skin, carefully avoiding the eyes, hair, lips, and sides of the nose (you need those shadows for dimension).
6. BASE - Sharpen your base. Then...
----PhotoShop Users - Fade Sharpen 70%
----PaintShop Pro Users - Sharpness >> Unsharpen Mask (Radius: 2.00, Strength: 30, Clipping: 5)
7. BASE - Let's touch up her skin again. Use your preferred technique, which for me means the Soft Brush again, same settings as Step #5.
8. BASE - Duplicate the base, Desaturate this new layer, then set it to Soft Light 100%.
9. SOFT LIGHT LAYER - Duplicate the Soft Light layer and set this new layer to Screen 67% opacity.
10. SOFT LIGHT LAYER - Duplicate the Soft Light layer again, bring it to the top, and just leave it at 100% opacity.
11. ALL - Now, Copy Merge ALL of the layers and then Paste As New Layer on top.
12. TOP LAYER - Get your Dodge Tool
(same settings as above: Size 3-5 Soft; Range: Highlights; Exposure 23%). Use the Dodge Tool to lighten the eyes and lips and jewelry. We want them to sparkle!
13. TOP LAYER - Sharpen Tool
(same settings: Strength: 40-50%; Soft Brush). Use this tool to sharpen the eyes, lips, and jewelry.
14. NEW LAYER - Create a new layer on top. Scribble a white line onto the gleam of the lips, using a size 3 Brush. (Missing step: I think you set this layer to Soft Light? Any other setting seems to have ridiculous results. Or just skip this step altogether. It won't make *that* big of a difference.)
15. MERGE ALL LAYERS.
16. BASE - Time for the Burn Tool
(same settings as above: Size 3-5 Soft; Range: Shadows, Exposure 20%). Use it lightly over the red of cheeks, neck, and lips.
Now, personally, this is a little bit too "zombied" for my tastes, but this can be especially effective when you're applying this technique to darker or olive-skinned people, or to pictures that have warmer colors to them. Experiment with a few different faces, and you'll see what I mean.
More examples to come when I get off my butt and get around to them.
[Note:] This tutorial is adapted from a Photoshop tutorial that was previously located here, but was deleted when the boards were reset. I have not been able to track down the original author, but this tutorial was the *only* version of this "dodgey" eye look that I actually liked. THAT is why I'm re-making it and posting it here; not because I have any desire to step on toes or take the credit. All I did was keep some poorly scribbled notes on how to do it.