Kohaku Icon Tutorial (for beginers)
Alright, this is my first tutorial and will be easy (or at least should be) for beginers. No selective colouring! Just layers, so it's real easy.^^ Now, we'll be going from this-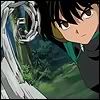
to this-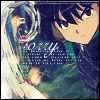
in less then 10 very easy steps!! :D Basicly this tutorial teaches you different effects you can use on your icons and how to put it together nicely.^_^

1. Okay, get your image and of course crop it. I really liked this pic of Kohaku (and the episode^^) so I decided to use it. Now I sharpened my base; you can either make a new layer and sharpen that, OR just sharpen the base. IT WILL MAKE NO DIFFERENCE.
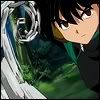
2.Duplicate your baseand bring it to the top. Then go FILTER>>BLUR>>GAUSSIAN BLUR and set it to Soft Light at 100%.

3. Now make a new layer and fill it with #080375. Set it to Exclusion at 65%. Oooh, I like that, but I bet it could use a bit more to it, ne?

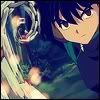
4. Now get this texture by... Sorry, I downloaded this texture a long time ago and forget who made it...If you know who made it please let me know so I can give them credit. Anyways, we're going to set this layer to Screen. Hmm, still needs a bit more...
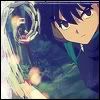
5. Now get this texture by p-precious and set it to Screen 100%. Still a bit too plain...and light.
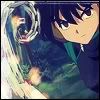
6. Bring your base up to the top and set it to Soft Light 45%. All that did really was darken my icon a tiny bit. If your icon is already dark, avoid doing this. Or, if it is still too light, play around with the opacity a bit- make the icon your own!
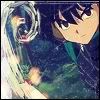
7. Now get this texture by inkaddict and set it to Screen at 65%. Almost done!

8. There! Now you can add whatever else you'd like to your icon! I chose to add some text and tiny text to my icon.
I hope you found my little tutorial useful!^^ I'd love to hear what you think and see some results!<3

to this-

in less then 10 very easy steps!! :D Basicly this tutorial teaches you different effects you can use on your icons and how to put it together nicely.^_^

1. Okay, get your image and of course crop it. I really liked this pic of Kohaku (and the episode^^) so I decided to use it. Now I sharpened my base; you can either make a new layer and sharpen that, OR just sharpen the base. IT WILL MAKE NO DIFFERENCE.

2.Duplicate your baseand bring it to the top. Then go FILTER>>BLUR>>GAUSSIAN BLUR and set it to Soft Light at 100%.

3. Now make a new layer and fill it with #080375. Set it to Exclusion at 65%. Oooh, I like that, but I bet it could use a bit more to it, ne?


4. Now get this texture by... Sorry, I downloaded this texture a long time ago and forget who made it...If you know who made it please let me know so I can give them credit. Anyways, we're going to set this layer to Screen. Hmm, still needs a bit more...


5. Now get this texture by p-precious and set it to Screen 100%. Still a bit too plain...and light.

6. Bring your base up to the top and set it to Soft Light 45%. All that did really was darken my icon a tiny bit. If your icon is already dark, avoid doing this. Or, if it is still too light, play around with the opacity a bit- make the icon your own!


7. Now get this texture by inkaddict and set it to Screen at 65%. Almost done!

8. There! Now you can add whatever else you'd like to your icon! I chose to add some text and tiny text to my icon.
I hope you found my little tutorial useful!^^ I'd love to hear what you think and see some results!<3