Tutorial #1 - Rounded borders

Step 1.
Make you icon like you normally do (square) and save it.

Step 2.
Now, save this 'mask' to your PC.

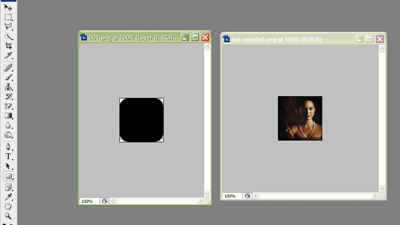
Step 3.
Open both the icon and the 'mask' in your Photoshop.
Step 4.
With your icon selected, press Ctrl+A and Ctrl+C (to copy it) and paste into the mask file. (Ctrl+V).
Step 5.
Now, select the layer of your icon, and right-click in it, selecting 'Create Clipping Mask'. (to see your layers window, press F7 or go to 'Window > Layers'). Older versions of Photoshop call it 'Group with Previous'.


And we are done! Now you can save your rounded icon! =D
Important: Save your file as .png or .gif (.png has better quality and the file size is small) so you can keep the transparency showing.
Any questions? Feel free to ask! ;)
Oh, and feel free to friend me for updates.