❝ 219 ❞ ► icon tutorials #25 and #26
► Okay I'm REALLY behind all the tutorials/guides requested for me. I'm really sorry but I've been working steadily on the project of publishing a magazine for my university. I'll try to fill every tutorial requested or everything as close as possible.
TUTORIALs (#25, #26) for ask the maker 3.0
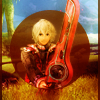
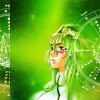
margerydaw_s2 asked me tutorial for these icons:


I was able to re-create the first two but not the third. Hope you don't mind. The use of some textures on the third one will be covered in a texture guide I'll write later.
The tutorials will be for these:


TUTORIAL #25

-
█ Original - Recreated █

█ STEP #01
● I'll be using two images for this icon. One for the background and another with the subject. First crop the background. I'm not worrying about the character here since the composition will cover him later.

-
█ STEP #02
● Add this texture by midnightroad in a new layer and set it to Soft Light. Opacity around 45-50%.

-
█ STEP #03
● Add a Vibrance Layer. Vibrance - +60

-
█ STEP #04
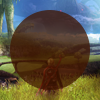
● Now let's add a Circle Shape to start the composition. I always use the "shape" option if you need to resize later. Color is #411600 and Opacity is 75%. Size is up to you but I used a circle to cover the character in the background and to use more or less 50~% of space.

-
█ STEP #05
● Now let's add the subject. Extract the original background and place it over the circle shape. Add a Mask to erase the bottom part of it making it appear that he is "leaving" the circle.

-
█ STEP #06
● Add this texture again. It's the main base of our coloring here. Set to Soft Light and Opacity 20%.

-
█ STEP #07
● Add another Vibrance Layer. Vibrance - +100

-
█ STEP #08
● Select All the Copy Merged to paste into a New Layer. Use the Box Blur filter with Radius 5. Set this layer to Soft Light and Opacity 35%. This will add a glowy effect.

-
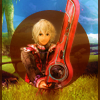
█ STEP #09
● Add this texture again set to Soft Light and Opacity 31%

-
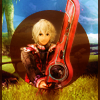
█ STEP #10
● Now add two retangles to make a side border. Same color as the Circle. Set the Opacity to 75%.

-
█ STEP #11
● Now add a Gradient Map layer. Make a gradient from the color #3e2e2e to #fbf1d8 and set the layer to Soft Light.

-
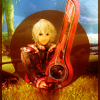
█ STEP #12
● And guess what? Add this texture again! Soft Light and Opacity 56%.
-
█ STEP #13
● Now let's add this texture for the last time and set it to Hard Light. Use a Mask Layer to erase over the subject's and set the opacity to 8%.
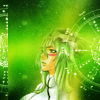
TUTORIAL #26
-
█ Original - Recreated █
█ STEP #01
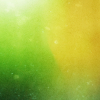
● First add this texture by midnightroad.

-
█ STEP #02
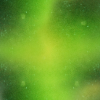
● Now let's play a bit with it. Duplicate a few times, rotate and erase the yellow bits of it to make a mixed texture almost pure green. Merge all. Let's call it the background texture.

-
█ STEP #03
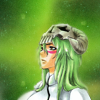
● Add your subject with extracted background. Resize and place.

-
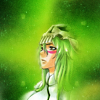
█ STEP #04
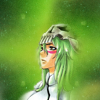
● Duplicate the background texture layer and put it above the subject layer. Use a Mask to erase over the subject but to hide a few bits like she's blending with the background.

-
█ STEP #05
● Add another background texture layer over everything and set it to Soft Light.

-
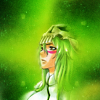
█ STEP #06
● Add a Vibrance Layer. Vibrance - +50

-
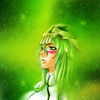
█ STEP #07
● Duplicate Step #05 layer and set the Opacity to 25%. Put it above all the composition.

-
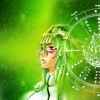
█ STEP #08
● Add this texture by midnightroad and set it to Soft Light, Opacity 35%.

-
█ STEP #09
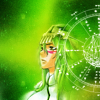
● Now add this texture by innocent_Lexys and use Ctrl+I to Invert the colors. Set it to Screen, Opacity 95%.

-
█ STEP #10
● Select All the Copy Merged to paste into a New Layer. Use the Box Blur filter with Radius 5. Set this layer to Soft Light and Opacity 42%.

-
█ STEP #11
● Select All the Copy Merged to paste into a New Layer again. Filter - Other - Offset. Horizontal +10 and we're finished.
► COMMENTS ARE NICE → ♥
► CREDITS ARE LOVE → twinstrike or twinstrikeish;
► RESOURCES → ( here );
► AFFILIATES → ( here );
► UPDATES → ( watch );
TUTORIALs (#25, #26) for ask the maker 3.0


margerydaw_s2 asked me tutorial for these icons:
I was able to re-create the first two but not the third. Hope you don't mind. The use of some textures on the third one will be covered in a texture guide I'll write later.
The tutorials will be for these:


TUTORIAL #25
-

█ Original - Recreated █

█ STEP #01
● I'll be using two images for this icon. One for the background and another with the subject. First crop the background. I'm not worrying about the character here since the composition will cover him later.

-

█ STEP #02
● Add this texture by midnightroad in a new layer and set it to Soft Light. Opacity around 45-50%.

-

█ STEP #03
● Add a Vibrance Layer. Vibrance - +60

-

█ STEP #04
● Now let's add a Circle Shape to start the composition. I always use the "shape" option if you need to resize later. Color is #411600 and Opacity is 75%. Size is up to you but I used a circle to cover the character in the background and to use more or less 50~% of space.

-

█ STEP #05
● Now let's add the subject. Extract the original background and place it over the circle shape. Add a Mask to erase the bottom part of it making it appear that he is "leaving" the circle.

-

█ STEP #06
● Add this texture again. It's the main base of our coloring here. Set to Soft Light and Opacity 20%.

-

█ STEP #07
● Add another Vibrance Layer. Vibrance - +100

-

█ STEP #08
● Select All the Copy Merged to paste into a New Layer. Use the Box Blur filter with Radius 5. Set this layer to Soft Light and Opacity 35%. This will add a glowy effect.

-

█ STEP #09
● Add this texture again set to Soft Light and Opacity 31%

-

█ STEP #10
● Now add two retangles to make a side border. Same color as the Circle. Set the Opacity to 75%.

-

█ STEP #11
● Now add a Gradient Map layer. Make a gradient from the color #3e2e2e to #fbf1d8 and set the layer to Soft Light.

-

█ STEP #12
● And guess what? Add this texture again! Soft Light and Opacity 56%.

-

█ STEP #13
● Now let's add this texture for the last time and set it to Hard Light. Use a Mask Layer to erase over the subject's and set the opacity to 8%.
TUTORIAL #26

-

█ Original - Recreated █

█ STEP #01
● First add this texture by midnightroad.

-

█ STEP #02
● Now let's play a bit with it. Duplicate a few times, rotate and erase the yellow bits of it to make a mixed texture almost pure green. Merge all. Let's call it the background texture.

-

█ STEP #03
● Add your subject with extracted background. Resize and place.

-

█ STEP #04
● Duplicate the background texture layer and put it above the subject layer. Use a Mask to erase over the subject but to hide a few bits like she's blending with the background.

-

█ STEP #05
● Add another background texture layer over everything and set it to Soft Light.

-

█ STEP #06
● Add a Vibrance Layer. Vibrance - +50

-

█ STEP #07
● Duplicate Step #05 layer and set the Opacity to 25%. Put it above all the composition.

-

█ STEP #08
● Add this texture by midnightroad and set it to Soft Light, Opacity 35%.

-

█ STEP #09
● Now add this texture by innocent_Lexys and use Ctrl+I to Invert the colors. Set it to Screen, Opacity 95%.

-

█ STEP #10
● Select All the Copy Merged to paste into a New Layer. Use the Box Blur filter with Radius 5. Set this layer to Soft Light and Opacity 42%.

-

█ STEP #11
● Select All the Copy Merged to paste into a New Layer again. Filter - Other - Offset. Horizontal +10 and we're finished.
► COMMENTS ARE NICE → ♥
► CREDITS ARE LOVE → twinstrike or twinstrikeish;
► RESOURCES → ( here );
► AFFILIATES → ( here );
► UPDATES → ( watch );