❝ 130 ❞ ▄ ( tutorial )
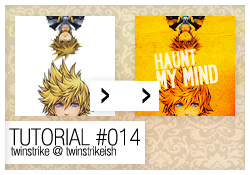
▄ Program: Adobe Photoshop CS4
▄ Type: Coloring/Composition
▄ Difficult: Medium
▄ PSD: No
▄ Requested by: kayestar
TUTORIAL #014
STEP #001
ORIGINAL IMAGES
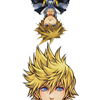
Prepare your base. First extract the backgrounds. Not really necessary here but always recommended. Resize and crop it. Flatten if necessary.
STEP #002

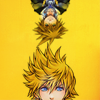
Add this texture by lemonpunch and set it to Multiply. Erase over the subject's faces.
STEP #003

Duplicate Step #002 Layer and Erase a few more bits as you prefer. Set this Layer to Multiply and Opacity 75%.

STEP #004

Add this texture by ??? and set it to Multiply.

STEP #005

Now to end the texture party. Add this texture by impressive_instant and set it to Multiply.

STEP #006

Add your first Text Layer: "Haunt". Font used - Roadway. Rotate this text a bit and go to Layer - Rasterize - Type. Then go to Filter - Blur - Blur. Set the Opacity to 86%.

STEP #007

Now add another Text Layer: "My Mind". Same font. Rotate it too and add Layer Style to it. Layer Style - Drop Shadow. Multiply - Opacity 7%, Distance 1px and Size 1px.

STEP #008

New Adjustment Layer - Hue/Saturation
Masters
Saturation +36

STEP #009

New Adjustment Layer - Brightness/Contrast
Brightness: +91
Contrast: +77
Set the Opacity of this Layer to 46%

STEP #010

New Adjustment Layer - Curves
Add one new point.
Output: 199 Input: 165

STEP #011

New Adjustment Layer - Vibrance
Vibrance: +53

STEP #012

New Adjustment Layer - Selective Color
Reds C +55 M -17 Y +100 K 0
Yellows C 0 M 0 Y +18 K +15
Neutrals C +13 M 0 Y -16 K 0

STEP #013

New Adjustment Layer - Selective Color
Reds C -35 M +2 Y 0 K +35
Yellows C -55 M -10 Y 0 K +35
Cyans C +35 M -45 Y 0 K -34
Whites C 100 M 0 Y -65 K 0
Neutrals C +20 M 0 Y +25 K +15
Blacks C -10 M 0 Y +25 K +50
Set the Opacity of this Layer to 75%

STEP #014

New Adjustment Layer - Channel Mixer
Red +110, +10, -8
Green -6, +106, -6
Blue +5, -7, +74
Set the Opacity of this Layer to 44%

STEP #015

New Adjustment Layer - Color Balance
Shadows - +12, +11, +6
Midtones - -9, +9, +11
Highlights - +82, +2, +51
Set the Opacity of this layer to 39%

STEP #016

New Adjustment Layer - Selective Color
Reds C -100 M +36 Y +100 K -15
Yellows C -100 M +51 Y +100 K -29
Cyans C +30 M -27 Y -18 K 0
Blues C +100 M +100 Y +75 K +84
Whites C 0 M 0 Y +40 K +2
Set the Opacity of this layer to 28%

EXAMPLES
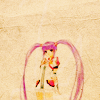


▄ NOTES ¹ → Hey kayestar I tried to match the tutorial results as close as you requested and at the same time I tried to make a completely new tutorial. Hope you like it.
² → If you try any tutorial please show me your results! I'd love to see it.
▄ COMMENTS ARE NICE → ♥
▄ CREDITS ARE LOVE → twinstrike or twinstrikeish;
▄ RESOURCES → ( here );
▄ REQUESTS → ( here );
▄ AFFILIATES → ( here );
▄ UPDATES → ( watch );